Common Garbage Disposal Issues and How to Fix Them

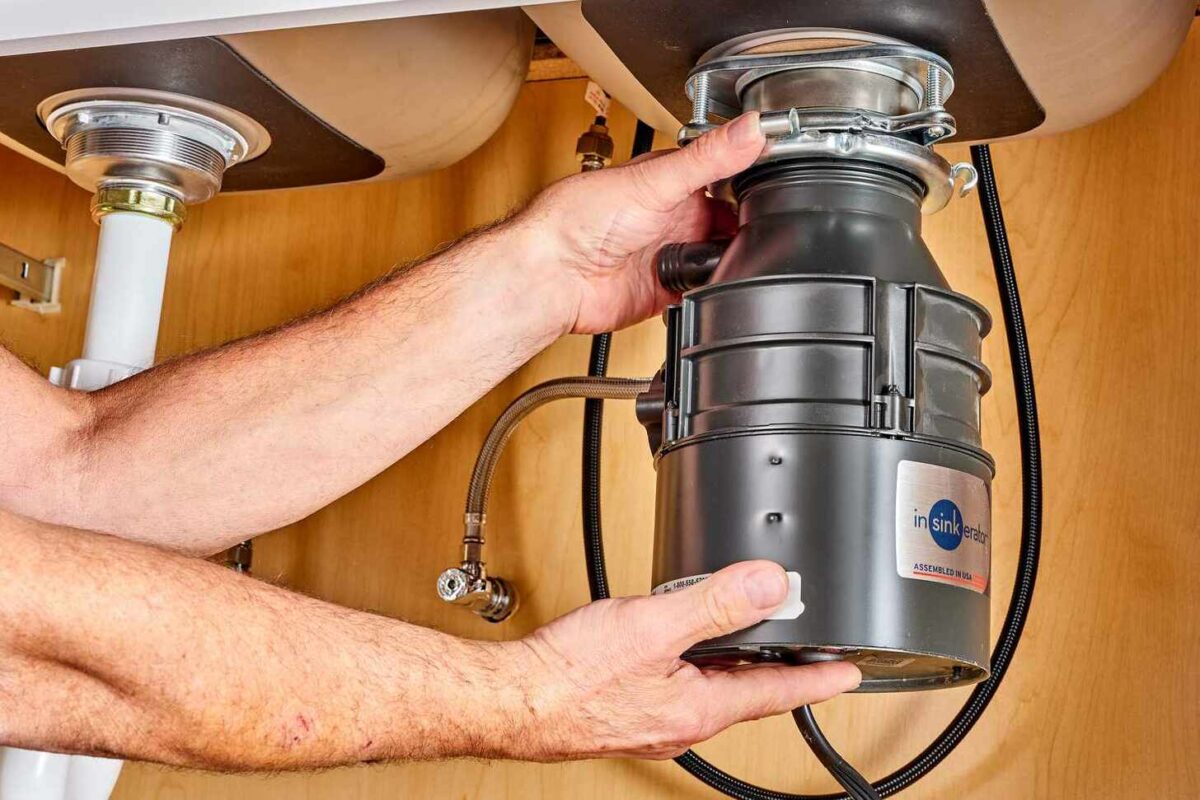
A garbage disposal unit is an essential kitchen appliance that can develop various issues over time.

Like most kitchen appliances, it’s powered by a cord connected to an electrical outlet or hardwired to your home’s power supply. To fix or even inspect it, it’s crucial to disconnect the unit under the kitchen sink.

Understanding common problems with your garbage disposal can save you money on repairs and prevent premature replacement.

This guide will walk you through diagnosing and fixing frequent issues, empowering you to handle repairs confidently.

Key Takeaways

  • Diagnose common garbage disposal issues
  • Learn basic troubleshooting techniques
  • Perform simple repairs to extend the life of your unit
  • Avoid costly professional service calls
  • Understand the importance of disconnecting the unit before repair

Understanding How Your Garbage Disposal Works

Detailed cross-section of the interior components of a modern household garbage disposal unit, illuminated by warm ambient lighting and depicted from an angled perspective to showcase the intricate mechanics. The foreground features the grinding mechanism with sharp stainless steel blades, the middle ground showcases the motor housing and inlet/outlet ports, while the background includes the mounting assembly and electrical connections. Rendered with a technical, engineering-focused aesthetic to convey the precise functionality of this essential kitchen appliance.

To effectively troubleshoot and maintain your garbage disposal, it’s essential to understand its inner workings. A garbage disposal is a kitchen appliance installed under the sink that breaks down food waste into smaller particles that can be flushed down the drain.

Basic Components and Operation

A typical garbage disposal unit consists of several key components: the motor, impeller plate, grinding chamber, and mounting assembly. When you turn on the disposal, the motor activates the impeller plate, which spins at high speeds (typically 1,725-1,800 RPM) to break down food waste. The impeller plate is crucial as it creates the centrifugal force needed to push food particles against the grinding ring.

The Grinding Process Explained

Unlike popular belief, garbage disposals don’t actually have “blades.” Instead, they use centrifugal force to push food particles against a grinding ring with small teeth. This process breaks down the food waste into tiny particles that can safely pass through your plumbing system without causing clogs. Understanding this grinding process is vital for maintaining your disposal and ensuring it operates efficiently.

Regular maintenance and proper use can extend the life of your garbage disposal and prevent common issues. By knowing how your disposal works, you can better troubleshoot problems when they arise and keep your kitchen running smoothly.

Essential Tools for Garbage Disposal Repair

Image of a toolbox with essential garbage disposal repair tools

Learn More

Garbage disposal repair requires a specific set of tools to ensure the job is done efficiently and safely. Having the right tools not only makes the repair process easier but also helps prevent damage to the disposal unit.

Must-Have Tools for DIY Fixes

Before attempting any garbage disposal repair, gather essential tools including a hex wrench (Allen wrench), flashlight, pliers, screwdrivers, plumber’s putty, and a bucket to catch water. A specialized garbage disposal wrench is particularly useful for freeing jammed impellers, though a standard hex wrench can often work as a substitute.

Key tools for the job: Screwdriver sets, Hex key, Garbage disposal wrench, Flashlight, Long-nosed pliers, Clamp, Bucket, Plunger.

Safety Precautions Before Starting Repairs

Safety should be your top priority when working with garbage disposals – always disconnect the power by unplugging the unit or turning off the circuit breaker before attempting any repairs. Never place your hands inside the disposal, even when the power is disconnected; instead, use tools like tongs or pliers to remove objects.

Garbage Disposal Not Turning On: Troubleshooting Power Issues

A close-up view of a garbage disposal reset button, set against a bright, clean kitchen countertop. The button is prominently featured, its small red surface contrasting with the sleek, stainless steel sink and disposal unit. Soft, directional lighting casts subtle shadows, highlighting the button's physical details and texture. The image conveys a sense of clarity and simplicity, focusing the viewer's attention on the reset button's function and accessibility within the everyday kitchen environment.

A non-functional garbage disposal can be a significant inconvenience, often stemming from power issues. When the disposal doesn’t respond at all, the problem is usually electrical rather than mechanical.

Checking Electrical Connections

The first step in troubleshooting is to check if the disposal is properly plugged in. Sometimes, items stored under the sink can shift and dislodge the power cord. Ensure the disposal is securely plugged into the outlet.

For hardwired disposals, it’s essential to turn off the power at the circuit breaker before inspecting any electrical connections to avoid potential electrical shock.

How to Reset Your Garbage Disposal

Most garbage disposals come equipped with a reset button, typically located at the bottom of the unit. This button acts as an internal circuit breaker that prevents motor damage. If the disposal overheats or jams, the reset button may pop out automatically. Pressing it back in often resolves the issue.

  • Locate the reset button on the bottom of the garbage disposal unit.
  • Press the reset button firmly.
  • Try turning on the disposal after resetting it.

Circuit Breaker Problems

If resetting the disposal doesn’t solve the problem, the next step is to check your home’s main circuit breaker panel. It’s possible that the circuit controlling the disposal has tripped. Check the panel and reset the breaker if necessary.

Persistent electrical issues might indicate more serious problems with the disposal’s internal wiring or motor, which may require professional assessment.

Fixing a Humming Garbage Disposal That Won’t Grind

A garbage disposal that hums but doesn’t operate is typically a sign of a jammed impeller or flywheel. When you switch on the garbage disposal and it produces a low, humming sound, it means the motor is running, but something is preventing the impeller plate or flywheel from turning.

If the humming continues for too long, the motor can overheat and burn out unless it trips the circuit breaker. To resolve this issue, you need to manually rotate the impeller to get it moving again.

Identifying a Jammed Impeller

The humming noise from your disposal indicates that the motor is receiving power, but the impeller or flywheel is jammed. This common issue is usually caused by food debris, small bones, or foreign objects becoming lodged between the impeller and the grinding ring.

If left unaddressed, a humming disposal can quickly overheat and burn out the motor, leading to a more expensive repair or replacement.

Using a Hex Wrench to Free the Flywheel

Most garbage disposals have a hex-shaped hole at the bottom of the unit, specifically designed for manually rotating the flywheel to clear jams. To fix the issue, you’ll need to use a hex wrench (also known as an Allen wrench).

Insert the hex wrench into the hole at the hole bottom and rotate it back and forth to dislodge whatever is causing the jam. This should free the stuck impeller or flywheel, allowing the disposal to operate again.

Manual Rotation Techniques

If you don’t have a hex wrench, you can sometimes free the impeller by inserting a wooden object, like a spoon handle, into the disposal (with the power off) and manually pushing against the impeller blades.

After freeing the jam, always run cold water while briefly operating the disposal to flush away any dislodged debris. To turn disposal back on, ensure it’s properly plugged in or that the circuit breaker is switched back on.

Clearing a Clogged Garbage Disposal

A clogged garbage disposal can significantly hinder your kitchen’s workflow. Clearing a clogged garbage disposal is a relatively straightforward process that can be done with the right tools and techniques. Understanding the signs of a clog and knowing how to address it can save you time and potential plumbing costs.

Signs of a Clogged Disposal

A clogged garbage disposal typically presents with several noticeable symptoms. These include standing water in the sink, slow drainage, unusual noises during operation, or foul odors emanating from the drain. Clogs can occur either within the disposal itself or in the drain pipe connecting the disposal to your home’s plumbing system. Common culprits behind disposal clogs are food particles that are fibrous, starchy, or greasy, as they can accumulate over time and restrict water flow.

  • Standing water in the sink
  • Slow drainage
  • Unusual noises during operation
  • Foul odors coming from the drain

Step-by-Step Unclogging Methods

Before attempting to clear a clog, always disconnect power to the disposal to prevent accidental activation during the cleaning process. Use a flashlight to inspect the disposal drain for visible obstructions that can be safely removed with pliers or tongs—never use your hands. If the clog is visible and accessible, remove as much of the obstruction as possible.

Alternatively, you can use a plunger designed for sinks to remove debris. Place the plunger over the drain hole, fill the sink with enough water to cover the tip of the plunger, and then pump the plunger up and down with force until the debris is dislodged. After plunging, turn the faucet on to flush out the debris. Once cleared, plug in the disposal and test it.

Dealing with Stubborn Clogs

For more stubborn clogs that cannot be resolved with plunging or manual removal of debris, it may be necessary to disconnect the P-trap beneath the sink. This allows direct access to the drain pipe to clear any blockages. It’s crucial to avoid using chemical drain cleaners with garbage disposals, as they can damage the unit’s components and void the manufacturer’s warranty.

By following these steps and understanding the causes of clogs, you can effectively clear a clogged garbage disposal and maintain your kitchen’s efficiency.

Repairing a Leaking Garbage Disposal

If your garbage disposal is leaking, it’s crucial to identify and fix the issue quickly to avoid further complications. A leaky disposal can lead to water damage, mold growth, and other issues that can be costly and time-consuming to repair.

Identifying the Source of Leaks

The first step in repairing a leaking garbage disposal is determining where the leak is coming from. Common locations for leaks include the sink flange, dishwasher connection, discharge pipe, and the disposal unit itself. Inspecting these areas carefully will help you pinpoint the source of the leak.

Leaks can occur due to various reasons such as loose connections, worn-out seals, or cracks in the disposal unit. Understanding the cause is essential to applying the correct fix.

Fixing Leaks from the Top (Sink Flange)

Leaks from the top of the garbage disposal, typically occur at the sink flange. To fix this, you’ll need to disconnect the disposal and inspect the mounting assembly. Often, the issue is due to loose mounting bolts or deteriorated plumber’s putty. To repair:

  • Turn off the power to the disposal at the circuit breaker.
  • Loosen the mounting ring under the sink and remove the disposal from the mounting flange.
  • Loosen the mounting bolts holding the flange to the sink and lift it out.
  • Scrape off the old plumber’s putty and apply a fresh amount around the top of the flange sink area.
  • Reinstall the flange, retighten the mounting bolts, and reattach the disposal.

Addressing Leaks from the Bottom

A garbage disposal leaking from the bottom usually indicates a more serious issue, such as a failed internal seal or a crack in the disposal housing. Unfortunately, these problems typically require replacing the disposal unit entirely. For leaks at connection points like the dishwasher inlet or discharge pipe, check for loose clamps or damaged gaskets that can be tightened or replaced.

Before starting any repair, place a bucket under the disposal to catch any water that may leak during the process. For more complex issues or if you’re unsure about how to proceed, consider consulting a professional plumber. You can also refer to resources like Bob Vila’s guide on garbage disposal for additional troubleshooting tips.

Cause of Leak Location Fix
Loose mounting bolts or deteriorated plumber’s putty Sink Flange (Top) Tighten bolts, replace plumber’s putty
Failed internal seal or cracked housing Disposal Unit (Bottom) Replace disposal unit
Loose clamps or damaged gaskets Dishwasher inlet or discharge pipe Tighten clamps, replace gaskets

Solving Slow Draining Issues

When your garbage disposal drains slowly, it’s often a sign of a deeper issue within your plumbing system. This problem can be attributed to various factors, not necessarily the disposal unit itself.

Common Causes of Slow Drainage

Several factors can contribute to slow drainage in a sink with a garbage disposal. Common causes include partial clogs in the P-trap, discharge pipe, or main drain line. Grease buildup can also narrow the pipe diameter, while improper installation can create drainage issues. When water backs up into the sink during or after running the garbage disposal, it indicates a restriction somewhere in the drain system.

Cleaning the Drain Trap and Discharge Pipe

To resolve slow drainage, start by cleaning the drain trap (P-trap), a curved pipe section under the sink that captures debris and can become clogged over time. Disconnect the discharge pipe from the side of the garbage disposal and the drain trap from the wall pipe, having a bucket ready to catch water. Check for clogs or obstructions and clean the disposal. If none are found, the clog might be in the branch drain line going into the wall.

Using a Sink Auger for Branch Drain Clogs

For clogs beyond the trap in the branch drain (the horizontal pipe leading into the wall), a sink auger (also called a drain snake) can be effective at breaking up or retrieving the blockage. After clearing any obstructions, reassemble the drain trap and reconnect the discharge tube to the side of the garbage disposal. Run water through the system to ensure proper drainage before reassembling all components.

By following these steps, you can identify and fix the issue causing slow drainage, ensuring your garbage disposal and drain system function efficiently.

Best Practices for Garbage Disposal Use and Maintenance

To keep your garbage disposal running smoothly, follow these best practices. Proper use and regular maintenance can prevent most common issues and significantly extend the life of the appliance.

Foods to Avoid Putting Down Your Disposal

Not all food waste is suitable for garbage disposals. Avoid putting cooking fats, grease, and oils down your disposal as they can liquify and clog your drain. Other items to avoid include large bones, fruit seeds and cores, fibrous plant scraps, and raw vegetables, as they can dislodge internal seals and grinding components. Additionally, starchy foods like rice and pasta can clump together and cause drainage issues.

  • Cooking fats, grease, and oils
  • Large bones and fruit pits
  • Fibrous vegetables like celery and corn husks
  • Starchy foods such as pasta and rice

Proper Operation Techniques

Always run cold water before, during, and after using your garbage disposal. Cold water helps to solidify grease and oils, allowing them to be chopped up and flushed away rather than coating your pipes. It’s also important not to overload your disposal; instead, feed food waste gradually while the unit is running.

Regular Maintenance Tips

Regular maintenance is crucial for the longevity of your garbage disposal. Run your disposal regularly, even when not in use, to prevent rust and corrosion. Cleaning your disposal monthly by grinding ice cubes followed by citrus peels can help keep it fresh and clean. For stubborn odors, try grinding a mixture of ice cubes and rock salt or running a solution of baking soda and vinegar through the disposal.

By following these best practices, you can ensure your garbage disposal operates efficiently and effectively, reducing the likelihood of common issues and prolonging its lifespan.

When to Replace vs. When to Call a Professional

When dealing with a malfunctioning garbage disposal, it’s crucial to determine whether the issue can be resolved through DIY repairs or if professional assistance is required.

If you’ve tried troubleshooting and repairing your garbage disposal but the problems persist, it may be time to consider replacement. Signs that indicate a need for a new garbage disposal include persistent leaks from the unit, frequent jams, excessive noise, or repeated electrical failures.

Installing a new garbage disposal can be a moderately complex task, requiring basic plumbing and electrical knowledge. If you’re not comfortable with these aspects, it’s recommended to seek professional installation. Factors to consider when selecting a new unit include horsepower, noise level, grinding chamber material, and warranty coverage.

In your home, if you encounter complex electrical issues, persistent leaks, or unusual sounds that basic troubleshooting doesn’t resolve, it’s advisable to call a professional for repair. The cost of a new unit can range from $80 to $350, with professional installation adding $100 to $250.

Regular maintenance can extend the life of your garbage disposal, but most units will need replacement after 8-10 years. Understanding the right time to replace or seek professional help can save you time and money in the long run, ensuring your home remains functional and efficient.

How Much Does Mini-Split Installation Cost in Arizona?

Arizona’s desert climate poses unique challenges for home cooling, making efficient cooling systems a necessity. The cost of installing a mini-split system in Arizona can vary widely, typically ranging from $2,000 to $10,500.

This variation in cost is due to several factors, including the local market conditions, the condition of the home, and the specific requirements of the cooling system needed.

Understanding these factors is crucial for homeowners to make informed decisions about their cooling solutions.

Key Takeaways

  • Average cost range for mini-split systems in Arizona.
  • Factors influencing the total cost of the system.
  • Importance of energy efficiency in Arizona’s climate.
  • Difference in cost between single-zone and multi-zone systems.
  • Impact of extreme heat on system selection and installation.

Understanding Mini-Split Systems in Arizona’s Climate

Arizona’s harsh desert climate demands efficient cooling solutions, making mini-split systems an increasingly popular choice among homeowners. To appreciate their growing popularity, it’s essential to understand what mini-split air conditioners are and why they’re particularly suited to Arizona’s climate.

What Are Mini-Split Air Conditioners?

Mini-split air conditioners, also known as ductless mini-splits, are heat pump systems that provide both cooling and heating. They consist of an outdoor unit connected to one or more indoor units, allowing for zoned cooling and heating. This setup enables homeowners to control the temperature in individual rooms or zones, enhancing comfort and potentially reducing energy consumption.

Unlike traditional HVAC systems that rely on ductwork to distribute air throughout a home, mini-splits deliver conditioned air directly into the space, eliminating duct losses and improving overall efficiency.

Why Mini-Splits Are Popular in Arizona

Several factors contribute to the popularity of mini-splits in Arizona. Their high efficiency ratings are particularly valuable in a state where cooling systems operate for extended periods. Additionally, the zoned cooling capability allows homeowners to cool only occupied rooms, saving energy during the long, hot seasons.

  • Flexibility for diverse housing styles, from historic homes to modern construction
  • Ability to handle extreme temperature swings between day and night
  • Ideal for home additions, sunrooms, and garage conversions common in Arizona’s expanding housing market

These benefits make mini-splits an attractive option for Arizona homeowners seeking efficient and flexible cooling solutions for their home.

Average Mini-Split Installation Cost in Arizona

An airy, sunny Arizona home interior with a prominent, freshly installed mini-split HVAC system. The sleek, white unit is mounted flush against the crisp white wall, complementing the modern decor. Warm sunlight streams through large windows, casting a soft glow across the polished hardwood floors. The room is sparsely furnished, with a minimalist sofa and coffee table, allowing the mini-split to take center stage. The composition highlights the seamless integration of the mini-split into the overall home design, conveying the ease and efficiency of this heating and cooling solution.

Mini-split AC installation costs in Arizona are influenced by various factors, making it essential to understand the pricing for different system configurations. The type of mini-split system chosen significantly impacts the overall cost.

Single Zone System Costs

A single-zone mini-split system is ideal for smaller homes or rooms. For a 36,000 BTU Mini-Split with 1 head, the cost is around $10,725.64. This cost includes both the equipment and installation expenses.

Single Zone System Cost Breakdown:

BTU Rating Cost
36,000 $10,725.64

Multi-Zone System Costs

For larger Arizona homes, multi-zone systems are often more efficient. The cost increases with the number of zones. For instance, a 36,000 BTU Mini-Split with 2 heads costs $12,671.64, while a system with 5 heads costs $15,564.64.

Multi-Zone System Cost Comparison:

Number of Heads Total Cost
1 $10,725.64
2 $12,671.64
3 $13,186.64
4 $14,135.64
5 $15,564.64

Breakdown of Mini-Split Installation Expenses

When planning for a mini-split installation, it’s essential to break down the various expenses involved. This breakdown will help homeowners in Arizona understand where their money is going and make informed decisions about their investment.

Equipment Costs

The cost of the mini-split equipment itself is a significant portion of the total installation expense. This includes the indoor unit, outdoor unit, and any additional components required for the system to function properly. High-quality equipment from reputable brands like Carrier and Daikin can be more expensive upfront but may offer better efficiency and longer lifespan.

Labor Costs

Labor costs are another substantial component of mini-split installation expenses. The complexity of the installation work and the rates charged by contractors can vary significantly. It’s crucial to hire experienced professionals who can ensure a proper installation, as this directly impacts the system’s performance and longevity.

Additional Materials and Supplies

Beyond the main equipment, several additional materials are necessary for a complete mini-split installation. These include mounting hardware, electrical connections, refrigerant lines, drain lines, and insulation materials specifically chosen for Arizona’s climate conditions. The length and complexity of the refrigerant lines can significantly affect the overall cost, as longer or more complex installations require more materials and labor.

Specialized materials may be needed to withstand Arizona’s extreme heat, including weatherproofing and UV-resistant components for outdoor units. Electrical requirements and potential panel upgrades also contribute to the total material costs.

Factors That Influence Mini-Split Installation Cost

Several factors can significantly impact the overall cost of mini-split installation in Arizona. Understanding these elements is crucial for homeowners to budget accurately and make informed decisions about their cooling systems.

Size of Your Home or Room

The size of your home or the specific room you want to cool plays a significant role in determining the cost of mini-split installation. Larger spaces require more powerful systems, which can increase equipment costs. Additionally, the number of rooms or zones you want to cool will affect the overall price, as multi-zone systems are generally more expensive than single-zone ones.

System Capacity and BTU Requirements

System capacity, measured in British Thermal Units (BTUs), is another critical factor. A higher BTU rating indicates a more powerful cooling capacity. The BTU requirements for your home depend on factors such as insulation, window size, and local climate conditions. An HVAC professional will assess these factors to recommend the appropriate system capacity, directly influencing the installation cost.

Energy Efficiency Ratings (SEER2, EER2, HSPF2)

Energy efficiency ratings, including SEER2, EER2, and HSPF2, significantly impact the cost and performance of mini-split systems. Higher efficiency ratings often result in higher upfront costs but can lead to substantial long-term savings on energy bills. Arizona’s hot climate makes energy-efficient systems particularly beneficial.

Installation Complexity

Installation complexity is a significant factor that can affect the overall cost. This includes considerations such as:

  • Installation location and accessibility
  • Length and routing of refrigerant lines
  • Electrical requirements and potential panel upgrades
  • Special considerations for historic homes or complex architectural designs
Installation Complexity Factor Impact on Cost
High wall installation vs. in-ceiling Increases labor time and potentially requires additional materials
Long refrigerant lines Requires more material and can increase labor costs
New installation vs. replacement New installations may require additional work, such as electrical upgrades

By understanding these factors, Arizona homeowners can better anticipate the costs associated with mini-split installation and make more informed decisions about their cooling solutions.

Single Zone vs. Multi-Zone Mini-Split Systems

When considering mini-split systems for your Arizona home, one of the key decisions you’ll face is whether to opt for a single-zone or multi-zone setup. A single-zone system provides comfort to one room or area and includes one outdoor unit and one indoor unit. In contrast, multi-zone systems can provide separate comfort control in several areas with 2-5 indoor units connected to one outdoor unit.

Cost Comparison

The cost of single-zone and multi-zone mini-split systems varies significantly. Single-zone systems are generally less expensive upfront, with costs starting at around $1,500 for the equipment and installation. Multi-zone systems, while more expensive initially, can offer greater flexibility and potentially lower overall costs for larger homes or homes with multiple areas that require cooling.

System Type Equipment Cost Installation Cost Total Cost
Single-Zone $1,000 – $2,000 $500 – $1,000 $1,500 – $3,000
Multi-Zone $2,500 – $5,000 $1,000 – $2,500 $3,500 – $7,500

Which Option Is Right for Your Arizona Home?

Choosing between a single-zone and multi-zone mini-split system depends on several factors, including your home’s layout, your family’s cooling needs, and your budget. For homes with multiple rooms or areas that require separate temperature control, a multi-zone system may be the more practical choice. On the other hand, single-zone systems are ideal for smaller homes or rooms that require individual cooling.

Consider your specific needs and circumstances. If you have a vacation home or rental property with fluctuating occupancy, a multi-zone system can offer greater flexibility and energy efficiency. For a primary residence with consistent occupancy, a single-zone system might suffice for individual rooms.

Top Mini-Split Brands and Their Cost Range

Selecting the right mini-split brand is crucial for Arizona residents, where extreme temperatures demand high-quality HVAC systems.

Learn More

Premium Brands

Premium brands like Carrier and Daikin offer high-quality mini-split systems known for their reliability and advanced features. These brands are particularly suited to Arizona’s extreme climate.

Mid-Range Options

Mid-range brands such as LG and GE provide a balance between price and quality. They offer competitive features at a lower cost than premium brands, making them an attractive option for many homeowners.

Budget-Friendly Choices

For those on a tighter budget, brands like Senville or Fujitsu offer more affordable options. While they may not match the reliability of premium brands, they can be suitable for certain applications, such as rental units or temporary spaces.

When choosing a mini-split brand, it’s essential to consider not just the upfront price of the unit, but also the long-term quality and reliability of the system. Premium brands may offer better durability and performance in Arizona’s challenging climate.

New Installation vs. Replacement Costs

The cost of mini-split installation in Arizona can vary significantly depending on whether you’re installing a new system or replacing an old one. Understanding these costs is essential for making an informed decision.

First-Time Installation Expenses

First-time mini-split installation involves several expenses, including the cost of the unit itself, labor, and additional materials. The total cost can range widely based on factors such as the size of the area to be cooled and the complexity of the project.

A typical new installation requires a thorough assessment of the home’s cooling needs, selection of appropriate equipment, and professional installation. The cost of the equipment can vary based on the brand, model, and features.

Replacement Cost Considerations

Replacing an existing mini-split system can be more cost-effective than a new air conditioner installation, as some components may be reused. However, it’s crucial to evaluate the condition of existing parts and ensure compatibility with the new unit.

When replacing a mini-split system, several factors must be considered, including the condition of the line set, the need for a vacuum pull before opening the king valve, and calibration of freon levels. A checklist can help ensure that all necessary steps are taken:

Replacement Checklist Status
Is the line set cleaned using an acid flush before hookup? Yes/No
Is a vacuum pulled before opening the king valve (if required)? Yes/No
Are the freon levels calibrated? Yes/No
Is the communicating wire between the condenser and heads hooked up correctly? Yes/No
Are the condenser and heads level? Yes/No

By carefully evaluating these factors and using a replacement checklist, homeowners can ensure a successful and cost-effective replacement project.

Ways to Save on Mini-Split Installation in Arizona

To minimize expenses on mini-split installations, Arizona residents can leverage various cost-saving opportunities. By understanding the factors that influence installation costs and exploring available incentives, homeowners can enjoy efficient cooling without overspending.

Learn More

Seasonal Timing for Best Pricing

Timing is everything when it comes to saving on mini-split installations. Scheduling your installation during the off-season (usually fall or spring) can result in better pricing due to lower demand. Contractors may offer discounts or promotions during these periods to keep their businesses busy.

Rebates and Tax Credits Available in Arizona

Arizona homeowners may be eligible for rebates and tax credits that can significantly reduce the cost of their mini-split installation. Utility companies and government programs often offer incentives for energy-efficient installations. It’s essential to research and take advantage of these programs to lower your upfront costs.

Getting Multiple Quotes from Contractors

Obtaining multiple quotes from licensed contractors is a crucial step in saving on mini-split installation. By comparing prices, services, and equipment quality, homeowners can make informed decisions. Look for detailed estimates that include labor costs, materials, warranty terms, and the brand of equipment being used. This transparency helps in identifying the best value for your investment.

DIY vs. Professional Installation: Cost Analysis

Arizona homeowners considering mini-split installation face a critical decision: whether to undertake the installation themselves or hire a professional. This decision can significantly impact both the upfront and long-term costs of the system.

Risks of DIY Installation

While DIY installation may seem cost-effective initially, it comes with significant risks. Improper installation can lead to inefficiencies, safety hazards, and potentially void the manufacturer’s warranty. Arizona’s extreme climate demands precise system sizing and calibration, which is challenging for non-professionals.

  • Inefficient system performance due to incorrect sizing
  • Potential safety risks from improper handling of electrical and refrigerant components

Benefits of Hiring a Professional

Hiring a professional contractor ensures that the installation is done correctly, maintaining the system’s efficiency and warranty. Professionals can properly size the system for Arizona’s climate, charge the refrigerant correctly, and calibrate the system for optimal performance.

  • Ensured compliance with Arizona-specific code requirements and permit processes
  • Ongoing service relationships and warranty protection

Making the Right Investment for Your Arizona Home

For Arizona homeowners, a well-designed mini-split system can significantly improve home comfort while providing long-term savings. When evaluating the investment in such a system, it’s essential to consider factors beyond the initial installation cost.

A quality cooling system can increase your home‘s value and enhance your living experience. The energy efficiency of a mini-split system can lead to substantial savings over its lifetime, especially in Arizona’s extended cooling season.

By balancing the upfront costs against the long-term benefits, homeowners can make an informed decision that suits their needs and budget. This approach ensures that the system provides both comfort and financial benefits in the long run.

Tips to use your HVAC unit to alleviate allergies

If you suffer from allergies, there are a few things you can do to help reduce your symptoms. One is to use your HVAC unit to create cleaner air in your home. Here are some tips to follow: -Change your air filter regularly. A dirty air filter can cause your HVAC unit to work less efficiently and can also lead to more allergens circulating in your home. -Make sure your vents are clear. Blocked vents can cause your HVAC unit to work harder, which can lead to more allergens being circulated. -Consider using an air purifier. An air purifier can help remove allergens from the air, making it easier to breathe. -Talk to your doctor about medications. If your allergies are severe, your doctor may prescribe medication that can help relieve your symptoms.

Filter your air to reduce allergies

1. Indoor allergies are often caused by dust, mold, and other airborne particles. By using an air filter, you can reduce the amount of allergens in your home and make it a more comfortable place for everyone.

2. There are a few things to consider when choosing an air filter, such as the size of your space and the specific needs of your family. If you have allergies, be sure to choose a filter that is designed to remove the particles that trigger your symptoms.

3. Regularly changing your air filter is important to keep your home free of allergens. Depending on the type of filter you have, you may need to change it every few months or every year.

4. In addition to using an air filter, there are other ways to reduce allergies in your home. These include vacuuming regularly, using dust covers on mattresses and pillows, and keeping pets out of bedrooms.

5. By taking some simple steps, you can create a more allergy-friendly home and make life more comfortable for everyone.

Get an air purifier for your home

If you’re looking to improve your home’s air quality, an air purifier is a great option. Air purifiers can remove dust, pollen, smoke, and other airborne particles from the air, making it easier to breathe. There are a few things to keep in mind when shopping for an air purifier. First, consider the size of the unit and the specific needs of your home. Second, look for a purifier with multiple filtration stages to ensure that it can remove a variety of airborne contaminants. Finally, make sure to choose a unit that is certified by the Association of Home Appliance Manufacturers (AHAM) to ensure that it meets strict quality standards.

Use a humidifier to ease allergy symptoms

If you suffer from allergies, using a humidifier in your home can help to ease your symptoms. By adding moisture to the air, a humidifier can help to loosen congestion and keep your nasal passages hydrated, both of which can help to reduce the severity of allergy symptoms. Additionally, a humidifier can also help to prevent static electricity, which can further irritate your allergies.

Keep your home clean to reduce allergens

If you or someone in your family suffers from allergies, you’ll want to do everything you can to reduce allergens in your home. A clean home is a good place to start. Here are some tips for keeping your home clean and reducing allergens:

1. Vacuum regularly. Vacuuming removes dust, dirt, and pet dander from carpets and upholstery. Be sure to vacuum regularly, even if you don’t have pets.

2. Dust often. Dust collects on surfaces such as furniture, shelves, and electronics. Use a damp cloth to dust, or use an electrostatic dusting cloth.

3. Clean floors regularly. sweep and mop your floors often, especially if you have pets. Be sure to use a cleaner that won’t leave behind a residues that can attract dust.

4. Disinfect surfaces. Allergens can live on surfaces such as countertops, door knobs, and light switches. Use a disinfectant wipe or spray to clean these surfaces regularly.

5. Launder bedding and curtains. Bedding and curtains can collect dust, pollen, and pet dander. Launder them in hot water at least once a week. By following these tips, you can reduce allergens in your home and create a cleaner, healthier environment for your family.

Change your filters regularly

If you have an air filter in your home, it’s important to change it regularly. Depending on the type of filter you have, you should change it every 1-3 months. If you have allergies or asthma, you might need to change your filter more often. A dirty filter can’t trap all the allergens and pollutants in the air, so they end up recirculating into your home. Changing your filter is easy. Just follow the instructions in your owner’s manual. Some filters can be washed and reused, while others need to be replaced. If you don’t have an air filter, now is a good time to get one. They’re relatively inexpensive and can make a big difference in the quality of the air in your home.

Vacuum often to remove dust and other allergens

When it comes to keeping your home clean and free of allergens, vacuum often to remove dust and other irritants. This is especially important if you have pets, as their dander can trigger asthma and allergy symptoms. Be sure to check the filters on your vacuum regularly and replace them as needed.

Why you might need an emergency plumber

If you’re like most people, the thought of an emergency plumber coming to your home is enough to send your wallet into panic mode. But don’t worry, we’re here to help. In this blog post, we’ll tell you everything you need to know about how much an emergency plumber costs, so you can be prepared for anything.

Why you might need an emergency plumber

You might need an emergency plumber for a number of reasons. Maybe you have a burst pipe, a broken hot water heater, or a clogged drain. Whatever the problem is, an emergency plumber can help solve it.

Emergency plumbers are available 24 hours a day, 7 days a week. They are trained and experienced in dealing with plumbing emergencies. They will usually be able to come to your home within an hour or two.

Emergency plumbers charge by the hour. The cost will depend on the severity of the problem and the time it takes to fix it. In most cases, you can expect to pay between $100 and $500 for an emergency plumber’s services.

What factors affect the cost of an emergency plumber

There are many factors that affect the cost of an emergency plumber. The first is the type of problem that you have. If you have a clogged drain, the cost will be different than if you have a broken pipe. The second factor is the time of day or night that you need the plumber. Emergency plumbers are typically more expensive than regular plumbers because they are available 24 hours a day, 7 days a week. The third factor is the location of your home or business. If you live in a rural area, the cost may be higher than if you live in a city. Finally, the severity of the problem will also affect the cost. A simple clogged drain may cost less than a broken pipe that is spraying water all over your home.

How to find a reputable emergency plumber

If your plumbing fails in the middle of the night or on a holiday, you need an emergency plumber who will respond immediately. Plumbing problems can happen at any time, and they often occur when you least expect them. That’s why it’s important to have a reputable emergency plumber you can call on when you need help.

There are a few things you can do to find a reputable emergency plumber:

-Ask your friends, family, and neighbors if they have someone they recommend.
-Check online review sites.
-Call a few different companies and ask about their rates and services.

Once you find a few emergency plumbers you feel good about, make sure to keep their contact information handy so you can call them the next time you have a plumbing problem.

What to expect when you call an emergency plumber

When you have a plumbing emergency, you need to know that help is going to be available and that it’s going to be affordable. Here’s a quick rundown of what you can expect when you call an emergency plumber.

First, an emergency plumber is going to charge you more than a regular plumber. This is because they are available 24/7 and usually have to pay their employees overtime. However, if you have a plumbing problem that needs to be fixed immediately, the extra cost is worth it.

Next, the emergency plumber will assess the situation and give you a general idea of how much it will cost to fix the problem. They may need to see the problem first hand in order to give you an accurate estimate. Once they have an idea of what needs to be done, they will give you a written quote.

At this point, you can decide whether or not you want to hire the emergency plumber. If it’s a simple fix, such as a clogged drain, then you may be able to do it yourself and save some money. However, if it’s something more serious, such as a broken pipe, then it’s best to let the professionals handle it.

Once you’ve decided to hire the emergency plumber, they will come to your home or business and get started on fixing the problem. In most cases, they will be able to fix the problem within an hour or so. However, if it’s a more complex issue, such as a sewer line backup, then it may take them longer to fix the problem.

After they’ve fixed the problem, they will clean up any mess that was made during the repair process. Then, they will provide you with an invoice for their services. The invoice should include all of the materials and labor costs associated with fixing your plumbing problem.

As you can see, there are many things that go into hiring an emergency plumber. However, if you keep these things in mind, then finding and hiring one should be easy and stress-free.

How to prepare for an emergency plumber visit

An emergency plumber is someone who specializes in fixing plumbing problems that occur unexpectedly and often with little notice. These problems can range from burst pipes to clogged toilets and can often be very costly to fix if they are not addressed quickly. Many people are not prepared for these sorts of emergencies and end up having to pay much more than they would if they had planned ahead. There are a few things you can do to prepare for an emergency plumber visit so that you are not caught off guard:

-Keep a list of plumbers in your area that you can call in an emergency. This will allow you to call someone right away instead of having to search for a reputable company.

-Make sure you know where your main water shut-off valve is located. This will allow you to turn off the water supply quickly in the event of a leak.

-If you have a septic tank, make sure you know where it is located and how to properly care for it. This will prevent any sewage backups that could occur as a result of a clog.

By following these simple tips, you can be prepared for an emergency plumber visit so that you do not have to worry about the cost or the repairs that need to be made.

What to do if you have a plumbing emergency

If you have a plumbing emergency, you need to know how much it will cost to hire an emergency plumber. There are many factors that go into the cost of a plumbing emergency, including the time of day, the severity of the problem, the type of problem, and the location.

How to prevent plumbing emergencies

There are a number of things you can do to prevent plumbing emergencies from occurring in your home. By taking some simple precautions and being mindful of your plumbing, you can avoid many costly and inconvenient problems.

Here are some tips to prevent plumbing emergencies:

-Know where your main water shut-off valve is located and how to turn it off in case of a leak.
-Inspect your plumbing regularly for leaks, drips, or other problem areas.
-Be mindful of what goes down your drains, and avoid pouring grease, food waste, or other materials that can clog them.
-Install strainers in all of your sink drains to catch hair and other potential cloggers.
-If you have a garbage disposal, run it regularly to prevent blockages.
-Never try to repair or replace a plumbing fixture on your own – always call a licensed plumber.

The benefits of having an emergency plumber on call

There are many benefits of having an emergency plumber on call. For one, it can save you a lot of money in the long run. Plumbing problems can be very costly, and if you don’t have a professional to help you fix them, they can end up costing you a lot more.

Another benefit of having an emergency plumber on call is that it can save you a lot of time and hassle. If you have a plumbing problem in the middle of the night, you don’t have to wait until the next day to call a professional. You can just pick up the phone and have someone come out to take care of your problem right away. This can be a big help if you’re in a bind and need your plumbing fixed ASAP.

Lastly, having an emergency plumber on call can peace of mind. Knowing that there’s someone you can call if something goes wrong with your plumbing can give you a sense of security and comfort. This is especially beneficial if you live in an area where plumbing problems are more common.

The downside of not having an emergency plumber

If you have a plumbing emergency, you may be tempted to try to fix it yourself. After all, it seems like a simple enough problem and who wants to pay for a service when you can just do it yourself, right? Unfortunately, there are a few downsides to this plan. First of all, if you don’t know what you’re doing, you could end up making the problem worse. Second, even if you do know what you’re doing, attempting to fix a plumbing emergency on your own could result in injury. And third, trying to fix a plumbing emergency without the help of an emergency plumber will likely take longer and be much more frustrating than if you had just called for help in the first place.

So, while it may seem like an easy way to save money, the downside of not having an emergency plumber on hand when you need one far outweighs any potential savings. An emergency plumber can quickly assess the situation and take care of the problem so that you can get back to your life with as little disruption as possible.

When to call an emergency plumber

You should call an emergency plumber if you have a plumbing problem that needs to be fixed immediately. Some examples of situations that would require an emergency plumber include a clogged toilet, a burst pipe, or a backed-up sewer. Emergency plumbers are available 24 hours a day, 7 days a week, and can usually be at your home within an hour.

How much does a plumber make?

If you’re looking for an exciting and financially rewarding career, look no further than plumbing! Plumbers are in high demand and can earn a comfortable living. Plus, there’s nothing more satisfying than helping others out of a sticky situation!

How much does a plumber make?

How much does a plumber make? This is a difficult question to answer because there are so many variables that can affect a plumber’s salary. For example, the size of the company for which a plumber works, the geographical region in which he or she works, the number of years of experience a plumber has, and the type of plumbing work he or she does can all affect earnings. In addition, self-employed plumbers usually make more than those who work for someone else.

According to the Bureau of Labor Statistics (BLS), the median annual salary for plumbers was $51,450 in May 2016. The lowest 10 percent earned less than $30,730, while the highest 10 percent earned more than $86,490. The BLS notes that most plumbers receive some on-the-job training and must pass an exam to become licensed. Many states also require continuing education to maintain licensure. Some employers may offer tuition reimbursement or apprenticeships to encourage workers to stay up-to-date on new techniques and technology.

What factors affect a plumber’s salary?

There are several factors that affect a plumber’s salary, including experience, location, and type of employer.

-Experience: A plumber with more experience is likely to earn a higher salary than one with less experience.

-Location: A plumber working in a large city is likely to earn more than one working in a small town.

-Type of employer: A plumber working for a large company is likely to earn more than one working for a small company.

The top-paying industries for plumbers

There are a number of different industries where plumbers can earn a high salary. In general, the top-paying industries for plumbers are:

-Oil and gas extraction: $79,560
-Utilities: $74,540
-Construction of buildings: $73,820
-Architectural and engineering services: $72,530
-Pipeline transportation of crude oil: $71,760

The top-paying states for plumbers

The best-paid 25 percent of plumbers earn $62,920 or more annually, which is about $30.15 per hour. The lowest-paid 25 percent of plumbers earn less than $32,140 or $15.44 per hour.

The metropolitan areas with the highest wages for plumbers

The metropolitan areas with the highest wages for plumbers are San Francisco, Honolulu, New York, and Los Angeles. In these cities, plumbers earn an average wage of $60,000 per year.

The industries that employ the most plumbers

The industries that employ the most plumbers are construction, plumbing and heating contractors, and building equipment contractors. These industries accounted for about one-third of all jobs in May 2019.

The states with the most plumbers

There are many factors that affect how much plumbers make. These include their location, experience, and the type of employer they work for.

According to the Bureau of Labor Statistics, the five states with the highest employment levels for plumbers are California, Texas, New York, Florida, and Illinois. The states with the highest wages for plumbers are Alaska, Hawaii, Massachusetts, Rhode Island, and New Jersey.

The type of employer also affects how much plumbers make. For example, those who work for residential construction firms tend to make more than those who work for plumbing contractors or plumbing and heating equipment and supplies dealers.

The metropolitan areas with the most plumbers

1. New York City, NY
2. Los Angeles, CA
3. Chicago, IL
4. Houston, TX
5. Phoenix, AZ
6. Philadelphia, PA
7. San Antonio, TX
8. Dallas, TX
9. San Diego, CA
10. San Jose, CA

How to become a plumber

There are many paths to becoming a plumber. Some plumbers are trained through an apprenticeship, while others attend a trade school or community college. No matter which route you take, you’ll need to get a plumbing license before you can practice your craft.

If you’re interested in becoming a plumber, here’s what you need to know.

What Does a Plumber Do?
Plumbers are responsible for installing and repairing the piping systems that carry water, sewage, and natural gas in homes and businesses. They also install fixtures such as sinks, toilets, water heaters, and dishwashers. In addition to their installation and repair work, plumbers also perform regular maintenance checks on these systems to ensure they’re functioning properly.

Becoming a Plumber
There are two main ways to become a plumber: through an apprenticeship or by attending trade school.

Apprenticeships are typically four years long and combine on-the-job training with classroom instruction. At the end of the program, apprentices must pass a final exam to earn their journeyman license. Journeyman plumbers can then work independently or become supervisors for apprentice plumbers.

Those who want to attend trade school can choose between a two-year diploma or certificate program or a four-year associate’s degree program in plumbing technology. Upon graduation, students must pass an industry-recognized exam to earn their journeyman license.

What to expect as a plumber

As a plumber, you can expect to earn a decent wage. However, your exact salary will depend on a number of factors, including your experience, the size of the company you work for and the geographical location of your job. In general, plumbers in the United States earn between $50,000 and $100,000 per year.

AZ Home Services Group is Here for You!

Don’t take our word for it. Listen to some of the feedback provided by our customers!

I just got a new AC/heat pump unit installed. It was a stressful situation and decision but AZ Home Services Group made it much easier. I felt supported all the way through. Everything was quick, easy, and stress-free. The new unit is unbelievably quiet! I am very pleased and would recommend AZ Home Services Group.

avatar

Mary Sequoia

New Air Conditioner

AZ Home Servies Group was excellent. They arrived on time and explained the issues with my air conditioner. They were courteous, professional, knowledgeable, and gave me financing options to work with and a fair price. I highly recommend them!

avatar

Philip Glacier

Air Conditioner

AZ Home Services Group did an awesome job servicing my AC and making some recommendations to increase the effectiveness of our unit. We were able to schedule our appointment right away. AZ Home Services Group is our go-to and always provides great service and the people are knowledgeable. We are very pleased!

avatar

Amy Redwood

Air Conditioner Service

Feel free to contact us anytime for immediate assistance.

We would be happy to schedule an appointment or answer any questions you may have.

ROC: 336757 | ROC: 336689

Privacy Policy | Terms & Conditions

Hours

Monday: 6:00 am-12:00 am
Tuesaday: 6:00 am-12:00 am
Wednesday: 6:00 am-12:00 am
Thursday: 6:00 am-12:00 am
Friday: 6:00 am-8:00 pm
Saturday: Closed
Sunday: 8:00 am-10:00 pm

Via Email

Via Phone

(602) 806-7212

Location

1331 E Carmen Street Tempe, AZ 85283

Ready to fix that Plumbing or A/C Issue?

Give us a call now, our knowledgeable staff can get you answers quickly!

Call For Immediate Service (602) 806-7212