Why Your Water Heater Isn’t Heating — and How to Fix It
Turning on your faucet or shower only to be met with icy cold water can be incredibly frustrating. The issue could be as simple as a tripped circuit breaker or as complex as a malfunctioning heater element.
A non-functional water heater can disrupt your daily routine. Problems with your tank can range from simple fixes to complex issues requiring professional help.
This comprehensive guide will walk you through the common causes of hot water issues and provide step-by-step solutions to get your water heater working again.
Key Takeaways
- Identify common causes of water heater failure
- Learn basic DIY maintenance to prevent future problems
- Understand when to call a professional plumber
- Discover troubleshooting steps for gas and electric water heaters
- Prevent sediment buildup and other issues
Understanding Your Water Heater System

A well-functioning water heater is vital for daily comfort, and understanding its mechanics can help you address any problems. Your water heater is an essential component of your home, providing hot water for showers, baths, dishwashers, washing machines, and faucets.
Types of Water Heaters: Gas vs. Electric
There are primarily two types of water heaters: gas and electric. A gas water heater uses a burner at the bottom of the tank to heat water and typically heats water faster than electric models. However, it may have issues with pilot lights and gas supply. On the other hand, an electric water heater uses heating elements immersed in the water tank to heat water, with a thermostat controlling the temperature.
How Water Heaters Work
Both gas and electric water heaters have a tank lined with insulation to keep water hot, a dip tube that brings cold water in, and an outlet pipe that delivers hot water to your home. For more detailed information on common water heater problems and their fixes, you can visit this resource.
Common Components and Their Functions
Understanding the basic components of your water heater—including the thermostat, heating elements, anode rod, and pressure relief valve—helps in diagnosing problems. The anode rod is a crucial component that prevents tank corrosion by attracting corrosive minerals in the water. Regular maintenance of these components can extend the lifespan of your water heater, which typically lasts 8-12 years.
Signs Your Water Heater Isn’t Working Properly

A water heater that’s not working properly will typically display certain signs that something is amiss. Recognizing these indicators can help you identify the problem and take corrective action before it leads to more significant issues.
No Hot Water at All
The most obvious sign of water heater problems is a complete lack of hot water. This could be due to power supply issues, a failed heating element, or gas supply problems for gas heaters. Checking these potential causes can help you diagnose the issue.
Water Not Hot Enough
If your hot water isn’t hot enough, the issue might stem from an undersized water heater for your household needs, a faulty thermostat, or sediment buildup reducing heating efficiency. Addressing these potential problems can help restore your water to the desired temperature.
Water Too Hot
Water that’s too hot can be dangerous and indicates a malfunctioning thermostat that needs immediate attention to prevent scalding. Ensuring the thermostat is functioning correctly is crucial for both safety and comfort.
Strange Noises or Odors
Strange noises like rumbling, popping, or banging from your heater typically signal sediment buildup at the bottom of the tank. Foul odors, particularly a rotten egg smell, from hot water can indicate bacterial growth in the tank or a failing anode rod. These signs suggest that maintenance or repair is necessary.
Some common issues to look out for include:
- Rusty or discolored water, which suggests corrosion inside the tank or pipes.
- Fluctuating water temperatures, often pointing to a failing heating element or thermostat issues.
By being aware of these signs and addressing them promptly, you can prevent further damage to your water heater and ensure a steady supply of hot water at the right temperature.
Power Supply Issues: The First Thing to Check
Power supply issues are a common reason for water heaters to malfunction. Ensuring that your water heater is receiving the necessary power is the first step in troubleshooting.
Tripped Circuit Breakers for Electric Heaters
For electric water heaters, a tripped circuit breaker is often the culprit when hot water suddenly stops. Check your electrical panel first before assuming more serious problems. Resetting a tripped breaker is simple: locate your home’s electrical panel, find the breaker labeled for the water heater, flip it completely off, then back to the on position.
Gas Supply Problems for Gas Heaters
For gas water heaters, verify that the gas supply valve is fully open and that your home’s gas service hasn’t been interrupted. Ensure the handle is parallel to the gas pipe to confirm it’s fully open.
How to Reset Your Water Heater
Many modern water heaters have a reset button, usually red, located near the thermostat. Pressing this button can resolve some issues after power interruptions. Always turn off the power at the breaker first for safety before pressing the reset button.
| Issue | Solution |
|---|---|
| Tripped Circuit Breaker | Reset the breaker |
| Gas Supply Interrupted | Check and open the gas supply valve |
| Water Heater Not Reset | Press the reset button after ensuring power is off |
After resetting, allow 30-60 minutes for the water to heat before checking if hot water has been restored. If the circuit breaker trips repeatedly, it indicates a more serious electrical issue that requires professional attention.
Pilot Light Problems in Gas Water Heaters

Gas water heaters rely on a pilot light to ignite the burner, and issues with it can lead to heating problems. The pilot light is a small flame that burns continuously, ready to ignite the main burner when hot water is needed.
Why Pilot Lights Go Out
Pilot lights can go out due to various reasons, including drafts, dirty gas lines, thermocouple issues, or temporary gas supply interruptions. These issues are common in gas water heaters and can cause the pilot light to extinguish.
Step-by-Step Guide to Relighting a Pilot Light
To relight a pilot light, first, turn the gas control valve to “off” and wait 5-10 minutes to allow any accumulated gas to dissipate. Then, turn the control knob to “pilot,” press and hold it down while using the igniter button or a long lighter to ignite the pilot. Continue holding for 30-60 seconds to ensure the pilot light stays lit.
When to Replace the Thermocouple
If the pilot light won’t stay lit after multiple attempts, the thermocouple likely needs replacement. Signs of a failing thermocouple include a pilot that lights but goes out as soon as you release the control knob. Replacing the thermocouple is a relatively inexpensive repair that can be done by a handy homeowner.
It’s essential to follow the manufacturer’s instructions when relighting a pilot light, as the process may vary depending on the specific gas water heater model. By understanding the causes of pilot light issues and how to address them, you can troubleshoot and potentially fix problems with your gas water heater.
Thermostat Malfunctions and How to Fix Them
A malfunctioning thermostat can be the culprit behind your water heater‘s inability to heat water properly. The thermostat plays a crucial role in regulating the temperature of your heater, ensuring it operates efficiently and safely.
Checking Thermostat Settings
First, check the thermostat settings to ensure they are within the recommended range. For most residential water heaters, the ideal temperature setting is between 120-125°F. This range provides hot water for household needs while preventing scalding and maximizing energy efficiency.
Testing for Thermostat Failure
If the settings are correct, the next step is to test the thermostat for failure. Electric water heaters typically have two thermostats (upper and lower) that work together. Testing involves using a multimeter to check for continuity. Before testing, always turn off the power to the heater at the circuit breaker for safety.
Replacing a Faulty Thermostat
If the thermostat is faulty, it may need to be replaced. Signs of thermostat failure include water that’s too hot, not hot enough, or fluctuating temperature despite consistent usage patterns. Replacing a thermostat is a moderately complex DIY job that requires removing access panels, disconnecting wires, and installing the new component. When purchasing a replacement, bring the old one to ensure an exact match for your heater model.
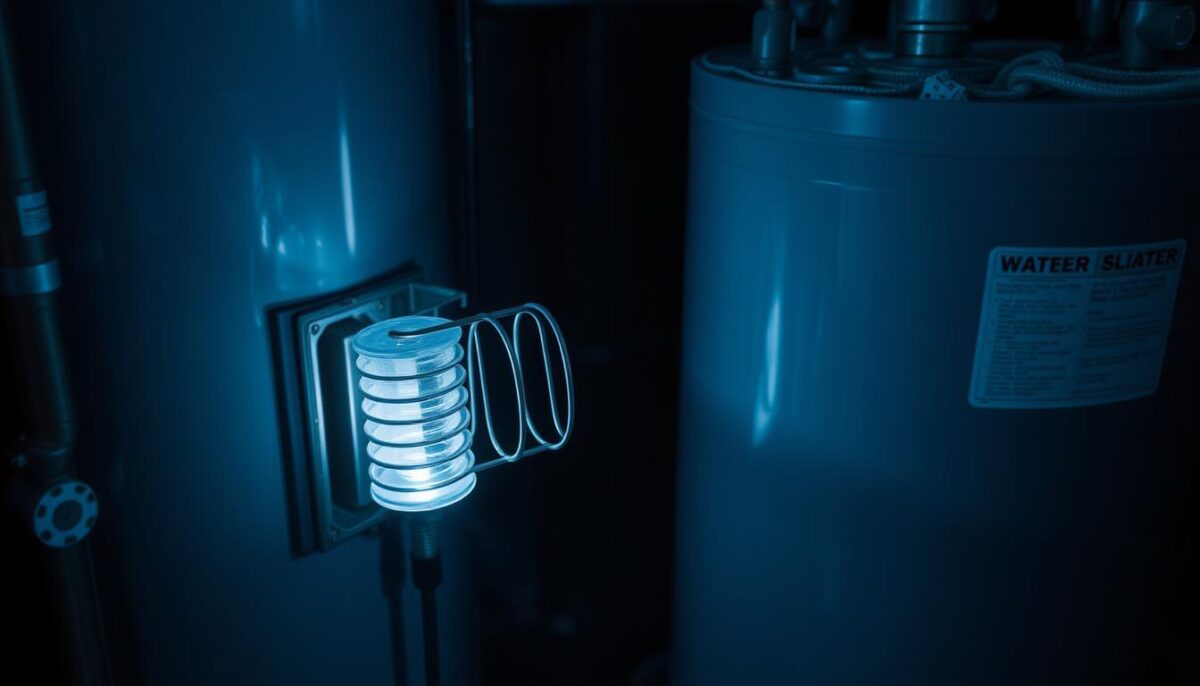
Heating Element Failures in Electric Water Heaters
Electric water heaters rely on heating elements to warm the water, and when these elements fail, problems arise. Most electric water heaters have two heating elements—upper and lower—that heat water in the tank. When either fails, hot water production is compromised.
Signs of a Burned-Out Heating Element
Common signs of a failed heating element include lukewarm water, hot water that runs out quickly, or no hot water at all despite the power being on. If you notice any of these issues, it’s likely that one of your heating elements has failed.
Testing Heating Elements with a Multimeter
To diagnose a faulty heating element, you’ll need a multimeter. Set the multimeter to measure ohms (resistance); a functioning element will show a reading between 10-30 ohms. Before testing, always shut off power to the water heater at the circuit breaker and drain at least some water from the tank.
Replacing Heating Elements: DIY Guide
Replacing a heating element is a manageable DIY project that requires basic tools, including an element wrench, screwdriver, and garden hose for draining. When purchasing replacement elements, ensure they match the wattage and voltage specifications of your original elements for proper operation.
Heating elements fail due to sediment buildup that causes them to overheat, normal wear and tear, or power surges that damage the electrical components. Regular maintenance can help extend the life of your heating elements.
Water Heater Not Heating Due to Sediment Buildup
One of the often-overlooked reasons for a water heater not heating properly is sediment accumulation. Over time, minerals from your water supply can settle at the bottom of the tank, creating a layer of sediment that can significantly impact your water heater’s performance.
How Sediment Affects Water Heating
Sediment buildup occurs as minerals from your water supply, especially in hard water areas, settle at the bottom of the tank. This creates an insulating layer between the heating element or burner and the water. As a result, your water heater has to work harder and longer to heat the water, increasing energy costs and reducing the unit’s lifespan.
Signs of Sediment Accumulation
There are several signs that indicate sediment buildup in your water heater. These include popping or rumbling noises coming from the tank, decreased hot water capacity, longer heating times, and fluctuating water temperatures. If you notice any of these symptoms, it’s likely that sediment accumulation is the cause.
Flushing Your Water Heater: Step-by-Step
Flushing your water heater annually is the best preventative maintenance to remove sediment and extend your unit’s life. To flush your water heater, start by turning off the power or gas supply. For a gas water heater, set the thermostat to the “Pilot” setting. For an electric heater, turn off the power to the heater at the fuse box.
Next, shut off the cold water supply to the tank and connect a garden hose to the drain valve. Place the other end of the hose in a drain or a bucket, and then open the drain valve to allow the tank to drain completely. After draining, briefly opening the cold water supply valve while the drain valve is still open can help flush out remaining sediment.
For severe sediment buildup, multiple flush cycles may be necessary. In extreme cases, professional descaling services might be required to restore your water heater to optimal performance.
Dealing with Limescale and Mineral Deposits
One of the overlooked maintenance tasks for water heaters is addressing limescale and mineral deposits. Limescale buildup is the result of hard water flowing through pipes and appliances, coating the edges of plumbing fixtures and eventually developing into thick layers that slow down water flow.
How Hard Water Affects Your Water Heater
Hard water contains high levels of calcium and magnesium that form limescale deposits inside your water heater, reducing efficiency by up to 30% and shortening its lifespan. Unlike sediment that settles at the bottom, limescale adheres to all internal surfaces including heating elements, thermostats, and tank walls.
Descaling Methods and Products
Commercial descaling products containing mild acids can dissolve existing limescale when used during a thorough tank flush. For electric water heaters, removing and soaking heating elements in vinegar or a commercial descaler can restore their efficiency.
Preventing Future Buildup with Water Softeners
Installing a water softener is the most effective long-term solution, as it removes the minerals that cause limescale before water enters your heater. Point-of-entry magnetic or electronic descalers can also help prevent new scale formation without removing minerals from your water supply.
Pressure and Temperature Relief Valve Issues
A critical safety component often overlooked in water heaters is the temperature and pressure relief valve. This valve is essential for preventing dangerous pressure buildup inside the tank.
Understanding the Purpose of the Relief Valve
The temperature and pressure relief valve (T&P valve) is designed to release water when the pressure or temperature inside the tank exceeds safe levels, thus preventing potential tank rupture or explosion. A properly functioning T&P valve is crucial for the safe operation of your water heater.
Signs of a Faulty Relief Valve
Signs that your relief valve might be faulty include constant dripping or leaking, failure to open when tested, or a valve that’s stuck open and continuously releasing water. If you notice any of these issues, it’s essential to address them promptly.
| Signs | Description |
|---|---|
| Constant Dripping or Leaking | Water continuously leaks from the valve. |
| Failure to Open When Tested | The valve doesn’t release water when the test lever is lifted. |
| Valve Stuck Open | The valve continuously releases water without closing. |
Testing and Replacing the Valve
Testing the T&P valve should be done every 6-12 months by lifting the test lever briefly and allowing a small amount of water to discharge. If the valve continues to leak after testing, it likely needs replacement. When replacing a T&P valve, always select one with the same pressure and temperature ratings as the original valve.
Regular maintenance of the T&P valve is crucial for the longevity and safety of your water heater. By understanding its function and performing regular checks, you can prevent potential hazards and ensure your water heater operates efficiently.
tag.
6. Keyword Placement Matrix: The keyword density will be maintained at up to 2% to avoid keyword stuffing. The relevant keywords are: water heater (3), leaking water (2), heater (3), water (3), tank (3), valve (5), leak (3), leaks (2), connections (2).
7. Readability: The content will be broken into short paragraphs, and the Flesch Reading Ease and Flesch Kincaid Grade will be ensured to be within the specified ranges (Flesch score between 60-70).
8. Text Size: The recommended text size for Section 11 is 300 words.
Let’s proceed with creating the content for Section 11.
## Step 1: Writing the Initial Paragraph
Leaking Water Heater Problems and Solutions
Dealing with a leaking water heater requires understanding the cause to apply the right fix. Leaks can stem from various sources, ranging from minor issues that are easily repairable to serious problems that necessitate replacing the water heater.
## Step 2: Explaining the Sources of Leaks
Identifying the Source of Leaks
Water heater leaks can originate from different parts of the system. Top-of-tank leaks often result from loose pipe connections, a faulty temperature and pressure relief valve, or issues with the cold water inlet valve. On the other hand, leaks from the bottom may indicate problems with the drain valve, heating element gaskets, or corrosion within the tank itself.
## Step 3: Discussing Fixes for Leaks
Fixing Loose Connections and Valves
For leaks coming from loose connections, tightening them with a wrench is often sufficient. Applying thread tape can also help create a better seal. A leaking drain valve may require tightening or replacement, a relatively simple task that can prevent further water damage.
## Step 4: Addressing Tank Leaks
When a Leaking Tank Means Replacement
If the tank itself is leaking due to corrosion or cracks, replacement is usually the only viable option. Internal tank repairs are generally not feasible or cost-effective. Given that water heaters typically last between 8 to 12 years, if yours is nearing this age and developing leaks, it might be more economical to consider replacement.
## Step 5: Including Additional Information
As noted by plumbing experts, “A leaking water heater is not just a nuisance; it’s a sign of a potentially larger issue that needs immediate attention.” Regular maintenance, such as checking the anode rod and ensuring proper connections, can help extend the life of your water heater.
## Step 6: Creating a Relevant Table
| Leak Source | Common Cause | Fix |
|---|---|---|
| Top-of-tank | Loose pipe connections, faulty relief valve | Tighten connections, replace valve if necessary |
| Bottom | Drain valve issues, corroded tank | Replace drain valve, consider tank replacement |
## Step 8: Finalizing the Content
The final content is now ready to be enclosed in the “ tag.
Leaking Water Heater Problems and Solutions
Dealing with a leaking water heater requires understanding the cause to apply the right fix. Leaks can stem from various sources, ranging from minor issues that are easily repairable to serious problems that necessitate replacing the water heater.
Identifying the Source of Leaks
Water heater leaks can originate from different parts of the system. Top-of-tank leaks often result from loose pipe connections, a faulty temperature and pressure relief valve, or issues with the cold water inlet valve. On the other hand, leaks from the bottom may indicate problems with the drain valve, heating element gaskets, or corrosion within the tank itself.
Fixing Loose Connections and Valves
For leaks coming from loose connections, tightening them with a wrench is often sufficient. Applying thread tape can also help create a better seal. A leaking drain valve may require tightening or replacement, a relatively simple task that can prevent further water damage.
When a Leaking Tank Means Replacement
If the tank itself is leaking due to corrosion or cracks, replacement is usually the only viable option. Internal tank repairs are generally not feasible or cost-effective. Given that water heaters typically last between 8 to 12 years, if yours is nearing this age and developing leaks, it might be more economical to consider replacement.
A leaking water heater is not just a nuisance; it’s a sign of a potentially larger issue that needs immediate attention.
| Leak Source | Common Cause | Fix |
|---|---|---|
| Top-of-tank | Loose pipe connections, faulty relief valve | Tighten connections, replace valve if necessary |
| Bottom | Drain valve issues, corroded tank | Replace drain valve, consider tank replacement |
Water Heater Size and Capacity Problems
The size of your water heater directly impacts its ability to meet your household’s hot water demands. If your tank is too small, it won’t be able to store enough hot water for your needs.
Signs Your Water Heater Is Too Small
Running out of hot water frequently, especially during peak usage times, is a clear indication that your water heater is too small. Other signs include simultaneous use of hot water in multiple areas of the home exceeding the heater’s capacity.
Calculating the Right Size for Your Household
For tank water heaters, a general guideline is 30-40 gallons for 1-2 people, 40-50 gallons for 2-3 people, and 50-80 gallons for 4+ people. Calculating your household’s peak hour demand helps determine the proper water heater size.
Upgrading Options: Tank vs. Tankless
Upgrading to a larger tank water heater requires considering space and fuel type. Tankless water heaters offer unlimited hot water but require proper sizing based on flow rate. Converting to a tankless system typically requires significant installation changes.
When to Call a Professional Plumber
While DIY fixes can resolve many water heater issues, some problems require the expertise of a professional plumber. If you notice gas odors, significant water leaks, or if the tank is producing rusty water consistently, call a professional immediately.
Electrical issues beyond a simple tripped breaker, such as burning smells or sparking, indicate potentially dangerous conditions requiring professional attention. If your heater is more than 10 years old and experiencing multiple heater problems, a professional can help evaluate whether repair or replacement is more cost-effective.
Regular maintenance every 1-2 years can extend your water heater’s life and prevent costly emergency repairs. A qualified plumber can perform thorough maintenance tasks like inspecting the anode rod and testing pressure relief valves. If none of the DIY procedures work, it’s time to consider purchasing a new water heater. To be sure, contact a plumbing specialist.