Common Garbage Disposal Issues and How to Fix Them
A garbage disposal unit is an essential kitchen appliance that can develop various issues over time.
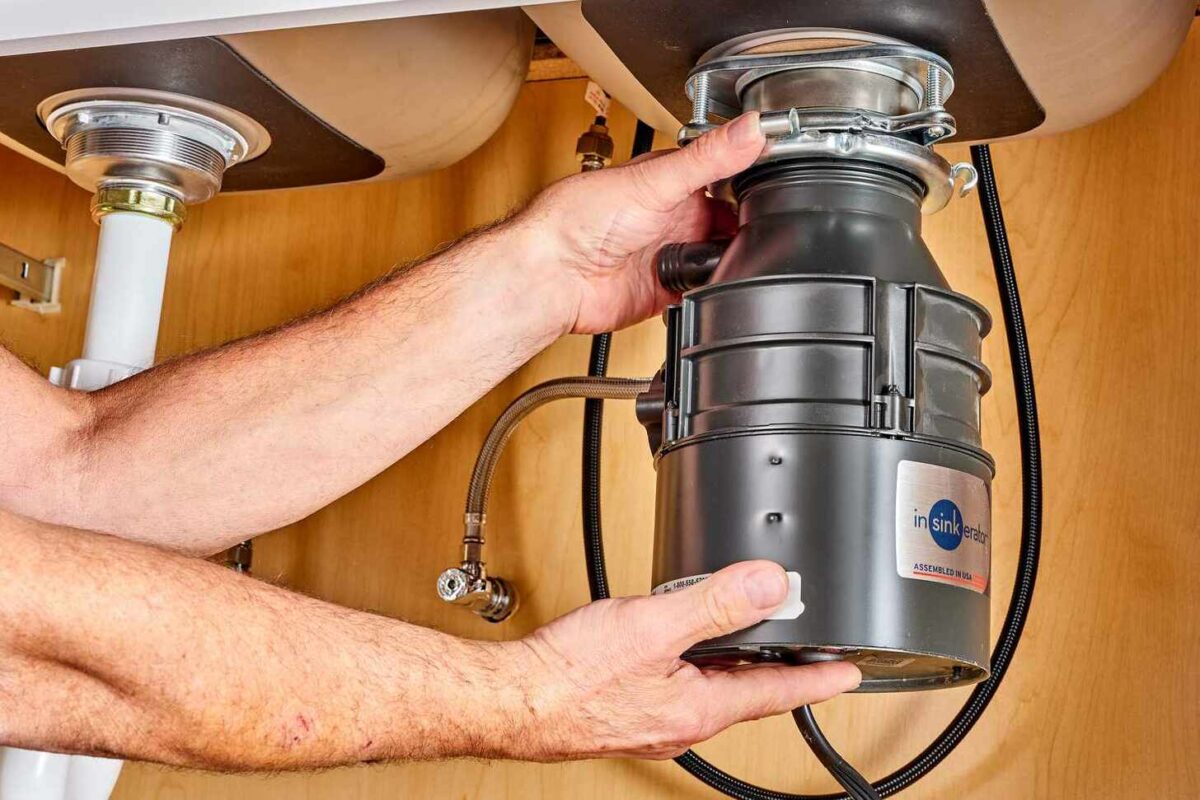
Like most kitchen appliances, it’s powered by a cord connected to an electrical outlet or hardwired to your home’s power supply. To fix or even inspect it, it’s crucial to disconnect the unit under the kitchen sink.
Understanding common problems with your garbage disposal can save you money on repairs and prevent premature replacement.
This guide will walk you through diagnosing and fixing frequent issues, empowering you to handle repairs confidently.
Key Takeaways
- Diagnose common garbage disposal issues
- Learn basic troubleshooting techniques
- Perform simple repairs to extend the life of your unit
- Avoid costly professional service calls
- Understand the importance of disconnecting the unit before repair
Understanding How Your Garbage Disposal Works

To effectively troubleshoot and maintain your garbage disposal, it’s essential to understand its inner workings. A garbage disposal is a kitchen appliance installed under the sink that breaks down food waste into smaller particles that can be flushed down the drain.
Basic Components and Operation
A typical garbage disposal unit consists of several key components: the motor, impeller plate, grinding chamber, and mounting assembly. When you turn on the disposal, the motor activates the impeller plate, which spins at high speeds (typically 1,725-1,800 RPM) to break down food waste. The impeller plate is crucial as it creates the centrifugal force needed to push food particles against the grinding ring.
The Grinding Process Explained
Unlike popular belief, garbage disposals don’t actually have “blades.” Instead, they use centrifugal force to push food particles against a grinding ring with small teeth. This process breaks down the food waste into tiny particles that can safely pass through your plumbing system without causing clogs. Understanding this grinding process is vital for maintaining your disposal and ensuring it operates efficiently.
Regular maintenance and proper use can extend the life of your garbage disposal and prevent common issues. By knowing how your disposal works, you can better troubleshoot problems when they arise and keep your kitchen running smoothly.
Essential Tools for Garbage Disposal Repair

Garbage disposal repair requires a specific set of tools to ensure the job is done efficiently and safely. Having the right tools not only makes the repair process easier but also helps prevent damage to the disposal unit.
Must-Have Tools for DIY Fixes
Before attempting any garbage disposal repair, gather essential tools including a hex wrench (Allen wrench), flashlight, pliers, screwdrivers, plumber’s putty, and a bucket to catch water. A specialized garbage disposal wrench is particularly useful for freeing jammed impellers, though a standard hex wrench can often work as a substitute.
Key tools for the job: Screwdriver sets, Hex key, Garbage disposal wrench, Flashlight, Long-nosed pliers, Clamp, Bucket, Plunger.
Safety Precautions Before Starting Repairs
Safety should be your top priority when working with garbage disposals – always disconnect the power by unplugging the unit or turning off the circuit breaker before attempting any repairs. Never place your hands inside the disposal, even when the power is disconnected; instead, use tools like tongs or pliers to remove objects.
Garbage Disposal Not Turning On: Troubleshooting Power Issues

A non-functional garbage disposal can be a significant inconvenience, often stemming from power issues. When the disposal doesn’t respond at all, the problem is usually electrical rather than mechanical.
Checking Electrical Connections
The first step in troubleshooting is to check if the disposal is properly plugged in. Sometimes, items stored under the sink can shift and dislodge the power cord. Ensure the disposal is securely plugged into the outlet.
For hardwired disposals, it’s essential to turn off the power at the circuit breaker before inspecting any electrical connections to avoid potential electrical shock.
How to Reset Your Garbage Disposal
Most garbage disposals come equipped with a reset button, typically located at the bottom of the unit. This button acts as an internal circuit breaker that prevents motor damage. If the disposal overheats or jams, the reset button may pop out automatically. Pressing it back in often resolves the issue.
- Locate the reset button on the bottom of the garbage disposal unit.
- Press the reset button firmly.
- Try turning on the disposal after resetting it.
Circuit Breaker Problems
If resetting the disposal doesn’t solve the problem, the next step is to check your home’s main circuit breaker panel. It’s possible that the circuit controlling the disposal has tripped. Check the panel and reset the breaker if necessary.
Persistent electrical issues might indicate more serious problems with the disposal’s internal wiring or motor, which may require professional assessment.
Fixing a Humming Garbage Disposal That Won’t Grind
A garbage disposal that hums but doesn’t operate is typically a sign of a jammed impeller or flywheel. When you switch on the garbage disposal and it produces a low, humming sound, it means the motor is running, but something is preventing the impeller plate or flywheel from turning.
If the humming continues for too long, the motor can overheat and burn out unless it trips the circuit breaker. To resolve this issue, you need to manually rotate the impeller to get it moving again.
Identifying a Jammed Impeller
The humming noise from your disposal indicates that the motor is receiving power, but the impeller or flywheel is jammed. This common issue is usually caused by food debris, small bones, or foreign objects becoming lodged between the impeller and the grinding ring.
If left unaddressed, a humming disposal can quickly overheat and burn out the motor, leading to a more expensive repair or replacement.
Using a Hex Wrench to Free the Flywheel
Most garbage disposals have a hex-shaped hole at the bottom of the unit, specifically designed for manually rotating the flywheel to clear jams. To fix the issue, you’ll need to use a hex wrench (also known as an Allen wrench).
Insert the hex wrench into the hole at the hole bottom and rotate it back and forth to dislodge whatever is causing the jam. This should free the stuck impeller or flywheel, allowing the disposal to operate again.
Manual Rotation Techniques
If you don’t have a hex wrench, you can sometimes free the impeller by inserting a wooden object, like a spoon handle, into the disposal (with the power off) and manually pushing against the impeller blades.
After freeing the jam, always run cold water while briefly operating the disposal to flush away any dislodged debris. To turn disposal back on, ensure it’s properly plugged in or that the circuit breaker is switched back on.
Clearing a Clogged Garbage Disposal
A clogged garbage disposal can significantly hinder your kitchen’s workflow. Clearing a clogged garbage disposal is a relatively straightforward process that can be done with the right tools and techniques. Understanding the signs of a clog and knowing how to address it can save you time and potential plumbing costs.
Signs of a Clogged Disposal
A clogged garbage disposal typically presents with several noticeable symptoms. These include standing water in the sink, slow drainage, unusual noises during operation, or foul odors emanating from the drain. Clogs can occur either within the disposal itself or in the drain pipe connecting the disposal to your home’s plumbing system. Common culprits behind disposal clogs are food particles that are fibrous, starchy, or greasy, as they can accumulate over time and restrict water flow.
- Standing water in the sink
- Slow drainage
- Unusual noises during operation
- Foul odors coming from the drain
Step-by-Step Unclogging Methods
Before attempting to clear a clog, always disconnect power to the disposal to prevent accidental activation during the cleaning process. Use a flashlight to inspect the disposal drain for visible obstructions that can be safely removed with pliers or tongs—never use your hands. If the clog is visible and accessible, remove as much of the obstruction as possible.
Alternatively, you can use a plunger designed for sinks to remove debris. Place the plunger over the drain hole, fill the sink with enough water to cover the tip of the plunger, and then pump the plunger up and down with force until the debris is dislodged. After plunging, turn the faucet on to flush out the debris. Once cleared, plug in the disposal and test it.
Dealing with Stubborn Clogs
For more stubborn clogs that cannot be resolved with plunging or manual removal of debris, it may be necessary to disconnect the P-trap beneath the sink. This allows direct access to the drain pipe to clear any blockages. It’s crucial to avoid using chemical drain cleaners with garbage disposals, as they can damage the unit’s components and void the manufacturer’s warranty.
By following these steps and understanding the causes of clogs, you can effectively clear a clogged garbage disposal and maintain your kitchen’s efficiency.
Repairing a Leaking Garbage Disposal
If your garbage disposal is leaking, it’s crucial to identify and fix the issue quickly to avoid further complications. A leaky disposal can lead to water damage, mold growth, and other issues that can be costly and time-consuming to repair.
Identifying the Source of Leaks
The first step in repairing a leaking garbage disposal is determining where the leak is coming from. Common locations for leaks include the sink flange, dishwasher connection, discharge pipe, and the disposal unit itself. Inspecting these areas carefully will help you pinpoint the source of the leak.
Leaks can occur due to various reasons such as loose connections, worn-out seals, or cracks in the disposal unit. Understanding the cause is essential to applying the correct fix.
Fixing Leaks from the Top (Sink Flange)
Leaks from the top of the garbage disposal, typically occur at the sink flange. To fix this, you’ll need to disconnect the disposal and inspect the mounting assembly. Often, the issue is due to loose mounting bolts or deteriorated plumber’s putty. To repair:
- Turn off the power to the disposal at the circuit breaker.
- Loosen the mounting ring under the sink and remove the disposal from the mounting flange.
- Loosen the mounting bolts holding the flange to the sink and lift it out.
- Scrape off the old plumber’s putty and apply a fresh amount around the top of the flange sink area.
- Reinstall the flange, retighten the mounting bolts, and reattach the disposal.
Addressing Leaks from the Bottom
A garbage disposal leaking from the bottom usually indicates a more serious issue, such as a failed internal seal or a crack in the disposal housing. Unfortunately, these problems typically require replacing the disposal unit entirely. For leaks at connection points like the dishwasher inlet or discharge pipe, check for loose clamps or damaged gaskets that can be tightened or replaced.
Before starting any repair, place a bucket under the disposal to catch any water that may leak during the process. For more complex issues or if you’re unsure about how to proceed, consider consulting a professional plumber. You can also refer to resources like Bob Vila’s guide on garbage disposal for additional troubleshooting tips.
| Cause of Leak | Location | Fix |
|---|---|---|
| Loose mounting bolts or deteriorated plumber’s putty | Sink Flange (Top) | Tighten bolts, replace plumber’s putty |
| Failed internal seal or cracked housing | Disposal Unit (Bottom) | Replace disposal unit |
| Loose clamps or damaged gaskets | Dishwasher inlet or discharge pipe | Tighten clamps, replace gaskets |
Solving Slow Draining Issues
When your garbage disposal drains slowly, it’s often a sign of a deeper issue within your plumbing system. This problem can be attributed to various factors, not necessarily the disposal unit itself.
Common Causes of Slow Drainage
Several factors can contribute to slow drainage in a sink with a garbage disposal. Common causes include partial clogs in the P-trap, discharge pipe, or main drain line. Grease buildup can also narrow the pipe diameter, while improper installation can create drainage issues. When water backs up into the sink during or after running the garbage disposal, it indicates a restriction somewhere in the drain system.
Cleaning the Drain Trap and Discharge Pipe
To resolve slow drainage, start by cleaning the drain trap (P-trap), a curved pipe section under the sink that captures debris and can become clogged over time. Disconnect the discharge pipe from the side of the garbage disposal and the drain trap from the wall pipe, having a bucket ready to catch water. Check for clogs or obstructions and clean the disposal. If none are found, the clog might be in the branch drain line going into the wall.
Using a Sink Auger for Branch Drain Clogs
For clogs beyond the trap in the branch drain (the horizontal pipe leading into the wall), a sink auger (also called a drain snake) can be effective at breaking up or retrieving the blockage. After clearing any obstructions, reassemble the drain trap and reconnect the discharge tube to the side of the garbage disposal. Run water through the system to ensure proper drainage before reassembling all components.
By following these steps, you can identify and fix the issue causing slow drainage, ensuring your garbage disposal and drain system function efficiently.
Best Practices for Garbage Disposal Use and Maintenance
To keep your garbage disposal running smoothly, follow these best practices. Proper use and regular maintenance can prevent most common issues and significantly extend the life of the appliance.
Foods to Avoid Putting Down Your Disposal
Not all food waste is suitable for garbage disposals. Avoid putting cooking fats, grease, and oils down your disposal as they can liquify and clog your drain. Other items to avoid include large bones, fruit seeds and cores, fibrous plant scraps, and raw vegetables, as they can dislodge internal seals and grinding components. Additionally, starchy foods like rice and pasta can clump together and cause drainage issues.
- Cooking fats, grease, and oils
- Large bones and fruit pits
- Fibrous vegetables like celery and corn husks
- Starchy foods such as pasta and rice
Proper Operation Techniques
Always run cold water before, during, and after using your garbage disposal. Cold water helps to solidify grease and oils, allowing them to be chopped up and flushed away rather than coating your pipes. It’s also important not to overload your disposal; instead, feed food waste gradually while the unit is running.
Regular Maintenance Tips
Regular maintenance is crucial for the longevity of your garbage disposal. Run your disposal regularly, even when not in use, to prevent rust and corrosion. Cleaning your disposal monthly by grinding ice cubes followed by citrus peels can help keep it fresh and clean. For stubborn odors, try grinding a mixture of ice cubes and rock salt or running a solution of baking soda and vinegar through the disposal.
By following these best practices, you can ensure your garbage disposal operates efficiently and effectively, reducing the likelihood of common issues and prolonging its lifespan.
When to Replace vs. When to Call a Professional
When dealing with a malfunctioning garbage disposal, it’s crucial to determine whether the issue can be resolved through DIY repairs or if professional assistance is required.
If you’ve tried troubleshooting and repairing your garbage disposal but the problems persist, it may be time to consider replacement. Signs that indicate a need for a new garbage disposal include persistent leaks from the unit, frequent jams, excessive noise, or repeated electrical failures.
Installing a new garbage disposal can be a moderately complex task, requiring basic plumbing and electrical knowledge. If you’re not comfortable with these aspects, it’s recommended to seek professional installation. Factors to consider when selecting a new unit include horsepower, noise level, grinding chamber material, and warranty coverage.
In your home, if you encounter complex electrical issues, persistent leaks, or unusual sounds that basic troubleshooting doesn’t resolve, it’s advisable to call a professional for repair. The cost of a new unit can range from $80 to $350, with professional installation adding $100 to $250.
Regular maintenance can extend the life of your garbage disposal, but most units will need replacement after 8-10 years. Understanding the right time to replace or seek professional help can save you time and money in the long run, ensuring your home remains functional and efficient.