Noisy HVAC System? What Those Sounds Might Be Telling You

Your home’s HVAC system is supposed to operate relatively quietly, with only minimal background noise that you barely notice during normal operation.

However, when it starts making unusual or loud noises, it’s often a warning sign that something isn’t working correctly and requires attention.

Different sounds indicate different problems – from minor issues that you might be able to fix yourself to serious malfunctions that require professional intervention.

Understanding what these noises mean can help you address potential issues before they become major problems, saving you money on AC repairs and extending the life of your system.

Key Takeaways

  • Unusual noises from your HVAC system can indicate potential issues.
  • Understanding these sounds can help you address problems early.
  • Different sounds indicate different problems.
  • Some issues can be fixed yourself, while others require professional help.
  • Identifying and addressing issues early can save you money on repairs.

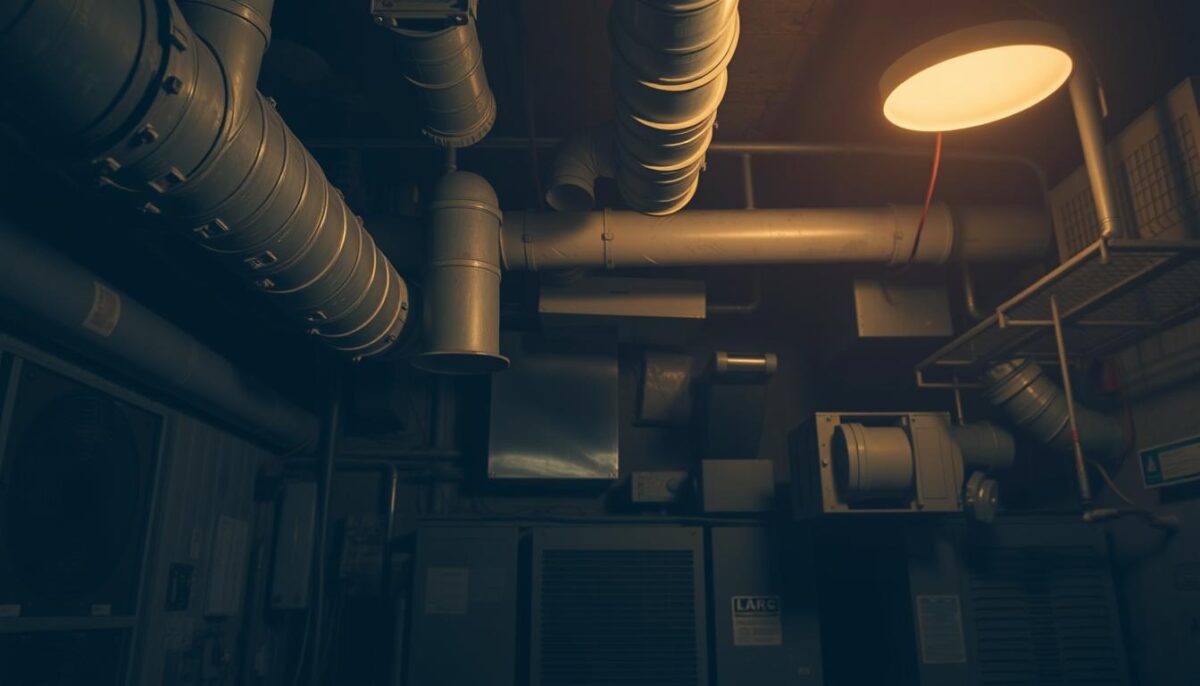
Understanding Your HVAC System and Its Normal Sounds

An in-depth technical diagram showcasing the key components of a modern HVAC system. The image should depict a cutaway view, revealing the inner workings in vivid detail. Prominently feature the compressor, condenser coil, evaporator coil, blower fan, and ductwork in the foreground. In the middle ground, include annotations highlighting the function of each part. The background should provide a clean, minimalist context, with subtle lighting to enhance the technical aesthetic. Render the scene with a muted color palette, using shades of gray, silver, and blue to convey a sense of precision and professionalism, suitable for an informative article on HVAC system sounds and maintenance.

Understanding the normal sounds of your HVAC system can help you detect unusual noises that may indicate a problem. To do this, you first need to familiarize yourself with the basic components of your system and the sounds it typically makes during operation.

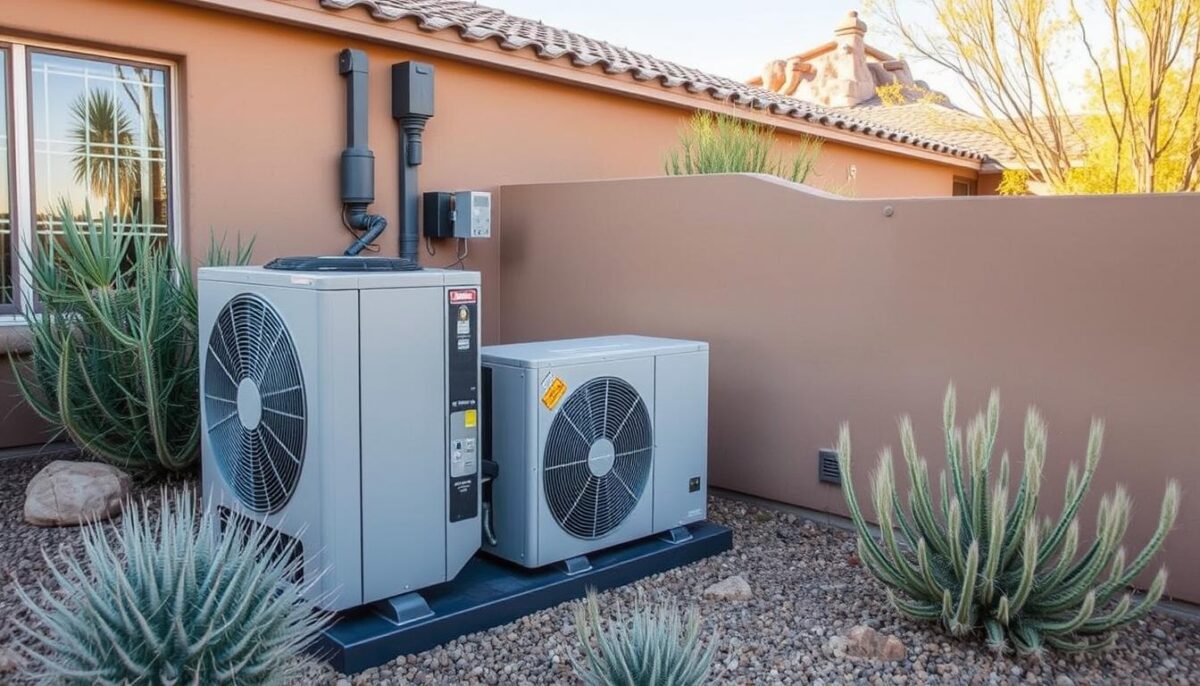
Key Components of a Residential HVAC System

A residential HVAC system consists of several key components, including the furnace or air conditioner, compressor, fan motor, and ductwork. Each of these parts plays a crucial role in heating or cooling your home. The components work together to circulate air and regulate temperature.

Component Function
Furnace/Air Conditioner Heats or cools the air
Compressor Compresses refrigerant to cool air
Fan Motor Circulates air through the system
Ductwork Distributes heated or cooled air throughout the home

What Constitutes “Normal” HVAC Noise

Even well-functioning HVAC systems produce some level of noise. Normal sounds include a gentle humming when the system starts, soft whooshing of air through vents, and occasional clicking when it turns on or off. Becoming familiar with these sounds helps you identify when something unusual occurs.

Common Noisy HVAC System Sounds and Their Meanings

A large, industrial-grade HVAC system sits in the foreground, its metal housing vibrating and panels rattling as a loud, persistent buzzing emanates from the unit. The system is situated in a dimly lit, utilitarian mechanical room, the drab concrete walls and exposed pipes creating a utilitarian atmosphere. Overhead, a single fluorescent light casts an unforgiving, harsh glow, accentuating the system's wear and tear. The scene conveys a sense of neglect and the need for maintenance, hinting at the potential issues that could be causing the troubling buzzing sound.

Identifying the specific noises your HVAC system is making is the first step in diagnosing and addressing potential issues. Different sounds can indicate various problems, ranging from minor maintenance needs to serious system failures.

Squealing or Screeching Noises

Squealing or screeching noises from your HVAC system often point to issues with the belt or motor. A worn-out or misaligned belt can cause these high-pitched sounds. It’s essential to address these noises promptly to prevent further damage to your system.

Banging, Clanking, or Rattling Sounds

Banging, clanking, or rattling sounds typically indicate loose or broken parts within your HVAC system. These could be loose screws, debris in the ductwork, or a malfunctioning blower wheel. Inspecting and tightening loose parts or removing debris can often resolve these issues.

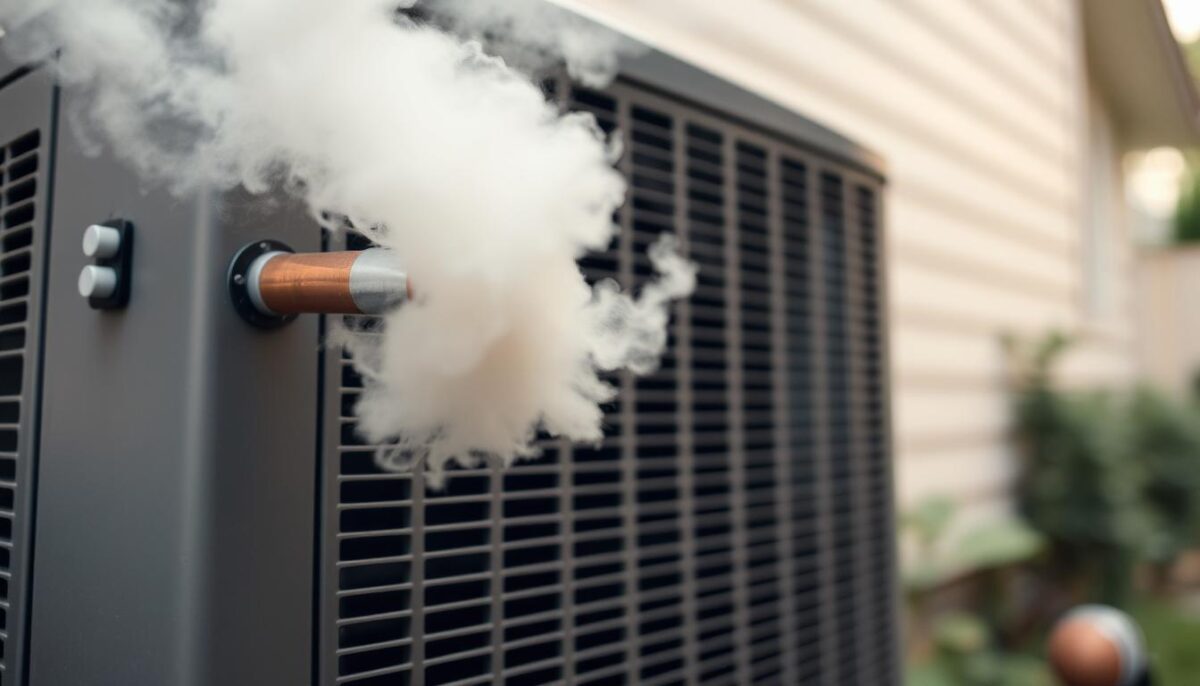
Hissing or Whistling Noises

Hissing or whistling noises usually suggest issues related to airflow or refrigerant leaks. A hissing sound might indicate a leak in the refrigerant lines or a problem with the system’s ductwork. Whistling noises often result from high-velocity air escaping through gaps or leaks in the ducts.

Buzzing or Humming Sounds

Buzzing or humming sounds often indicate electrical problems within your HVAC system’s components. These noises can originate from the compressor, transformer, or relay switches when they’re not functioning properly. A buzzing sound might signal that the compressor is struggling to start due to electrical issues or is nearing the end of its useful life. Loose electrical connections can create persistent humming that may grow louder over time. In some cases, buzzing might be caused by vibrating ductwork or loose panels that resonate when the system operates. Electrical buzzing sounds should be addressed promptly as they can indicate issues that might lead to system failure or even electrical hazards.

  • Electrical issues are a common cause of buzzing or humming noises in HVAC systems.
  • Components such as the compressor, transformer, and relay switches are often the source of these sounds when malfunctioning.
  • Loose electrical connections can lead to persistent humming that worsens over time.
  • Vibrating ductwork or loose panels can also cause buzzing noises.

Troubling Sounds That Require Immediate Attention

Certain noises from your HVAC system are red flags, indicating potential problems that could lead to significant damage if ignored. While some sounds might be harmless, others signal serious issues that require prompt professional attention.

Understanding the nature of these noises is crucial for diagnosing and addressing the underlying causes before they escalate into major problems.

High-Pitched Screaming from Your AC Unit

A high-pitched screaming noise from your air conditioning unit can be alarming. This sound often indicates a serious issue, such as a malfunctioning compressor or a failing fan motor. If you hear such a noise, it’s advisable to turn off your AC unit to prevent further damage and consult a professional technician.

Loud Booming from Your Furnace

A loud booming noise from your furnace can be startling and is typically a sign of an ignition issue. This could be due to a problem with the igniter or the gas valve. Ignition issues can lead to safety hazards, including the risk of gas leaks or explosions. Therefore, a booming furnace noise warrants immediate investigation by a qualified HVAC technician.

Persistent Clicking or Grinding Noises

Clicking or grinding noises from your HVAC system can indicate a range of issues. If the clicking is coming from the AC unit, it might be related to the outside compressor or the inside air handler. For furnaces, persistent clicking could signal a problem with the ignition system. Grinding noises, on the other hand, almost always indicate serious mechanical problems, such as worn-down motors or bearings.

Noise Type Possible Cause Recommended Action
High-Pitched Screaming Malfunctioning compressor or fan motor Turn off the unit and consult a technician
Loud Booming Ignition issue or gas valve problem Contact a qualified HVAC technician immediately
Clicking or Grinding Electrical or mechanical issues Schedule a professional diagnosis

Addressing these noises promptly is crucial to prevent minor issues from becoming major air conditioning repairs. Regular maintenance and inspections can also help identify potential problems before they manifest as disturbing noises.

What’s Causing Your HVAC System to Make Noise?

The causes of a noisy HVAC system can vary widely, from mechanical problems to airflow issues. Understanding the root cause is essential for effective troubleshooting and resolving the problem.

Mechanical Issues: Loose or Broken Parts

Mechanical issues are a common cause of noise in HVAC systems. Loose or broken parts can create a variety of sounds, from rattling and clanking to squealing and screeching. For instance, a loose belt or a malfunctioning fan motor can produce distinct noises that signal a problem.

Airflow Problems: Blockages and Restrictions

Airflow problems can also lead to unusual noises. Blockages or restrictions in the ductwork or air filters can cause the system to work harder, resulting in increased noise levels. Common issues include dirty air filters, closed dampers, or debris obstructing airflow.

Age-Related Wear and Tear

As HVAC systems age, they naturally develop more noise due to wear and tear on components. Bearings in motors and fans wear down, capacitors become less effective, and heat exchangers can develop cracks. These age-related issues can lead to a range of noises, from humming and grinding to popping and banging. Regular maintenance can help mitigate some of these issues, but in many cases, they signal that the system is approaching the end of its service life.

DIY Solutions for Minor HVAC Noises

Image of a person cleaning around an outdoor HVAC unit

Addressing minor HVAC noises promptly can prevent more significant problems from developing, and there are several DIY solutions you can try first. Before calling a professional, it’s worth exploring these simple fixes to potentially save time and money.

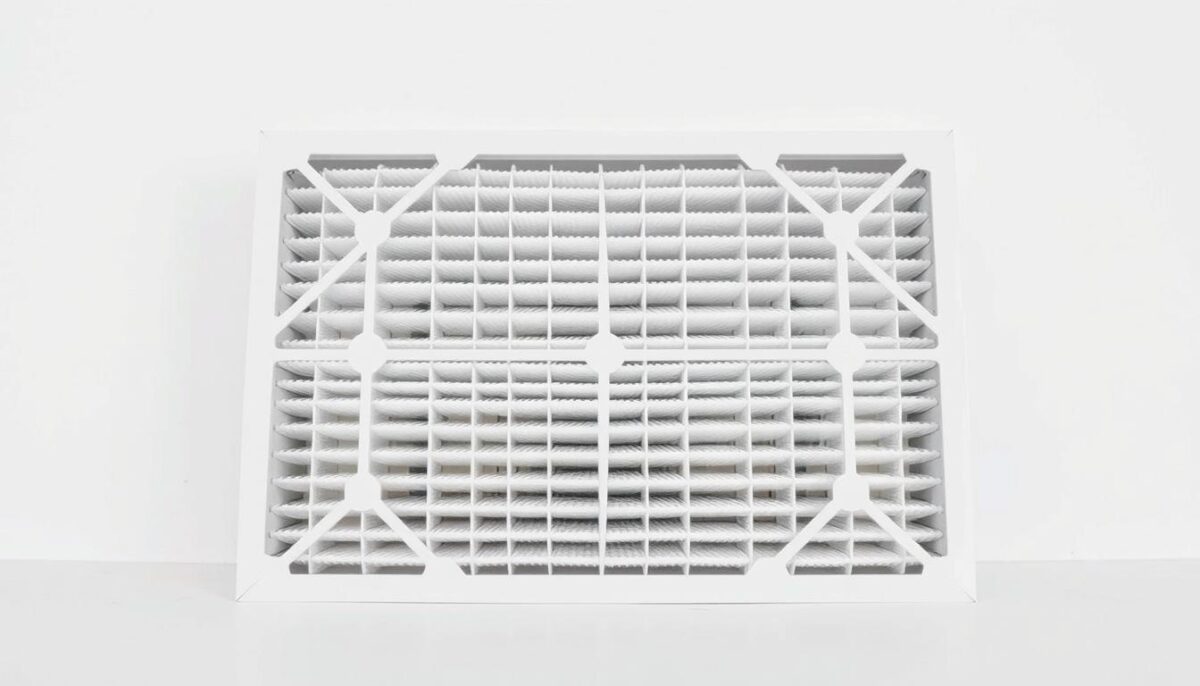
Cleaning or Replacing Air Filters

A dirty or clogged air filter can cause your HVAC system to work harder, leading to increased noise. Regularly cleaning or replacing the air filter can help reduce noise and improve efficiency. Ensure you check your filter monthly and replace it as recommended by the manufacturer.

Securing Loose Panels and Ductwork

Loose panels or ductwork can cause rattling or clanking noises. Inspect your ductwork and panels to ensure they are securely fastened. Tightening any loose parts can help minimize these noises and prevent further damage to your system.

Clearing Debris Around Outdoor Units

Outdoor condenser units can collect debris like leaves, twigs, and grass clippings, which can interfere with proper operation and create unusual noises. To clear debris:

  • Maintain at least two feet of clear space around all sides of your outdoor unit.
  • Gently clean the exterior fins with a soft brush or vacuum attachment.
  • Remove any vegetation growing too close to the unit.
  • Check for and remove any objects that may have fallen into the top grill of the unit.

After clearing debris, listen for any remaining unusual sounds that might indicate internal issues requiring professional attention.

Professional Solutions for Reducing HVAC Noise

To tackle stubborn HVAC noise, professional solutions offer a range of effective treatments. When DIY methods fall short, experts can diagnose and address the root causes of the noise, ensuring a quieter and more comfortable home environment.

Professional HVAC noise reduction services begin with a thorough assessment to identify the source of the noise. This might involve inspecting the system’s ductwork, components, and overall setup to pinpoint where the noise is coming from and what can be done to mitigate it.

Duct Modifications and Soundproofing

One effective approach to reducing HVAC noise is through duct modifications and soundproofing. This can involve modifying duct layouts to reduce turbulence and noise generation or adding soundproofing materials to ducts and surrounding areas to absorb sound. For more information on soundproofing HVAC systems, you can visit our detailed guide on how to soundproof HVAC systems similar to a recording studio would to keep the audio trapped in a room.

Component Upgrades and Replacements

Sometimes, the solution lies in upgrading or replacing noisy components. This could mean swapping out old or faulty parts for newer, quieter models. For instance, replacing an outdated compressor with a newer one can significantly reduce noise. Component upgrades not only help in noise reduction but can also improve the overall efficiency of the HVAC system.

Compressor Sound Blankets and Vibration Pads

A specific solution for reducing noise from the compressor involves using compressor sound blankets. These are specialized acoustic wraps designed to absorb noise from the compressor, which is often the loudest component of an air conditioning system. Additionally, vibration isolation pads can be used under equipment to prevent the transfer of mechanical vibrations to the home’s structure, further reducing noise.

By implementing these professional solutions, homeowners can enjoy a significantly quieter HVAC system. These methods not only reduce noise but also contribute to a more efficient and longer-lasting HVAC system.

When to Call an HVAC Technician

Noisy HVAC system

Knowing when to call an HVAC technician can save you time and money by addressing potential issues before they escalate. Your HVAC system is a complex piece of equipment that requires professional attention when it starts making unusual noises.

Signs of Serious System Problems

Certain noises from your HVAC system can indicate serious problems that require immediate attention. For instance, a high-pitched screaming from your AC unit or a loud booming from your furnace are signs of potential mechanical failures or other critical issues.

Other signs include persistent clicking or grinding noises, which can indicate worn-out or damaged parts. If you notice any of these symptoms, it’s crucial to call an HVAC technician promptly to prevent further damage.

What to Expect During a Professional Diagnosis

When you call an HVAC technician for a noise issue, you can expect a systematic diagnostic approach. The technician will first listen to the noise while the system operates and ask detailed questions about when it occurs and how long it’s been happening.

  • A comprehensive inspection will include checking electrical components with specialized testing equipment to identify any voltage or amperage abnormalities.
  • The technician will inspect mechanical components for wear, damage, or improper operation that might be causing the unusual sounds.
  • For refrigerant-based systems, pressure tests may be conducted to ensure proper levels and identify potential leaks.
  • After diagnosis, you should receive a clear explanation of the problem, recommended solutions, associated costs, and the consequences of delaying repairs.
  • Professional technicians can often detect and address developing issues that aren’t yet creating noticeable symptoms, preventing future breakdowns.

By understanding when to call an HVAC technician and what to expect during a professional diagnosis, you can ensure your system is running efficiently and effectively, minimizing the risk of unexpected failures and costly air conditioner repairs.

Preventative Maintenance to Keep Your HVAC System Quiet

Regular preventative maintenance is vital for keeping your HVAC system running smoothly and quietly. Your HVAC system is crucial for maintaining comfort in your home, especially during extreme temperatures.

To ensure quiet and efficient operation, annual professional maintenance is recommended. This should include inspection and cleaning of all components, tightening of electrical connections, and lubrication of moving parts. Scheduling maintenance in spring for air conditioning systems and fall for furnace systems ensures your equipment is ready for peak usage seasons.

Homeowners can complement professional maintenance by checking and replacing air filters monthly, keeping outdoor units clear of debris, and listening for changes in the system’s normal operating sounds. Proper refrigerant levels are also essential for quiet operation, as both overcharged and undercharged systems can create distinctive noises.

Investing in preventative maintenance typically costs less than emergency repairs and extends the lifespan of your HVAC equipment. By following these guidelines, you can enjoy a quieter, more efficient HVAC system that provides comfort throughout the year.

HVAC Warranties Explained: What’s Covered and What’s Not

Understanding your heating and cooling system warranty is crucial for protecting your investment and avoiding unexpected costs when problems arise. Unlike other home appliances, HVAC systems require proper sizing, installation, startup, and maintenance to function correctly, making warranty coverage more complex.

Modern warranties have evolved significantly, with many manufacturers now offering 10+ year coverage. It’s essential to comprehend both manufacturer parts warranties and labor warranties from installers to fully protect your HVAC investment.

Key Takeaways

  • Understanding your HVAC warranty is crucial for protecting your investment.
  • Modern HVAC warranties have evolved, with many manufacturers offering 10+ year coverage.
  • Proper sizing, installation, startup, and maintenance are required for HVAC systems to function correctly.
  • Comprehending manufacturer parts warranties and labor warranties is essential.
  • Knowing what is and isn’t covered under your warranty can save you thousands of dollars.

Understanding the Two Types of HVAC Warranties

A well-lit, high-resolution image of two HVAC warranties, one for a residential system and one for a commercial system, placed side by side on a clean, minimalist white background. The residential warranty is shown in the foreground, with its details clearly visible, while the commercial warranty is slightly out of focus in the middle ground. The lighting is soft and even, creating a sense of professionalism and legibility. The image conveys a clear understanding of the two main types of HVAC warranties, as described in the article section title.

The world of HVAC warranties can be complex, but breaking it down reveals two primary types that homeowners should be aware of. HVAC systems are significant investments, and understanding the warranties that protect these investments is crucial for homeowners.

HVAC systems come with two distinct types of warranties that protect different aspects of your investment. As noted by industry experts, “A comprehensive warranty can provide peace of mind and protect your investment from costly repairs.” These warranties are the manufacturer parts warranty and the labor warranty from installers.

Manufacturer Parts Warranty

The manufacturer parts warranty is designed to cover defects in the components themselves. This means that if a part fails due to manufacturing flaws, it will be replaced at no cost for the part itself. Over the years, manufacturer parts warranties have been extending, with many now offering 10+ years of coverage, compared to the standard 3-5 years in the 1990s.

Despite the longer warranty periods, HVAC equipment isn’t necessarily more reliable than before. In fact, some components may be made more economically now, making warranty protection even more important. As the industry trend continues towards longer parts warranty coverage, it’s essential for homeowners to understand what is covered and for how long.

Labor Warranty from Installers

Labor warranties, provided by the installation company, cover the workmanship and installation quality. These warranties are typically for a shorter period, often 1-2 years, unless extended options are purchased. Initial labor warranties are particularly important because most installation or equipment quality issues will become apparent during the first heating and cooling seasons.

When evaluating labor warranties, it’s crucial to understand who backs the warranty—the installation company itself or a third-party insurer. This is especially important if you’re concerned about the long-term viability of the installation company. Extended labor warranties are often available for purchase, providing additional years of coverage beyond the standard period, which can be valuable for expensive systems.

The Complete HVAC Warranty Guide: Coverage Duration and Registration

A comprehensive understanding of HVAC warranty coverage and registration is essential for homeowners to make informed decisions about their heating and cooling systems. HVAC warranties can vary significantly in terms of coverage duration and the registration process.

Standard vs. Extended Warranty Periods

The coverage period of an HVAC warranty is a critical factor that determines how long the homeowner is protected against equipment failures. Standard warranties typically cover parts for a limited time, often around 5 years. In contrast, extended warranties can provide coverage for 10 years or more, depending on the manufacturer’s policies and the registration process.

HVAC warranty coverage periods vary significantly between standard (base) warranties and extended (registered) warranties. Registration typically extends coverage from 5 years to 10 years or more. Most manufacturers require product registration within 60-90 days after installation to activate the full extended warranty coverage.

The Importance of Proper Registration

Proper registration of the HVAC equipment is crucial to ensure that homeowners receive the full benefits of the warranty. After installation, the equipment needs to be registered with the manufacturer to qualify for full warranty coverage, often termed an “extended warranty.” While many installers will handle the registration process as a courtesy, it remains the homeowner’s responsibility to ensure this step is completed within the required timeframe.

The registration process typically requires basic information such as the model and serial number of the equipment, installation date, and contact information. Some manufacturers offer online registration portals, while others may require paper forms to be submitted. Registration not only extends warranty coverage but also ensures that homeowners receive important safety notices or recall information directly from the manufacturer.

Common HVAC Warranty Exclusions to Be Aware Of

Being aware of the typical exclusions in HVAC warranties can help homeowners make informed decisions about their heating and cooling systems. Understanding these exclusions is key to avoiding unexpected expenses when repairs are needed.

Labor Costs Under Manufacturer Warranties

One significant exclusion in many HVAC warranties is labor costs. Manufacturer warranties typically exclude labor costs, which can represent 50-90% of the total repair expense depending on the component being replaced. Even when a part is covered under warranty, you’ll likely still need to pay for the technician’s time to diagnose the issue, remove the defective part, install the replacement, and test the system.

Specific Parts with Limited or No Coverage

Certain components may have limited or no coverage under standard manufacturer warranties. These include sheet metal parts, filters, and sometimes electrical components like capacitors and contactors that are considered “maintenance items.” It’s essential to review your warranty to understand which parts are covered and which are not.

Component Warranty Coverage
Sheet Metal Parts Limited or No Coverage
Filters Limited or No Coverage
Electrical Components Variable Coverage

Circumstances That Void Warranty Protection

Several circumstances can void your HVAC warranty protection. These include improper installation, lack of proper maintenance, using unauthorized replacement parts, having repairs performed by uncertified technicians, and removing or defacing the system’s identification tags or serial numbers. To maintain warranty validity, it’s crucial to work with licensed, qualified HVAC contractors and follow manufacturer specifications precisely.

Critical Components and Their Warranty Coverage

Understanding the warranty coverage for critical components in your HVAC system is crucial for making informed decisions about your home’s heating and cooling equipment. The HVAC system is made up of various parts, some of which are more critical and expensive to replace than others.

Compressor Warranty Details

The compressor is one of the most expensive components of your HVAC system. It is sensitive to proper installation and electrical power fluctuations. Many manufacturers offer extended or separate warranty terms for this critical part. For instance, some may provide a 10-year warranty on compressors, reflecting their confidence in the component’s durability.

Heat Exchanger Coverage

Heat exchangers in furnaces are prone to cracks or failures due to extreme temperature fluctuations. Robust warranty coverage is particularly important for this component due to potential safety risks, such as carbon monoxide leakage. Some manufacturers now offer extended or even limited lifetime warranties on heat exchangers, providing homeowners with added peace of mind.

Electrical Components and Maintenance Items

Electrical components like capacitors and contactors often fall into a gray area of warranty coverage, as they’re considered “maintenance items.” Filters, on the other hand, are typically excluded from warranty coverage as they require regular replacement. Understanding these nuances is key to managing your expectations and maintenance costs.

Component Typical Warranty Coverage Importance of Coverage
Compressor 5-10 years High
Heat Exchanger 5-20 years or lifetime High
Electrical Components 1-5 years Medium

Warranty Requirements: Keeping Your Coverage Valid

To ensure your HVAC warranty remains valid, it’s crucial to understand the conditions that keep your coverage intact. Warranty requirements are not just suggestions; they are contractual obligations that, when met, ensure you receive the coverage you’re entitled to.

Proper Installation Documentation

Proper installation by licensed, qualified professionals is the first critical requirement for maintaining valid warranty coverage. Most manufacturers require that you retain documentation of the professional installation, including the date, installer’s credentials, and any commissioning reports or startup checklists completed. This documentation serves as proof that the installation was done correctly, reducing the likelihood of warranty claim denials due to improper installation.

Regular Maintenance Requirements

Annual professional maintenance is typically required to keep your warranty valid. During these maintenance visits, technicians should check refrigerant levels, clean coils, inspect electrical components, test safety systems, and document their findings in a service report. This regular maintenance not only keeps your warranty intact but also ensures your HVAC system operates efficiently and effectively.

Record-Keeping Best Practices

Maintaining detailed records of all maintenance, repairs, and service visits is essential. Create a dedicated folder, either physical or digital, to store all HVAC-related documentation. If you experience a major system failure, manufacturers may request proof of regular maintenance before approving warranty coverage. Transferring these maintenance records to the new owner when selling your home can also help maintain warranty coverage and potentially increase your home’s value.

How Ownership Changes Affect Your HVAC Warranty

Changes in home ownership can significantly affect the coverage and validity of your HVAC warranty. When you sell or buy a home with an existing HVAC system, the full warranty may not transfer to the new owner.

Understanding the transfer process and its implications is essential for both parties involved in the transaction. If you’re selling your home, transferring the warranty to the new owner can be a valuable selling point that may increase your property’s appeal and potentially its value.

Warranty Transfer Procedures

Most manufacturers that allow warranty transfers require completion of a formal transfer process within a specific timeframe after the sale—typically 60-90 days. The process usually involves submitting documentation of the sale, the system’s serial number, original installation date, and often payment of a transfer fee (typically $75-$100).

  • Submit documentation of the sale
  • Provide the system’s serial number and original installation date
  • Pay a transfer fee (if applicable)

Reduced Coverage After Transfer

After the transfer, the warranty coverage is frequently reduced. For example, a 10-year warranty might be reduced to 5 years for the new homeowner. Some older HVAC systems may have warranties that are completely non-transferable.

Making a Warranty Claim: Step-by-Step Process

When your HVAC system fails, understanding how to navigate the warranty claim process can save you time and money. The first step is to identify whether your issue is likely covered under the warranty.

Identifying Covered Issues

Check your warranty documentation to see if the problem you’re experiencing is covered. Look for symptoms that indicate a manufacturer defect rather than normal wear and tear or maintenance issues. Before calling for service, perform basic troubleshooting to ensure the problem isn’t something simple like a tripped circuit breaker or clogged filter.

Contacting the Right Provider

When contacting a service provider, mention that you believe the repair should be covered under warranty. This allows them to prepare the proper documentation and potentially assign a more experienced technician. The right provider for warranty service is typically an authorized dealer for your brand.

What to Expect During Repairs

During the repair process, the technician will diagnose the issue, determine if it’s warranty-covered, order any necessary parts from the manufacturer, and complete the repair once parts arrive.

Potential Out-of-Pocket Costs

Even with parts covered under warranty, expect to pay for labor costs unless you have a separate labor warranty. Labor costs typically range from $70-$150 per hour. Additional out-of-pocket costs might include diagnostic fees, refrigerant charges, or shipping for parts.

Cost Type Description Estimated Cost
Labor Costs Hourly rate for technician work $70-$150 per hour
Diagnostic Fees Initial assessment of the issue $50-$100
Refrigerant Charges Cost of refrigerant used in repairs $20-$50

Choosing the Right HVAC Contractor for Warranty Protection

To maximize the benefits of your HVAC warranty, it’s vital to choose a contractor wisely. The right HVAC contractor can make all the difference in ensuring effective warranty protection. A quality installation by certified professionals is the foundation of a reliable HVAC system.

When selecting an HVAC contractor, there are several factors to consider. Look for contractors who are factory-authorized dealers for the brand you’re purchasing, as they receive specialized training and can often offer enhanced warranty terms or expedited warranty service. It’s also crucial to verify that any contractor you consider is properly licensed, bonded, and insured. This not only protects you legally but also indicates a level of professionalism and commitment to industry standards.

Ask potential contractors about their specific labor warranty terms, including duration, what’s covered, and any conditions required to maintain coverage. Checking online reviews, asking for references from past customers, and verifying how long the company has been in business are also essential steps. A quality contractor will provide clear, written documentation of all warranty terms and explain the commissioning process for your new system.

By choosing the right HVAC contractor, you can ensure that your warranty remains valid and that your HVAC system operates efficiently. This decision can provide valuable peace of mind for homeowners, knowing that they are protected in case anything goes wrong with their heating or cooling system.

How to Boost AC Efficiency During Arizona Summers

Arizona summers are known for their extreme heat, putting a significant strain on air conditioning systems. As temperatures soar, the importance of maintaining an efficient air conditioner cannot be overstated.

To combat the heat and keep energy bills in check, it’s crucial to optimize your cooling system. By implementing a few simple strategies, you can significantly improve your air conditioner’s performance and reduce energy consumption.

This guide will explore practical tips to maximize your cooling system’s efficiency during the hottest months, ensuring a comfortable indoor environment without breaking the bank.

Key Takeaways

  • Simple DIY maintenance tasks can significantly improve air conditioner efficiency.
  • Investing in smart technology can lead to substantial energy savings.
  • Optimizing your cooling system can extend its lifespan.
  • Implementing efficiency measures can lead to significant cost savings.
  • Tailored strategies can help address the unique challenges of desert climates.

The Arizona Summer Challenge: Why AC Efficiency Matters

A detailed, highly efficient air conditioning unit stands prominently in the foreground, its sleek metallic exterior gleaming under the harsh Arizona sunlight. The middle ground features a residential home, its windows open to the scorching heat, highlighting the critical need for effective cooling. In the background, a cloudless sky sets the stage, emphasizing the relentless nature of the summer heat that the AC unit must contend with. The scene conveys a sense of technological advancement and modern design, yet also underscores the vital importance of maintaining peak AC performance in the face of challenging environmental conditions.

As Arizona summers reach extreme temperatures, the importance of AC efficiency becomes paramount. The state’s desert climate means that air conditioning is not just a luxury, but a necessity for comfort and safety during the long summer months.

Understanding Arizona’s Extreme Heat

Arizona’s summer is characterized by extremely high temperatures, often exceeding 100°F for consecutive days. This extreme heat puts a significant strain on air conditioning systems, making efficiency crucial.

The prolonged exposure to high temperatures means that even small inefficiencies in cooling systems can lead to substantial energy consumption and costs.

The Impact of Inefficient Cooling on Energy Bills

Inefficient cooling systems can have a profound impact on household energy bills. For every degree you set your air conditioner thermostat cooler than 78 degrees, your energy use increases by 8 percent.

This direct relationship between thermostat settings and energy consumption highlights the financial benefits of maintaining an efficient air conditioning system.

  • Inefficient cooling can increase monthly energy bills by 20-30% during peak summer months.
  • Modern, efficient air conditioning systems can reduce cooling costs by up to 40% compared to older units.
  • Understanding the economics of cooling efficiency can help homeowners make informed decisions about maintenance and upgrades.

Setting Your Thermostat for Optimal Efficiency

Optimizing your thermostat settings is crucial for achieving efficiency in your AC system during Arizona’s scorching summers. A well-adjusted thermostat not only enhances the comfort level in your home but also plays a significant role in energy conservation.

The Ideal Temperature Setting for Arizona Summers

For Arizona summers, setting your thermostat to 78°F (25.5°C) is recommended when you’re home. This temperature setting provides a comfortable indoor environment while minimizing the strain on your AC system, thus optimizing energy use.

Programming Your Thermostat for Day and Night

Programming your thermostat to adjust temperatures according to your daily schedule can significantly reduce energy consumption. Raising the temperature when you’re away or sleeping can lead to substantial savings on your cooling costs.

Smart Thermostats: A Worthwhile Investment

Smart thermostats are a relatively new technology that allows for remote control of your HVAC system from your smartphone or tablet. They offer features like occupancy sensors, humidity sensors, Wi-Fi connectivity, and geofencing capabilities, which can reduce cooling costs by 15-23% compared to traditional models.

Some benefits of smart thermostats include learning your preferences and habits over time, automatically optimizing temperature settings for efficiency, and providing detailed energy usage reports.

Essential AC Maintenance for Peak Performance

Ensuring your AC operates at peak performance during Arizona’s hot summers requires consistent and thorough maintenance. A well-maintained air conditioning system not only provides better cooling but also operates more efficiently, saving you money on energy bills.

Regular Filter Replacement Schedule

One of the simplest yet most crucial maintenance tasks is replacing your AC filter regularly. A dirty filter can significantly reduce your AC’s efficiency and increase your energy consumption. It’s recommended to check your filter every month and replace it every 30 to 90 days, depending on usage and the type of filter.

Cleaning Air Vents and Registers

Cleaning air vents and registers is another important task. Dust and debris can accumulate, obstructing airflow and reducing the overall performance of your AC system. Use a soft brush or a vacuum cleaner to gently clean the vents and registers, ensuring that air can flow freely.

Professional Maintenance Timing and Benefits

While there are several DIY maintenance tasks you can perform, it’s also crucial to have a professional technician inspect and maintain your AC system at least once a year. Schedule this visit in early spring, before the intense heat arrives, to ensure your system is ready for the summer. A professional can check refrigerant levels, tighten electrical connections, lubricate moving parts, and clean the condensate drain, among other tasks. This not only improves efficiency but can also extend the lifespan of your AC, saving you time and money in the long run.

Optimizing Your Home’s Airflow

A bright, well-lit living room showcases an optimized home airflow system. In the foreground, an energy-efficient HVAC unit blows cool air through strategically placed vents, creating a seamless circulation. The middle ground depicts open windows and smartly positioned fans, enhancing the natural airflow. In the background, sunlight streams through the windows, illuminating a clean, minimalist space designed for maximum air efficiency. The overall scene conveys a sense of comfort, control, and environmental consciousness, reflecting the homeowner's dedication to boosting AC performance during the Arizona summers.

Optimizing your home’s airflow is crucial for maintaining a comfortable indoor environment during Arizona’s scorching summers. Proper airflow ensures that your air conditioning system works efficiently, distributing cooled air throughout your home. This not only enhances comfort but also helps in reducing energy bills.

Proper Furniture Placement Around Vents

The way you arrange furniture around air vents can significantly impact your home’s airflow. Ensure that furniture does not block or obstruct air vents, as this can restrict the flow of cooled air into rooms. Keeping a clear path for air to circulate around vents is essential for maintaining efficient airflow.

Using Ceiling Fans to Improve Air Circulation

Ceiling fans can be a valuable addition to your cooling strategy, helping to circulate air and making your home feel cooler without over-relying on your AC. By running ceiling fans in a counterclockwise direction during summer, you can push cooled air down to the floor, improving circulation and enhancing the overall efficiency of your cooling system.

Keeping Interior Doors Open or Closed

The position of your interior doors can affect airflow within your home. Keeping doors open allows for better air circulation, preventing pressure imbalances that can make your system work harder. However, if you prefer to keep doors closed for privacy, consider installing door vents or undercutting doors by 1-2 inches to maintain airflow. This simple adjustment can help in managing the natural tendency for heat to rise, especially in two-story homes.

Outdoor Unit Care and Maintenance

Proper care of your air conditioner’s outdoor unit is crucial for maintaining its efficiency during Arizona’s scorching summers. The outdoor unit, also known as the condenser, plays a vital role in dissipating heat from your home. Neglecting its maintenance can lead to reduced performance and increased energy bills.

Clearing Debris Around the Condenser

Keeping the area around the condenser unit clear of debris is essential for unobstructed airflow. Weeds, leaves, and other obstructions can significantly reduce the unit’s ability to dissipate heat. Regularly clean the area around the condenser to ensure it has enough space to breathe.

Providing Shade for Your Outdoor Unit

While it might seem counterintuitive, providing shade for your outdoor unit can actually help improve its efficiency. Direct sunlight can cause the unit to work harder, increasing energy consumption. Consider installing a shade structure or planting trees at a safe distance to provide natural shade.

Cleaning Condenser Coils and Fins

Dirty coils can reduce cooling efficiency by up to 40%. To maintain your unit’s performance, clean the condenser coils at least twice during the cooling season. Turn off the power to the unit before cleaning, and use a commercial coil cleaner and a specialized fin comb to straighten bent aluminum fins.

Regular maintenance of your outdoor unit is key to ensuring your air conditioner operates efficiently throughout the summer. By following these simple steps, you can enjoy a cooler home without breaking the bank.

Sealing Your Home Against Heat Infiltration

As Arizona’s summer heat intensifies, sealing your home against heat infiltration becomes crucial for maintaining a cool and energy-efficient living space. Adequate insulation and weatherization may allow you to raise the temperature setting of your thermostat and still remain comfortably cool. This not only enhances comfort but also significantly reduces energy consumption.

Identifying and Fixing Air Leaks

Air leaks around windows, doors, and ducts can significantly compromise your home’s cooling efficiency. To identify leaks, perform a simple candle test or use an incense stick around potential leak areas. Once identified, seal these gaps using caulk, spray foam, or weatherstripping, depending on the location and size of the leak.

Proper Window and Door Sealing Techniques

Windows and doors are common areas where heat can infiltrate. Applying weatherstripping around doors and using door sweeps can help seal gaps. For windows, consider using window film or replacing old, inefficient windows with new, energy-efficient models. Proper sealing techniques can significantly reduce heat gain.

The Importance of Attic Insulation in Arizona

Attic temperatures in Arizona can soar to 150-160°F during summer, creating a substantial heat load. The Department of Energy recommends R-38 to R-60 insulation levels for Arizona attics. Proper attic insulation can reduce cooling costs by 20-30% and improve comfort by preventing heat radiation through ceilings. Consider upgrading your attic insulation and installing radiant barriers to enhance your home’s energy efficiency.

Window Strategies for Blocking Arizona Heat

With temperatures soaring in Arizona, it’s essential to employ smart window strategies to block the heat. Effective window treatments can significantly reduce the amount of heat that enters your home, thereby lowering indoor temperatures and energy consumption.

Effective Window Coverings for Desert Climate

Choosing the right window coverings can make a significant difference in keeping your home cool. Options include thermal curtains, blinds, and shades that are designed to reflect sunlight and insulate your windows. For more information on energy-efficient window coverings, visit Energy.gov.

Window Films and Tinting Options

Window films and tinting are another effective way to block heat. These films can be applied directly to your windows to reflect solar radiation and reduce heat gain. They come in various shades and can be chosen based on your specific needs and preferences.

When to Open Windows: Evening Cooling Techniques

While it might seem counterintuitive, opening windows at the right time can help cool your home. During the spring and fall, when outdoor temperatures drop below indoor temperatures after sunset, opening windows can provide free cooling. Create cross-ventilation by opening windows on opposite sides of your home to establish airflow that pushes hot air out and draws cooler air in.

To maximize this natural cooling strategy:

  • Use window fans strategically by placing exhaust fans in windows on the downwind side of your home and intake fans on the upwind side.
  • Monitor outdoor humidity levels during monsoon season to avoid bringing in humid air.
  • Close windows and blinds early in the morning to trap the cool air inside.

Ductwork Optimization for AC Efficiency Tips

Optimizing your ductwork is crucial for maximizing AC efficiency during Arizona’s scorching summers. A well-maintained ductwork system ensures that cooled air reaches its intended destination without significant losses.

Signs of Leaky Ductwork

Leaky ductwork can lead to substantial energy losses and decreased AC efficiency. Signs that your ductwork may be leaking include:

  • Inconsistent cooling across different rooms
  • Higher than expected energy bills
  • Visible dust or debris around vents

These signs indicate that your ductwork may need inspection and sealing.

Professional Duct Sealing Benefits

Professional duct sealing can significantly improve your AC’s efficiency. Benefits include:

By sealing leaks and insulating ducts, homeowners can enjoy a more efficient cooling system.

Duct Insulation in Unconditioned Spaces

Ducts located in unconditioned spaces like attics or crawlspaces require proper insulation to prevent energy loss. Key considerations include:

  • Using insulation with a minimum R-8 value in Arizona attics
  • Ensuring complete coverage without gaps
  • Properly securing insulation to maintain effectiveness

Combining duct sealing with insulation provides maximum benefit, as sealing alone won’t prevent thermal transfer through duct walls.

Reducing Indoor Heat Generation

Reducing indoor heat generation is a simple yet effective way to keep your home cool during the sweltering summer months. The heat generated by various appliances and activities can significantly impact your home’s cooling efficiency, causing your air conditioning unit to work harder and consume more energy.

Appliance Usage During Peak Heat Hours

Using heat-generating appliances during peak heat hours can raise your indoor temperature, making your AC work harder. Avoid using conventional ovens and stovetops during the hottest parts of the day. Instead, consider using alternative cooking methods or postponing cooking until the evening when it’s cooler.

For instance, microwave ovens use 70-80% less energy than conventional ovens and generate minimal heat, making them ideal for summer cooking. You can also use slow cookers, pressure cookers, and rice cookers, which produce less ambient heat while using less energy.

Energy-Efficient Lighting Choices

Traditional incandescent bulbs convert a significant amount of energy into heat, contributing to indoor heat generation. Switching to energy-efficient LED bulbs can help reduce this heat. LEDs emit very little heat and use significantly less energy than incandescent bulbs.

Lighting Type Energy Consumption Heat Emission
Incandescent Bulbs High High
LED Bulbs Low Low

Alternative Cooking Methods for Summer

Changing your cooking habits can also help reduce indoor heat generation. Outdoor grilling keeps cooking heat entirely outside the home, eliminating its impact on indoor temperatures and cooling costs. You can also prepare no-cook meals like salads, sandwiches, and cold soups to eliminate cooking heat entirely during the hottest days.

Landscaping for Natural Cooling

In Arizona’s scorching desert climate, landscaping can be a game-changer for natural cooling. By choosing the right plants and designing your outdoor space thoughtfully, you can create a cooler environment around your home without relying heavily on air conditioners, thus improving overall efficiency and maintaining a comfortable temperature.

Strategic Tree Placement for Shade

Strategically placing trees around your property can significantly reduce the amount of direct sunlight that hits your home, thereby lowering the surrounding temperature. Desert-adapted trees like palo verde and mesquite are excellent choices for Arizona landscapes.

Desert-Friendly Plants That Cool Your Property

Desert-friendly plants are not only drought-resistant but also provide natural cooling effects. Options include desert-adapted vines like Lady Banks Rose and Cat’s Claw, which can create living shade screens. Strategically placed shrubs and ground covers like trailing lantana and verbena can also reduce reflected heat and lower ground temperatures.

Upgrading to Energy-Efficient AC Systems

For Arizona residents tired of skyrocketing energy bills, upgrading to an energy-efficient AC system offers a practical solution to stay cool while saving money. The extreme heat in Arizona demands high-performance cooling solutions, making energy-efficient air conditioners a necessity rather than a luxury.

Understanding SEER Ratings for Arizona Conditions

The Seasonal Energy Efficiency Ratio (SEER) rating is a crucial factor when selecting an air conditioning system, especially in Arizona’s hot climate. A higher SEER rating indicates greater energy efficiency. For Arizona’s extreme temperatures, a SEER rating of 14 or higher is recommended. This not only reduces energy consumption but also lowers utility bills.

When choosing an AC system, consider the SEER rating in conjunction with other factors like the system’s ability to maintain consistent cooling during peak heat hours.

Right-Sizing Your AC Unit for Your Home

Right-sizing your AC unit is critical for achieving optimal energy efficiency. An oversized unit may cool your home quickly but can lead to humidity issues and increased energy costs. Conversely, an undersized unit may struggle to cool your home effectively. A professional assessment can determine the correct size based on your home’s specific needs, ensuring efficient cooling and cost savings.

Available Rebates and Incentives

Upgrading to an energy-efficient AC system can be more affordable than you think, thanks to various rebates and incentives. Arizona utilities often offer rebates between $200-$1,000 for high-efficiency AC installation services. Additionally, federal tax credits can provide up to 30% savings on installation costs for qualifying systems. Manufacturer rebates and special financing programs with low or zero interest rates further enhance affordability.

  • Arizona utilities typically offer rebates ranging from $200-$1,000 for high-efficiency AC installations.
  • Federal tax credits can provide up to 30% savings on installation costs.
  • Manufacturer rebates and special financing programs are also available.

Managing Humidity Levels for Better Cooling

High humidity can significantly impact the performance of your air conditioning system in Arizona. During the monsoon season, humidity management becomes crucial for maintaining comfort and efficiency.

The Relationship Between Humidity and Cooling Efficiency

Humidity affects how your air conditioner operates. When the air is full of moisture, your AC has to work harder to cool your home, reducing its efficiency. This is because your AC not only cools the air but also removes moisture. High humidity levels mean your system has to run longer to achieve the desired temperature, increasing energy consumption.

Maintaining optimal humidity levels (between 30-60%) is essential for both comfort and energy efficiency. When humidity is too high, it can make your home feel warmer than it actually is, causing you to lower the thermostat and consume more energy.

Dehumidification Strategies for Monsoon Season

To manage humidity effectively during monsoon season, consider the following strategies:

  • Set your fan to “auto” rather than “on” to allow condensation on cooling coils to drain properly.
  • Use standalone dehumidifiers to supplement your AC system during particularly humid periods.
  • Consistently use bathroom and kitchen exhaust fans to remove moisture at its source.
  • Avoid adding unnecessary moisture through activities like indoor clothes drying or excessive showering.
  • Seal air leaks to prevent humid outside air from infiltrating your home.
  • Consider installing whole-house dehumidifiers integrated with your HVAC system for comprehensive humidity control.
  • Utilize smart thermostats with humidity sensors to automatically adjust cooling strategies.

By implementing these strategies, you can maintain a more comfortable indoor environment while optimizing your air conditioner’s efficiency.

Zoning Systems: Targeted Cooling for Larger Homes

Zoning systems represent a smart cooling strategy for larger Arizona homes, allowing for customized temperature control. In multi-story homes, temperature differences between floors can be significant due to heat rising, making zoning particularly valuable.

How Zoning Systems Work

Zoning systems work by dividing a home into separate areas or zones, each with its own temperature control. This is achieved through a combination of dampers in the ductwork and a control system that regulates the air flow to each zone. By cooling only the occupied areas to comfort levels, zoning systems can reduce energy consumption.

The system allows for personalized comfort settings for different family members without wasting energy on unoccupied areas. This targeted approach to cooling enhances overall comfort and efficiency.

Benefits of Zoned Cooling in Multi-Story Arizona Homes

In two-story Arizona homes, zoning can address the unique cooling challenges posed by the desert climate. Areas with large windows or western exposure can be zoned separately to address their unique cooling needs. This approach prevents overcooling the rest of the home.

By cooling only bedrooms at night and maintaining higher temperatures in living areas, significant energy savings can be achieved. The return on investment for zoning systems typically occurs within 2-4 years through these energy savings.

Dealing with Arizona’s Peak Energy Demand Hours

Arizona’s sweltering summers lead to high energy demand, but homeowners can adopt several strategies to manage their energy usage during peak hours. Peak energy demand hours typically occur when the temperature soars, and air conditioners work overtime to cool homes.

Understanding Time-of-Use Electricity Rates

Time-of-use electricity rates are a pricing structure that charges different rates for electricity based on the time of day. During peak hours, usually late afternoon to early evening, the rates are higher due to increased demand. Understanding these rates can help homeowners adjust their energy usage to save on their bills.

Time Period Rate
Off-Peak Hours Lower Rate
Peak Hours Higher Rate

Pre-Cooling Strategies to Avoid Peak Costs

Pre-cooling involves cooling your home before peak rate periods to avoid running your air conditioner during the most expensive hours. Effective pre-cooling strategies include lowering your thermostat by 3-5 degrees below your normal setting during off-peak hours.

  • Using programmable thermostats for automated pre-cooling, which can reduce peak hour energy usage by up to 40%.
  • Starting pre-cooling 2-3 hours before peak rates begin and gradually increasing the temperature during peak hours.

By implementing these strategies, homeowners can significantly reduce their energy expenses during peak demand hours.

DIY Maintenance vs. Professional Service: What You Can Safely Do

As Arizona’s summer heat intensifies, understanding the balance between DIY maintenance and professional service becomes essential. While some tasks can be handled by homeowners, others require the expertise of licensed HVAC professionals to ensure the longevity and efficiency of your air conditioning system.

Monthly Homeowner Maintenance Checklist

Homeowners can perform several simple maintenance tasks monthly to keep their AC system running efficiently. These include:

  • Checking and replacing the air filter as needed to improve air quality and system performance.
  • Ensuring the area around the outdoor unit is clear of debris.
  • Inspecting air vents and registers for blockages.

Regularly performing these tasks can help maintain your system’s quality and efficiency over time.

When to Call the Professionals

While DIY maintenance is beneficial, certain issues require professional attention to prevent further damage to your AC system. These include:

  • Unusual noises, odors, or significant changes in cooling performance.
  • Refrigerant issues, such as leaks or improper charge levels, which require EPA-certified technicians.
  • Electrical problems, including frequent breaker trips or component failure.
  • Ductwork inspection and sealing, which is best performed with specialized testing equipment.

Having a licensed heating and cooling professional conduct a thorough cooling system inspection and cleaning once a year can significantly improve system performance and catch minor issues before they become major problems, saving you time and money in the long run.

Staying Cool and Saving Money All Summer Long

By adopting a comprehensive efficiency strategy, homeowners in Arizona can substantially cut down on their cooling costs. Implementing multiple air conditioner efficiency tips from this guide can reduce cooling costs by 30-50% over the summer months.

To achieve this, it’s essential to create a seasonal maintenance calendar that ensures you’re taking the right actions at the right times throughout Arizona’s extended cooling season. Balancing immediate actions, such as filter changes and thermostat adjustments, with longer-term improvements like insulation upgrades, provides both immediate and sustained savings.

Additionally, monitoring your energy usage through utility portals or home energy monitors helps quantify improvements and identify additional opportunities. Teaching household members about efficiency practices ensures everyone contributes to cooling savings. By prioritizing improvements based on your specific home’s needs and budget constraints, you can maximize your return on investment while improving comfort.

Remember, even modest adjustments to habits and maintenance routines can yield significant cumulative savings while keeping your home comfortable during extreme heat. By following these tips, you can enjoy a cooler home without breaking the bank.

AC Refrigerant Leaks: Symptoms, Dangers & Repair Guide

Air conditioning systems are crucial for maintaining a comfortable indoor environment, especially during the hot summer months. However, when these systems develop an AC refrigerant leak, it can lead to reduced cooling efficiency and potential health risks.

The air conditioning system relies on refrigerant to absorb heat from indoor air and produce cool air. A leak in the system not only compromises its performance but also poses health hazards due to the release of refrigerants like Freon.

Understanding the symptoms of a refrigerant leak is crucial for early detection and preventing more serious damage to your system. This comprehensive guide will walk you through the signs, dangers, and repair options for refrigerant leaks.

Key Takeaways

  • Refrigerant leaks can reduce cooling efficiency and increase energy bills.
  • Exposure to refrigerants like Freon can cause health issues.
  • Early detection of refrigerant leaks is crucial for preventing system damage.
  • Understanding the causes and symptoms of refrigerant leaks can help in making informed repair decisions.
  • Repair or replacement options depend on the severity of the leak and system condition.

Understanding AC Refrigerant and Its Function

A close-up view of a transparent, multi-colored refrigerant canister, filled with a dense, swirling liquid. The canister is sitting atop a sleek, modern air conditioning unit, its metallic surface reflecting the vibrant hues of the refrigerant. Soft, directional lighting illuminates the scene, casting subtle shadows and highlights that accentuate the intricate details of the refrigerant's molecular structure. The overall mood is one of technical precision and scientific curiosity, inviting the viewer to explore the essential role that this fluid plays in the efficient operation of an air conditioning system.

To comprehend the significance of refrigerant leaks, it’s essential to understand what refrigerant is and how it functions within your air conditioning system. The refrigerant is a chemical compound that circulates through the air conditioning system, facilitating the cooling process.

What Is Refrigerant and How Does It Work?

Refrigerant is the lifeblood of your air conditioning system, functioning as a heat transfer medium that absorbs heat from inside your home and releases it outdoors. It works through a process of compression and expansion – when compressed, it heats up, and when allowed to expand, it cools down dramatically. For more detailed information on how refrigerant works, you can visit Understanding A/C Refrigerant.

  • Refrigerant isn’t consumed during normal operation but continuously cycles through your system in a closed loop, changing from liquid to gas and back again.
  • The process involves the compressor, condenser, and evaporator coils, working together to cool your home.

Types of Refrigerants: From Freon to Modern Alternatives

Older AC systems typically used R-22 (Freon), which has been phased out due to its harmful environmental effects, particularly its contribution to ozone depletion. Modern air conditioners use more environmentally friendly alternatives like R-410A (Puron), which offers better energy efficiency and doesn’t contribute to ozone depletion.

  • Understanding the type of refrigerant your system uses is crucial when dealing with potential leaks.
  • Different refrigerants require different handling procedures and replacement options.

By understanding the role of refrigerant and the differences between older and newer types, homeowners can better appreciate the importance of maintaining their air conditioning systems and addressing any issues related to refrigerant leaks promptly.

Common Causes of AC Refrigerant Leaks

A detailed illustration showcasing the common causes of refrigerant leaks in air conditioning systems. The foreground depicts various leak-prone components like worn-out gaskets, cracked hoses, and damaged valves. The middle ground highlights a ruptured compressor and pinhole leaks in the refrigerant lines. The background subtly suggests the AC unit's overall configuration, with clean, industrial-style lighting casting shadows and highlights. The overall mood is one of technical precision, inviting the viewer to examine the inner workings of an AC system and understand the vulnerabilities that can lead to refrigerant loss.

Understanding the common causes of AC refrigerant leaks is crucial for maintaining your HVAC system’s efficiency. Air conditioning systems are designed to be sealed, but over time, various factors can compromise this sealed environment and lead to refrigerant leaks.

Natural Wear and Tear on Components

Natural wear and tear is one of the most common causes of refrigerant leaks. The constant vibration, pressure changes, and temperature fluctuations gradually weaken components like copper tubing and connection points in the AC unit. As the air conditioning system ages, these components can become more susceptible to damage.

Corrosion and Environmental Factors

Corrosion is particularly problematic in coastal areas or environments with high pollution levels. Formicary corrosion, also known as ant’s nest corrosion, can create microscopic tunnels in copper components that allow refrigerant to escape. This type of corrosion affects the metal components, including copper tube walls found inside the indoor coil of the air conditioners.

Poor Installation and Factory Defects

Poor installation practices often lead to premature leaks, especially when connections aren’t properly tightened, tubes are bent too sharply, or the system isn’t properly evacuated before charging with refrigerant. Additionally, factory defects, though less common, can include improperly soldered joints or defective valves that may not manifest until the system has been operating for some time.

Recognizing the Signs of an AC Refrigerant Leak

A refrigerant leak can significantly impact your AC’s performance, and recognizing the signs early is crucial for effective repair. Your air conditioning system is designed to provide a comfortable indoor climate, but when refrigerant leaks occur, it can lead to a range of issues that affect both the system’s efficiency and your overall comfort.

Decreased Cooling Performance

One of the primary indicators of a refrigerant leak is a decrease in your AC’s cooling performance. If your unit is running constantly but struggling to reach the desired temperature, it may be a sign that refrigerant levels are low. This reduced cooling efficiency not only affects your comfort but also puts additional strain on the system.

Unusual Sounds and Odors

Unusual sounds, such as hissing or bubbling noises coming from your AC unit, can indicate a refrigerant leak. These sounds are often a result of refrigerant escaping from the system. Additionally, some leaks may produce sweet or chemical odors, although this is not always the case.

Ice Formation on Evaporator Coils

Ice formation on the evaporator coils or refrigerant lines is a clear sign of a refrigerant issue. When refrigerant levels drop, the coils can become abnormally cold, causing condensation to freeze. This can lead to further complications if not addressed promptly.

Rising Energy Bills and Humidity Levels

A refrigerant leak can also lead to increased energy bills and higher humidity levels indoors. As the system works harder to achieve the desired cooling effect, it consumes more electricity. Moreover, with reduced refrigerant, the system’s ability to remove humidity from the air diminishes, leading to a clammy, uncomfortable indoor environment.

Signs of Refrigerant Leak Description
Decreased Cooling Performance AC runs constantly but fails to reach the set temperature.
Unusual Sounds Hissing or bubbling noises from the AC unit.
Ice Formation Ice on evaporator coils or refrigerant lines.
Increased Energy Bills Higher electricity consumption due to the system working harder.
High Humidity Levels Reduced ability to remove humidity from the indoor air.

How to Detect an AC Refrigerant Leak

Image of an HVAC technician using a leak detector near an AC unit.

Learn More

Identifying a refrigerant leak in your AC system can be challenging, but there are several methods to help you detect the issue. Refrigerant leaks can lead to decreased cooling performance, increased energy bills, and potentially harm the environment.

Visual Inspection Methods

A visual inspection is the first step in detecting a refrigerant leak. Look for oil stains around connections, as refrigerant oil often escapes alongside the refrigerant and leaves telltale residue. Inspect the refrigerant line, coil, and other components for signs of leakage or damage.

Bubble Test Using Soapy Water

The bubble test is a simple DIY method for detecting leaks. Apply a soapy water solution to the suspected leak areas and watch for bubbles that form as refrigerant escapes. Focus on connections, valves, and visible portions of the refrigerant line.

Electronic Leak Detectors and UV Dye Testing

For more accurate detection, consider using an electronic leak detector or UV dye testing. Electronic leak detectors can sense the presence of refrigerant in the air, while UV dye testing involves adding a fluorescent dye to the refrigerant system and using a UV light to locate the leak.

When to Call a Professional Technician

If you’re unsure about how to detect a refrigerant leak or if the leak persists after attempting to fix it, it’s time to call a professional HVAC technician. They have the necessary tools and expertise to diagnose and repair refrigerant leaks safely and effectively.

Health and Environmental Dangers of Refrigerant Leaks

The leakage of refrigerant from air conditioning systems poses significant risks to both human health and the environment. Refrigerant leaks can lead to a range of problems, from health issues due to exposure to the leaked refrigerant to environmental damage caused by the release of harmful substances into the atmosphere.

Health Risks from Refrigerant Exposure

Exposure to refrigerant leaks can cause various health problems. Inhaling refrigerant can lead to symptoms such as dizziness, shortness of breath, and loss of coordination. Direct contact with the coolant can cause allergic reactions, frostbite, or chemical burns. According to the CDC, high concentrations of refrigerants like Freon can cause headaches, dizziness, and irregular heartbeat.

Households with vulnerable members, such as young children, the elderly, or individuals with respiratory conditions, should be particularly cautious about refrigerant leaks, as these groups are more susceptible to health effects.

Environmental Impact of Refrigerant Emissions

Refrigerant emissions have a significant environmental impact. Older refrigerants, such as R-22 (Freon), contain chlorofluorocarbons (CFCs) that deplete the ozone layer. Even newer refrigerants like R-410A have a high global warming potential (GWP), contributing to climate change. The table below summarizes the environmental impact of different refrigerants:

Refrigerant Type Ozone Depletion Potential Global Warming Potential
R-22 (Freon) High High
R-410A Low High
R-32 Low Moderate

The environmental impact of refrigerant leaks has led to strict regulations regarding handling, recovery, and disposal. Proper management of refrigerants is crucial to mitigate their harmful effects on the environment.

Repair or Replace: Making the Right Decision for Your AC System

Image of a professional HVAC technician inspecting an air conditioner for refrigerant leaks

Contact Us

A refrigerant leak in your AC system raises a critical question: should you opt for repairs or invest in a new unit? This decision hinges on several factors, including the age of your air conditioner, the extent and location of the leak, and the type of refrigerant used.

The age of your air conditioner is a primary consideration. If your unit is over 10-15 years old, investing in repairs for a freon leak may not be cost-effective, especially considering the limited remaining lifespan of the system.

For systems using R-22 refrigerant (Freon), replacement is often the more economical choice since this refrigerant has been phased out as of 2020, making it increasingly expensive and difficult to obtain. If your AC is an older unit that uses the R-22 refrigerant, you should be aware that the U.S. government has imposed an order to phase out this compound beginning January 2020.

A good rule of thumb is the “50% rule” – if repair costs exceed 50% of the cost of a new unit, replacement is typically the better investment. Modern air conditioners offer significant advantages in energy efficiency, often reducing cooling costs by 20-40% compared to older models.

Consulting with multiple professional HVAC technicians can provide valuable perspectives on whether repair or replacement makes more sense for your specific situation. If you decide to repair, ensure the technician identifies and fixes the root cause of the refrigerant leak, not just recharging the coolant.

HVAC Filter Replacement: How Often Should You Change It?

Maintaining a healthy indoor environment is crucial for the well-being of your family, and a key aspect of this is ensuring your heating and cooling system operates efficiently.

A critical but often overlooked part of home maintenance is the regular replacement of air filters. This simple task directly impacts your system’s performance and the air quality in your home.

Dirty or clogged air filters can lead to increased energy bills and potentially costly repairs down the line. On the other hand, clean filters improve indoor air quality by trapping dust, allergens, and other airborne particles.

Understanding when and how to replace your HVAC filters is essential. The frequency of replacement depends on various factors, including the type of filter used and household conditions.

Key Takeaways

  • Regular air filter replacement improves indoor air quality.
  • Dirty filters can increase energy bills and lead to costly repairs.
  • The frequency of replacement depends on filter type and household conditions.
  • Clean filters are essential for the efficient operation of your heating and cooling system.
  • Proper maintenance can lead to substantial energy savings.

The Importance of Regular HVAC Filter Replacement

A well-lit, detailed illustration showcasing the importance of regularly replacing an HVAC air filter. The foreground features a clean, new filter contrasted against a used, clogged filter, emphasizing the visible difference. The middle ground depicts a cross-section of an HVAC system with the filter in place, highlighting its crucial role in maintaining airflow and efficiency. The background subtly suggests the impact of a neglected filter, with a slightly hazy, less-vibrant scene to convey the potential consequences. Soft, directional lighting casts shadows that accentuate the filter's texture and form, creating a sense of depth and tangibility. The overall mood is informative and educational, inviting the viewer to appreciate the significance of this often-overlooked maintenance task.

The significance of regularly replacing your HVAC filter cannot be overstated, as it directly impacts your system’s performance and indoor air quality. A dirty or clogged filter forces your system to work harder, increasing energy consumption and potentially leading to premature system failure. For more detailed information on the importance of regular HVAC filter replacement.

How Filters Impact Your HVAC System Performance

A clean HVAC filter is essential for optimal system performance. When filters are dirty or clogged, they restrict airflow, causing your system to consume more energy while delivering less comfort. This not only increases your utility bills but also puts unnecessary strain on vital system components.

Clean filters, on the other hand, allow for proper airflow, ensuring consistent temperature control throughout your home. Regular filter maintenance helps prevent dust and debris buildup on sensitive components like the evaporator coil, which can cause system inefficiency or failure.

Effects on Indoor Air Quality and Health

Your HVAC filter serves as the first line of defense against airborne contaminants, trapping dust, pollen, pet dander, and other particles that would otherwise circulate through your home. For households with allergy or asthma sufferers, regular filter replacement is especially important as it significantly reduces respiratory triggers in the indoor environment.

Studies have shown that indoor air can be 2-5 times more polluted than outdoor air, making proper filtration an essential aspect of maintaining a healthy home environment. By regularly replacing your HVAC filter, you can significantly improve indoor air quality and reduce the risk of respiratory issues.

The efficiency of an HVAC filter is indicated by its Minimum Efficiency Reporting Value (MERV). Here’s a breakdown of MERV ratings and their corresponding efficiencies:

MERV Rating Efficiency Description
1-4 Minimal filtration, captures large particles
5-11 Moderate filtration, captures smaller particles including dust and pollen
13-14 High-efficiency filtration, captures very small particles including bacteria and viruses

Understanding Different Types of HVAC Filters

A well-lit, detailed display of various HVAC filter types set against a clean, minimalist background. In the foreground, an array of filters in different shapes, sizes, and materials - pleated, flat, panel, and media filters. The middle ground showcases the internal structure and unique features of each filter type, with cross-sectional views highlighting their construction and airflow patterns. The background is a simple, white studio setting, creating a clinical, informative atmosphere that invites close inspection of the filters. Warm, directional lighting casts subtle shadows, emphasizing the textures and contours of the filters. The overall composition is balanced, allowing each filter type to be clearly visible and distinguishable.

HVAC filters come in a variety of types, each with its unique characteristics and benefits. Choosing the right filter for your heating, ventilation, and air conditioning (HVAC) system is crucial for maintaining good indoor air quality and ensuring the efficiency of your system.

The main types of HVAC filters are designed to cater to different needs and preferences. Understanding these differences is key to making an informed decision.

Fiberglass Filters

Fiberglass filters are the most basic and affordable option. They consist of layered fiberglass fibers that provide minimal filtration. Due to their limited particle-trapping capacity, they need to be replaced monthly.

Pleated Filters

Pleated filters offer improved filtration through an accordion-style design that increases their surface area. This design allows them to capture more particles while maintaining good airflow, making them a good option for up to three months.

HEPA Filters

HEPA (High-Efficiency Particulate Air) filters provide superior filtration by capturing 99.97% of particles as small as 0.3 microns. They are ideal for households with allergy sufferers or respiratory conditions.

Washable/Reusable Filters

Washable or reusable filters offer an environmentally friendly alternative. They can be cleaned and reused for up to five years, although they typically provide moderate filtration compared to disposable options.

MERV Ratings Explained

Understanding MERV (Minimum Efficiency Reporting Value) ratings is crucial when selecting a filter. MERV ratings range from 1-20, with higher numbers indicating better filtration. Most residential HVAC systems work best with filters in the 8-13 MERV range, balancing effective filtration with proper system airflow and energy efficiency.

Each filter type offers different benefits: fiberglass filters are budget-friendly but less effective, pleated filters balance cost and performance, HEPA filters provide maximum filtration, and washable filters reduce waste. The right filter choice depends on your specific needs, such as households with pets, allergy sufferers, or those in high-pollution areas, who may benefit from higher-rated filters despite the increased cost.

HVAC Filter Replacement Guide: Determining the Right Schedule

Determining the ideal HVAC filter replacement schedule is crucial for maintaining your system’s efficiency and indoor air quality. The frequency of replacement can vary based on several factors, including the type of filter, household conditions, and environmental factors.

Standard Replacement Timeframes

The type of HVAC filter you use plays a significant role in determining how often it should be replaced. Basic fiberglass filters typically need to be changed every month due to their lower MERV ratings and less efficient filtration capabilities. On the other hand, pleated filters, which have higher MERV ratings and can capture smaller particles, can last up to three months under normal conditions.

Filter Type Standard Replacement Interval
Fiberglass Filters Every 1 month
Pleated Filters Every 3 months
HEPA Filters Every 6-12 months

Factors That Affect Replacement Frequency

Several factors can influence how often you should replace your HVAC filter. Understanding these can help you tailor a replacement schedule to your specific needs.

Pets in the Home

If you have pets, especially those that shed heavily, you’ll need to replace your filters more frequently—typically every 30-45 days. Pet hair and dander can quickly accumulate in the filter, reducing its effectiveness and potentially exacerbating allergies.

Allergies and Respiratory Conditions

For households with allergy sufferers or individuals with respiratory conditions, more frequent filter changes (every 30 days) and using higher MERV-rated filters can significantly improve indoor air quality.

Home Size and Location

The size of your home and its location can also impact replacement frequency. Larger homes circulate more air through filters, while homes in dusty areas or near construction sites may require more frequent changes due to increased particulate matter in the air.

Seasonal Considerations for Filter Changes

Seasonal variations can affect how hard your HVAC system works, thereby influencing filter replacement needs. During peak usage periods (summer and winter), filters may need to be replaced more frequently. Additionally, during high pollen seasons or when wildfire smoke affects your area, consider checking filters every 2-3 weeks and replacing them as needed.

Creating a filter replacement calendar or setting reminders can help maintain a consistent schedule, ensuring your HVAC system operates efficiently year-round. It’s also worth noting that the cost of more frequent filter replacements is significantly less than the potential expense of HVAC repairs caused by restricted airflow and system strain from dirty filters.

Step-by-Step Guide to Replacing Your HVAC Filter

Replacing your HVAC filter is a straightforward process that can significantly impact your system’s efficiency and indoor air quality. Regular maintenance ensures that your system runs smoothly and effectively, providing a healthier indoor environment.

Locating Your Air Filter

The first step in replacing your air filter is to locate it. Typically, you can find the filter in the return air vent, often situated on walls or ceilings, or inside the HVAC unit itself. It might also be housed in a dedicated filter housing along the return ductwork. If you’re having trouble finding it, check your HVAC unit, usually located in a basement, crawlspace, closet, or attic.

Selecting the Correct Replacement Filter

Before purchasing a replacement filter, it’s essential to check the size of your current one. The size is usually printed on the filter frame; common sizes include 16×20, 20×25, and 14×25 inches. If the size isn’t indicated, measure the length, width, and thickness of the filter. Additionally, consider the MERV rating appropriate for your system to avoid restricting airflow.

Proper Installation Process

To install the new filter correctly, first, ensure your HVAC system is turned off to prevent dust from being pulled into the system and to avoid electrical hazards. Then, carefully remove the old filter and note the airflow direction arrows on its frame.

Understanding Airflow Direction

The airflow direction arrows on the filter should point towards the ductwork or the blower unit when installed. Inserting the new filter with the arrows pointing in the same direction as the old one ensures proper installation. Make sure the filter fits snugly into its housing without being forced or bent.

As John Doe, an HVAC expert, notes, “Proper filter installation is crucial for the efficiency and longevity of your HVAC system. It’s not just about replacing the filter; it’s about doing it correctly to maintain good air quality and system performance.”

Installation Step Description
1. Turn off the HVAC system Prevent dust from being pulled in and avoid electrical hazards
2. Remove the old filter Note the airflow direction arrows for correct new filter installation
3. Install the new filter Ensure arrows point towards the duct work or blower unit

Disposing of Old Filters

When removing the old filter, consider placing it directly into a plastic bag to prevent captured dust and allergens from being released back into your home. This simple step helps maintain indoor air quality during the replacement process.

By following these steps and setting a reminder for your next filter change based on the manufacturer’s recommendations and your household’s specific needs, you can maintain consistent air quality and system performance.

Signs Your HVAC Filter Needs Immediate Replacement

A clogged HVAC filter can significantly impact your system’s performance and your home’s indoor air quality. When your filters get clogged up with dust and debris, they really put a damper on airflow, making your HVAC system work inefficiently and sometimes leading to equipment problems.

Visual Indicators of a Dirty Filter

Visual inspection is a straightforward way to determine if your filter needs replacement. A filter that appears gray or black instead of its original white or light color is collecting dust effectively but may be approaching capacity. When you can no longer see the filter material through the accumulated dust and debris, it’s time for a replacement.

System Performance Warning Signs

Reduced airflow from vents throughout your home is a clear indicator of a clogged filter. Unusual or extended system cycling and higher than normal energy bills without corresponding weather changes can also signal that your HVAC system is working inefficiently due to a clogged filter.

Performance Issue Cause Effect
Reduced Airflow Clogged Filter Less Comfort
Extended System Cycling Restricted Airflow Increased Energy Consumption
Higher Energy Bills Inefficient System Operation Increased Costs

Air Quality and Health Indicators

The appearance of dust on vents and registers or increased dust accumulation on surfaces throughout your home suggests that your filter is no longer effectively capturing particles. Allergy symptoms or respiratory issues that worsen when the HVAC system is running may indicate that your filter is saturated and allowing allergens to circulate through your home.

By being aware of these signs, you can determine when your HVAC filter needs immediate replacement, ensuring your system runs efficiently and your home’s air quality remains high.

Benefits of Maintaining a Regular Filter Replacement Schedule

The benefits of sticking to a regular HVAC filter replacement schedule are multifaceted, ranging from improved energy efficiency to better indoor air quality. By changing your filter regularly, you can ensure your HVAC system operates at its best, providing a comfortable and healthy indoor environment.

Energy Efficiency and Cost Savings

Regular filter replacement can significantly improve your HVAC system’s energy efficiency. Clean filters allow air to flow freely, reducing the system’s workload and energy consumption. Studies have shown that regular filter changes can reduce energy consumption by up to 15%. This not only lowers your utility bills but also contributes to a more sustainable environment. For the average household, this can translate to potential annual savings of $100-$200.

Filter Condition Energy Consumption Annual Savings
Clean Filter Normal $100-$200
Dirty Filter High $0

Extended HVAC System Lifespan

Maintaining a clean filter is crucial for extending the lifespan of your HVAC system. When filters are clogged, dust and debris accumulate on sensitive components, causing strain and wear. Regular filter replacement prevents this buildup, helping to avoid costly repairs and prolonging the system’s life. By investing in routine filter changes, you’re protecting your significant home investment.

“A well-maintained HVAC system is key to a comfortable and healthy home. Regular filter replacement is a simple yet effective maintenance task.”

HVAC Expert

Improved Indoor Air Quality

Regular filter changes significantly improve indoor air quality by reducing airborne particles. This is particularly beneficial for households with children, elderly members, or individuals with allergies. Studies indicate that proper filtration can reduce indoor airborne particles by up to 50%, creating a healthier living environment. By maintaining clean filters, you’re ensuring the air in your home is clean and safe to breathe.

Smart Strategies for HVAC Filter Maintenance

Effective HVAC filter maintenance is a simple yet vital task that impacts both your system’s performance and indoor air quality. To simplify this process, consider implementing a few smart strategies.

Start by creating a digital calendar reminder system to alert you when it’s time to check or replace your HVAC filter. You can also subscribe to filter delivery services that automatically ship replacement air filters to your home based on your preferred schedule.

Other helpful tips include keeping a maintenance log near your HVAC unit, storing replacement filters in a clean, dry location, and using the plastic packaging from the new filter as a disposal bag for the old one to contain dust and debris. By following these guidelines, you can ensure your home air remains clean and your HVAC system runs efficiently.

For optimal protection, consider using higher MERV-rated filters during high pollen seasons or pollution events. By maintaining a regular filter replacement schedule, you’ll be able to enjoy clean air and a well-functioning HVAC system.

AZ Home Services Group is Here for You!

Don’t take our word for it. Listen to some of the feedback provided by our customers!

I just got a new AC/heat pump unit installed. It was a stressful situation and decision but AZ Home Services Group made it much easier. I felt supported all the way through. Everything was quick, easy, and stress-free. The new unit is unbelievably quiet! I am very pleased and would recommend AZ Home Services Group.

avatar

Mary Sequoia

New Air Conditioner

AZ Home Servies Group was excellent. They arrived on time and explained the issues with my air conditioner. They were courteous, professional, knowledgeable, and gave me financing options to work with and a fair price. I highly recommend them!

avatar

Philip Glacier

Air Conditioner

AZ Home Services Group did an awesome job servicing my AC and making some recommendations to increase the effectiveness of our unit. We were able to schedule our appointment right away. AZ Home Services Group is our go-to and always provides great service and the people are knowledgeable. We are very pleased!

avatar

Amy Redwood

Air Conditioner Service