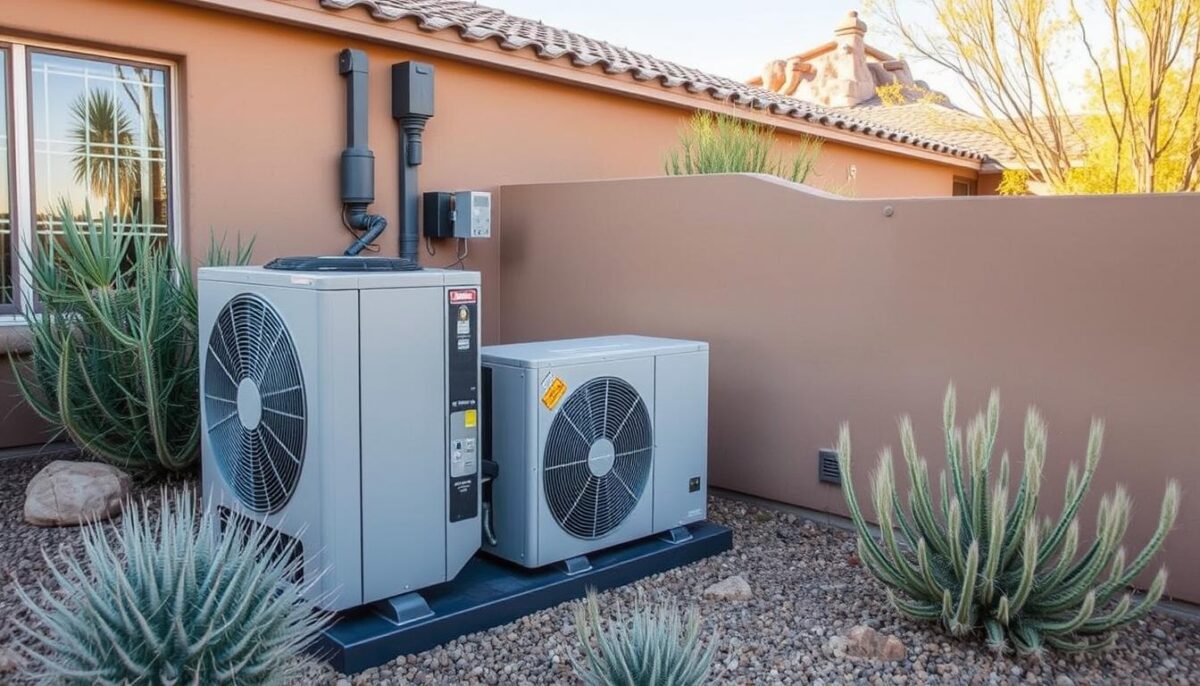
AC Replacement Cost in Arizona: What to Expect in 2025

Arizona’s desert heat can be unforgiving, especially when it comes to air conditioning systems. With a typical lifespan of 12-14 years, homeowners often face the daunting task of replacing their air conditioner at some point.

The cost of this replacement can vary significantly, influenced by factors such as the system’s efficiency rating, size, and installation requirements. On average, homeowners in Arizona can expect to pay between $3,000 and $7,000 for a new air conditioning system.

Understanding the current landscape of air conditioning replacement costs is crucial for homeowners planning this significant investment in 2025. This guide will provide comprehensive insights into the factors influencing these costs and help readers make informed decisions.

Key Takeaways

  • Average cost ranges for different types of air conditioning systems in Arizona.
  • Factors influencing air conditioner replacement costs.
  • The impact of Arizona’s climate on air conditioning system lifespan.
  • Latest efficiency standards and technological advancements.
  • Practical advice on evaluating quotes and selecting the right system.

Understanding the AC Replacement Landscape in Arizona
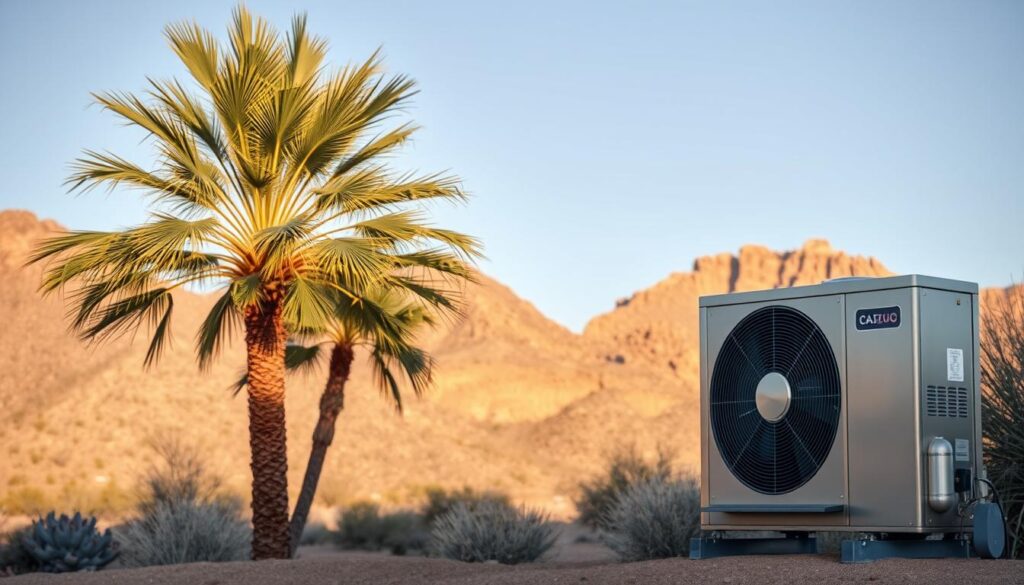
A modern, high-efficiency air conditioning system situated in the arid Arizona landscape. The system stands prominently in the foreground, its sleek, metallic exterior gleaming under the bright desert sun. In the middle ground, lush palm trees sway gently, providing a contrast to the industrial nature of the AC unit. The background features the distinct silhouettes of the Arizona mountains, their rugged terrain bathed in a warm, golden hue. The scene conveys a sense of technological integration within the natural environment, highlighting the importance of reliable climate control in the region.

Arizona’s harsh desert climate makes air conditioning a necessity, not a luxury. The state’s extreme heat, particularly during the summer months, puts a significant strain on air conditioning systems, making reliable cooling essential for both comfort and health.

Why Arizona’s Climate Demands Reliable Air Conditioning

Arizona’s climate is characterized by long, hot summers with temperatures often exceeding 110°F. This intense heat, combined with the dry desert conditions, creates a challenging environment for air conditioning systems. Unlike more temperate regions, Arizona homes rely on air conditioning not just for comfort but as a necessity for health and safety during the hottest months. The harsh conditions accelerate wear and tear on outdoor condensing units, requiring systems that can handle continuous operation for extended periods.

The extreme climate conditions in Arizona mean that air conditioning systems are working harder and longer than in other parts of the country. This prolonged usage can lead to increased maintenance needs and a shorter lifespan for the units.

Average Lifespan of AC Units in Arizona’s Desert Climate

The average lifespan of an air conditioning unit in Arizona is significantly shorter than the national average, typically lasting between 12 to 14 years. This reduced lifespan is due to the constant strain from the extreme heat and the prolonged cooling seasons. Regular maintenance becomes even more critical in Arizona’s climate to maximize the lifespan of your AC system. Understanding this shortened lifecycle is essential for proper financial planning and anticipating replacement needs.

Preparing for replacement before complete system failure can save money and prevent uncomfortable emergency situations during peak summer heat. Many homeowners are caught off guard by the need for replacement, not realizing how the local climate affects their system’s durability.

AC Unit Replacement Cost Arizona: 2025 Price Ranges

Understanding the cost of AC replacement in Arizona is essential for homeowners planning for 2025. The cost can vary significantly based on several factors, including the type of AC unit, its efficiency rating, and the complexity of the installation.

Basic AC Replacement Cost Breakdown

The cost of a new air conditioner in Arizona can range from $6,500 to $17,000 or more, depending on the type and efficiency of the unit. Here’s a breakdown of what homeowners can expect to pay:

  • Basic Single-Stage Systems: These systems, with minimum efficiency ratings (14.3 SEER2), typically cost between $6,500 and $11,500 installed.
  • Mid-Range Systems: Systems with better efficiency ratings (15-16 SEER2) generally cost between $10,000 and $13,000 installed, offering improved performance and energy savings.
  • Premium Variable-Speed Inverter Systems: These high-efficiency systems (17+ SEER2) can range from $13,000 to $17,000 or more, providing maximum comfort and the lowest operating costs.

The total cost includes equipment costs (50-60% of the total), labor (20-30%), and additional components such as ductwork modifications, electrical upgrades, and permits (10-20%).

Regional Price Variations Across Arizona

Regional variations in pricing exist across Arizona due to factors such as contractor density, travel time, and supply chain logistics. For instance:

  • Metropolitan Areas: Cities like Phoenix and Tucson may have more competitive pricing due to a higher density of contractors.
  • Rural Areas: Installation costs can be 10-15% higher in rural areas due to travel time and limited contractor availability.
  • Northern Arizona: Regions like Flagstaff may have different pricing structures due to the need for both heating and cooling systems.

Understanding these regional variations and the factors that influence AC replacement costs can help homeowners budget more effectively and make informed decisions.

Key Factors That Influence Your AC Replacement Cost
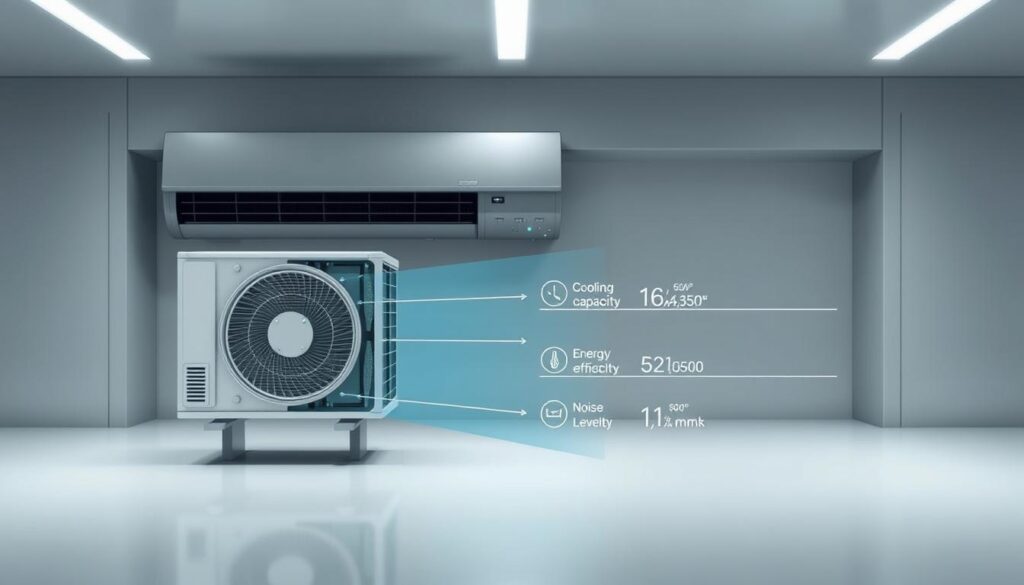
A detailed technical diagram showcasing the key factors that influence the size and efficiency of an air conditioning unit. The foreground shows a cross-sectional view of an AC unit, highlighting its internal components like the compressor, refrigerant coils, and fan. The middle ground depicts a set of performance metrics, including cooling capacity, energy efficiency ratio, and noise levels. The background features a sleek, minimalist industrial design with clean lines and subtle textures, conveying a sense of modern, high-tech aesthetics. The lighting is soft and even, casting slight shadows to accentuate the three-dimensional form. The camera angle is slightly elevated to provide an unobstructed, comprehensive view of the AC unit and its associated data.

When considering an AC replacement in Arizona, several key factors come into play that can significantly impact the overall cost. Understanding these factors is crucial for homeowners to make informed decisions about their air conditioning systems.

Unit Size and Capacity Requirements

An essential factor in determining air conditioner cost is its “size” or capacity. The capacity of your air conditioner affects how well it can effectively cool your home. A unit that is too small will struggle to cool your home, while one that is too large will cycle on and off too frequently, leading to inefficiency and potential premature failure.

Professional HVAC contractors determine the appropriate size through a detailed load calculation that considers factors such as square footage, ceiling height, insulation levels, window placement, and local climate conditions. Incorrectly sized units lead to inefficiency and premature failure, making this calculation critical.

Energy Efficiency Ratings (SEER2)

The efficiency of an AC unit is measured by its SEER (Seasonal Energy Efficiency Ratio) rating, comparable to a car’s gas mileage. As of January this year, government regulations changed the efficiency rating system to SEER2, with a new minimum air conditioner rating of 14.2 SEER2. Higher SEER2 ratings translate to better energy efficiency but also higher upfront costs.

For instance, each point increase in SEER rating typically adds $300-$500 to the system cost. However, the long-term energy savings from higher efficiency units can offset the initial investment, especially in Arizona’s hot climate where AC systems run extensively.

Installation Complexity and Accessibility

Installation complexity varies greatly depending on your home’s configuration. For example, attic installations typically cost more than garage placements due to access difficulties and safety requirements. Homes with limited access points or unusual configurations will incur higher labor costs.

Additional factors like electrical upgrades, permit fees, ductwork modifications, and thermostat upgrades can add 10-20% to the base installation cost. As noted by industry experts,

“The complexity of the installation can significantly impact the overall cost, making it essential to assess your home’s specific needs.”

Types of AC Systems and Their Cost Implications

The type of air conditioning system you choose for your Arizona home can significantly impact both the initial cost and long-term expenses. When considering a new AC installation, it’s essential to understand the different types of systems available and their respective cost implications.

Split System Air Conditioners

Split system air conditioners remain the most common type in Arizona homes. They consist of an outdoor condenser unit and an indoor air handler or furnace with an evaporator coil. These systems are ideal for homes with existing ductwork and offer flexibility in equipment placement.

The cost of split system air conditioners typically ranges between $6,500 and $13,000 installed, depending on efficiency ratings and capacity. They allow for zoned cooling when properly configured but require sufficient space for both indoor and outdoor components.

Packaged AC Units

Packaged AC units combine all components into a single outdoor cabinet, usually installed on rooftops or ground-level concrete pads. This design eliminates the need for an indoor air handler, making them suitable for homes with limited indoor space.

The average cost of a new packaged unit is around $9,500 to $13,000 installed. While they offer simplified installation and maintenance, packaged units tend to have shorter lifespans in Arizona due to constant exposure to the elements.

Ductless Mini-Split Systems

Ductless mini-split systems have gained popularity in Arizona, particularly for home additions or spaces without existing ductwork. A basic single-zone mini-split costs between $3,500 and $5,000 installed, while multi-zone systems range from $6,000 to $15,000.

These systems offer superior energy efficiency and zone control. For more detailed information on installing an AC unit, you can visit HomeAdvisor’s guide on AC installation costs.

Understanding SEER Ratings and Long-Term Savings

As Arizona homeowners prepare for the sweltering heat of 2025, understanding the intricacies of air conditioner efficiency has never been more crucial. The efficiency of an air conditioning unit is measured by its SEER (Seasonal Energy Efficiency Ratio) rating, a metric comparable to a car’s gas mileage. Recent government regulations have changed the efficiency rating system, introducing the SEER2 rating, which provides a more accurate measure of real-world performance.

The New SEER2 Rating System Explained

The SEER2 rating system, implemented in 2023, represents a significant shift in how air conditioner efficiency is measured. With more stringent testing methods, it better reflects real-world performance. Under this new system, a 14.3 SEER2 rating, the minimum for Southwest regions including Arizona, is roughly equivalent to the previous 15 SEER standard. Understanding this change is crucial for comparing units accurately, as manufacturers have redesigned equipment to meet these new standards.

Cost vs. Efficiency: Finding the Sweet Spot

For Arizona homeowners, the sweet spot for SEER2 ratings often lies between 16-18. This range balances upfront costs with long-term energy savings in the hot desert climate. While premium systems with 20+ SEER2 ratings offer maximum efficiency, they come with significantly higher upfront costs that may take over a decade to recoup through energy savings alone.

As “The Department of Energy estimates that upgrading from a 14 SEER to a 16 SEER unit can reduce energy consumption by approximately 13%, while jumping to an 18 SEER system can save around 22%.” This highlights the potential for significant long-term savings with higher efficiency systems.

Calculating Long-Term Energy Savings

Calculating potential savings requires analyzing current energy usage, local electricity rates, and the difference in efficiency between existing and new systems. Arizona’s high cooling demand means efficiency improvements deliver greater savings compared to more temperate regions. Most homeowners can expect to save $100-$300 annually for each SEER point improvement, depending on home size and usage patterns.

Beyond pure energy savings, higher efficiency systems often deliver better humidity control, more consistent temperatures, and quieter operation – comfort benefits that add value beyond mere utility bill reductions. As such, when considering an air conditioner replacement, it’s essential to weigh both the cost and the efficiency to make an informed decision that meets your needs and budget.

Installation Components That Affect Total Cost

Replacing an air conditioner in Arizona involves more than just the unit’s price; several installation components play a crucial role in determining the final cost. Understanding these factors can help homeowners prepare for the total expense of their AC replacement project.

Ductwork Modifications and Replacements

One critical aspect of AC installation is the ductwork. If the existing ducts are not compatible with the new unit’s size, modifications or replacements may be necessary. Properly sized ducts are essential for the unit’s performance, as undersized or leaky ducts can reduce system efficiency by up to 30%, regardless of the AC unit’s SEER rating. In Arizona homes, ductwork modifications or replacements typically add $1,000-$3,000 to the total installation cost, depending on accessibility and the extent of changes needed.

A professional contractor will conduct a duct assessment to determine if the existing ductwork can support the new system or requires sealing, insulating, or complete replacement. Many Arizona homes built before recent energy code updates have ductwork that’s inadequately sized or insulated for modern high-efficiency systems, necessitating upgrades.

Electrical Requirements and Upgrades

Newer AC systems, particularly high-efficiency models, may require dedicated circuits, upgraded wiring, or new disconnect boxes, which can add to the overall cost. Electrical upgrades typically cost $200-$800, depending on the complexity, and can include panel upgrades, new circuit breakers, or bringing older systems up to current code requirements. Not all AC units require electrical work, but when they do, it’s usually for updating the control wiring for the thermostat or installing high-voltage electrical work and breakers around the system.

Line Sets and Refrigerant Considerations

The line sets, which consist of copper refrigerant lines connecting the indoor and outdoor units, may need replacement when switching from an older R-22 system to a modern R-410A or R-32 refrigerant system. New line set installation costs $300-$750 on average but can increase significantly if walls need to be opened or if running new lines presents accessibility challenges. The transition to newer refrigerants has been mandated by environmental regulations, with R-22 being phased out completely.

Additional components like drain pans, condensate pumps, and vibration dampeners add smaller but necessary costs to ensure proper system operation and longevity in Arizona’s harsh climate. By understanding these installation components, homeowners can better estimate the total cost of their AC replacement project.

Labor Costs and Contractor Selection

In Arizona’s sweltering heat, the importance of proper AC installation cannot be overstated, and labor costs are a key consideration. The process of installing an air conditioning system is complex and requires skilled professionals to ensure it’s done correctly.

Understanding Labor Pricing in Arizona

Labor costs typically account for 20-30% of the total AC replacement cost in Arizona. Skilled HVAC technicians can charge between $75-$150 per hour, depending on their experience and certification levels. As such, labor costs for a complete system replacement generally range from $1,500-$2,800 in 2025.

Arizona’s licensing requirements for HVAC contractors help ensure quality, but labor rates can vary significantly between companies based on factors like overhead costs, insurance coverage, and warranty offerings.

How to Evaluate HVAC Contractor Quotes

When evaluating contractor quotes, it’s essential to look beyond the bottom-line price. Reputable contractors provide detailed, itemized quotes that break down equipment, materials, labor, and additional services. Be wary of quotes that are significantly lower than others, as they may indicate corners being cut on installation quality or the use of lower-grade components.

The Importance of Proper Installation

Proper installation is crucial for the efficiency and longevity of your air conditioner. Energy Star estimates that improper installation can reduce system efficiency by up to 30% and lead to premature equipment failure. Therefore, selecting a qualified contractor is as important as the equipment itself.

To ensure you’re hiring a reliable contractor, look for professionals who represent multiple brands and can provide references. Verify that your contractor will pull all necessary permits and schedule required inspections to avoid potential issues with home insurance and future home sales.

Financing Options and Available Rebates

The high upfront cost of installing a new air conditioning system can be mitigated through available financing options and incentives. Arizona homeowners can significantly reduce their AC replacement costs by exploring various rebate programs and financing plans offered by utility companies, manufacturers, and HVAC contractors.

Manufacturer and Utility Company Rebates

Arizona homeowners can benefit from rebates offered by utility companies like APS and SRP, which range from $400 to $1,200 for high-efficiency systems. These rebates typically require installation by participating contractors and minimum efficiency ratings of 16 SEER2 or higher. Major manufacturers such as Carrier, Trane, Lennox, and Rheem also offer seasonal rebates ranging from $500 to $1,500 on premium systems, which can be combined with utility rebates for maximum savings.

For instance, utility rebates can be a significant source of savings. As noted by industry experts, “Utility companies offer substantial rebates for energy-efficient AC units, making it more economical for homeowners to opt for high-efficiency systems.”

Federal Tax Credits for Energy-Efficient Systems

The federal government has extended tax credits for energy-efficient home improvements through the Inflation Reduction Act. Homeowners can claim up to 30% of the costs (maximum $600) for qualified air conditioners through 2032. Heat pump systems are eligible for even more generous tax credits of up to 30% of total costs (maximum $2,000), making them an attractive option for Arizona homeowners.

To qualify for these tax credits, systems must meet specific efficiency requirements, and proper documentation is necessary for tax filing. This incentive not only helps reduce the upfront cost but also promotes the adoption of energy-efficient HVAC solutions.

Financing Plans and Payment Options

Most HVAC contractors offer financing options with terms ranging from 12 to 120 months, often including promotional periods with 0% interest for 12-18 months for qualified buyers. Third-party financing through companies like GreenSky, Wells Fargo, or Synchrony typically offers more competitive rates than contractor in-house financing but may have stricter credit requirements.

When evaluating financing options, it’s crucial to consider the total cost of ownership, including interest charges, rather than focusing solely on monthly payment amounts. This approach ensures that homeowners make the most economical choice for their AC replacement needs.

Making the Smart Investment in Your Home’s Comfort

The scorching Arizona heat makes a reliable air conditioning system not just a comfort, but a necessity. As you consider replacing your AC unit, it’s crucial to look beyond the upfront cost and evaluate the long-term benefits and potential savings.

Investing in a new air conditioning system is about enhancing your quality of life in one of America’s hottest climates. When making your final decision, consider the total cost of ownership over the system’s expected 12-15 year lifespan, including purchase price, energy costs, maintenance requirements, and potential AC repair expenses.

  • A properly sized system with the right SEER rating can provide optimal comfort while minimizing energy consumption.
  • Research different brands and their reliability ratings to ensure long-term performance.
  • Consider how your cooling needs might change over time due to factors like family growth or work-from-home arrangements.
  • Don’t overlook the value of maintenance plans, which can extend system life and maintain efficiency.

Advanced technologies like heat pump systems offer excellent cooling performance and efficient heating during Arizona’s mild winters. Additionally, smart thermostats and zoning systems can deliver substantial comfort improvements and energy savings.

Choosing the right HVAC contractor is as important as selecting the equipment. Look for established companies with proven track records and strong warranties on both equipment and labor. Remember, the lowest quote isn’t always the best value; quality installation of appropriately sized equipment from reputable brands will provide better comfort, efficiency, and longevity.

Noisy HVAC System? What Those Sounds Might Be Telling You

Your home’s HVAC system is supposed to operate relatively quietly, with only minimal background noise that you barely notice during normal operation.

However, when it starts making unusual or loud noises, it’s often a warning sign that something isn’t working correctly and requires attention.

Different sounds indicate different problems – from minor issues that you might be able to fix yourself to serious malfunctions that require professional intervention.

Understanding what these noises mean can help you address potential issues before they become major problems, saving you money on AC repairs and extending the life of your system.

Key Takeaways

  • Unusual noises from your HVAC system can indicate potential issues.
  • Understanding these sounds can help you address problems early.
  • Different sounds indicate different problems.
  • Some issues can be fixed yourself, while others require professional help.
  • Identifying and addressing issues early can save you money on repairs.

Understanding Your HVAC System and Its Normal Sounds

An in-depth technical diagram showcasing the key components of a modern HVAC system. The image should depict a cutaway view, revealing the inner workings in vivid detail. Prominently feature the compressor, condenser coil, evaporator coil, blower fan, and ductwork in the foreground. In the middle ground, include annotations highlighting the function of each part. The background should provide a clean, minimalist context, with subtle lighting to enhance the technical aesthetic. Render the scene with a muted color palette, using shades of gray, silver, and blue to convey a sense of precision and professionalism, suitable for an informative article on HVAC system sounds and maintenance.

Understanding the normal sounds of your HVAC system can help you detect unusual noises that may indicate a problem. To do this, you first need to familiarize yourself with the basic components of your system and the sounds it typically makes during operation.

Key Components of a Residential HVAC System

A residential HVAC system consists of several key components, including the furnace or air conditioner, compressor, fan motor, and ductwork. Each of these parts plays a crucial role in heating or cooling your home. The components work together to circulate air and regulate temperature.

Component Function
Furnace/Air Conditioner Heats or cools the air
Compressor Compresses refrigerant to cool air
Fan Motor Circulates air through the system
Ductwork Distributes heated or cooled air throughout the home

What Constitutes “Normal” HVAC Noise

Even well-functioning HVAC systems produce some level of noise. Normal sounds include a gentle humming when the system starts, soft whooshing of air through vents, and occasional clicking when it turns on or off. Becoming familiar with these sounds helps you identify when something unusual occurs.

Common Noisy HVAC System Sounds and Their Meanings

A large, industrial-grade HVAC system sits in the foreground, its metal housing vibrating and panels rattling as a loud, persistent buzzing emanates from the unit. The system is situated in a dimly lit, utilitarian mechanical room, the drab concrete walls and exposed pipes creating a utilitarian atmosphere. Overhead, a single fluorescent light casts an unforgiving, harsh glow, accentuating the system's wear and tear. The scene conveys a sense of neglect and the need for maintenance, hinting at the potential issues that could be causing the troubling buzzing sound.

Identifying the specific noises your HVAC system is making is the first step in diagnosing and addressing potential issues. Different sounds can indicate various problems, ranging from minor maintenance needs to serious system failures.

Squealing or Screeching Noises

Squealing or screeching noises from your HVAC system often point to issues with the belt or motor. A worn-out or misaligned belt can cause these high-pitched sounds. It’s essential to address these noises promptly to prevent further damage to your system.

Banging, Clanking, or Rattling Sounds

Banging, clanking, or rattling sounds typically indicate loose or broken parts within your HVAC system. These could be loose screws, debris in the ductwork, or a malfunctioning blower wheel. Inspecting and tightening loose parts or removing debris can often resolve these issues.

Hissing or Whistling Noises

Hissing or whistling noises usually suggest issues related to airflow or refrigerant leaks. A hissing sound might indicate a leak in the refrigerant lines or a problem with the system’s ductwork. Whistling noises often result from high-velocity air escaping through gaps or leaks in the ducts.

Buzzing or Humming Sounds

Buzzing or humming sounds often indicate electrical problems within your HVAC system’s components. These noises can originate from the compressor, transformer, or relay switches when they’re not functioning properly. A buzzing sound might signal that the compressor is struggling to start due to electrical issues or is nearing the end of its useful life. Loose electrical connections can create persistent humming that may grow louder over time. In some cases, buzzing might be caused by vibrating ductwork or loose panels that resonate when the system operates. Electrical buzzing sounds should be addressed promptly as they can indicate issues that might lead to system failure or even electrical hazards.

  • Electrical issues are a common cause of buzzing or humming noises in HVAC systems.
  • Components such as the compressor, transformer, and relay switches are often the source of these sounds when malfunctioning.
  • Loose electrical connections can lead to persistent humming that worsens over time.
  • Vibrating ductwork or loose panels can also cause buzzing noises.

Troubling Sounds That Require Immediate Attention

Certain noises from your HVAC system are red flags, indicating potential problems that could lead to significant damage if ignored. While some sounds might be harmless, others signal serious issues that require prompt professional attention.

Understanding the nature of these noises is crucial for diagnosing and addressing the underlying causes before they escalate into major problems.

High-Pitched Screaming from Your AC Unit

A high-pitched screaming noise from your air conditioning unit can be alarming. This sound often indicates a serious issue, such as a malfunctioning compressor or a failing fan motor. If you hear such a noise, it’s advisable to turn off your AC unit to prevent further damage and consult a professional technician.

Loud Booming from Your Furnace

A loud booming noise from your furnace can be startling and is typically a sign of an ignition issue. This could be due to a problem with the igniter or the gas valve. Ignition issues can lead to safety hazards, including the risk of gas leaks or explosions. Therefore, a booming furnace noise warrants immediate investigation by a qualified HVAC technician.

Persistent Clicking or Grinding Noises

Clicking or grinding noises from your HVAC system can indicate a range of issues. If the clicking is coming from the AC unit, it might be related to the outside compressor or the inside air handler. For furnaces, persistent clicking could signal a problem with the ignition system. Grinding noises, on the other hand, almost always indicate serious mechanical problems, such as worn-down motors or bearings.

Noise Type Possible Cause Recommended Action
High-Pitched Screaming Malfunctioning compressor or fan motor Turn off the unit and consult a technician
Loud Booming Ignition issue or gas valve problem Contact a qualified HVAC technician immediately
Clicking or Grinding Electrical or mechanical issues Schedule a professional diagnosis

Addressing these noises promptly is crucial to prevent minor issues from becoming major air conditioning repairs. Regular maintenance and inspections can also help identify potential problems before they manifest as disturbing noises.

What’s Causing Your HVAC System to Make Noise?

The causes of a noisy HVAC system can vary widely, from mechanical problems to airflow issues. Understanding the root cause is essential for effective troubleshooting and resolving the problem.

Mechanical Issues: Loose or Broken Parts

Mechanical issues are a common cause of noise in HVAC systems. Loose or broken parts can create a variety of sounds, from rattling and clanking to squealing and screeching. For instance, a loose belt or a malfunctioning fan motor can produce distinct noises that signal a problem.

Airflow Problems: Blockages and Restrictions

Airflow problems can also lead to unusual noises. Blockages or restrictions in the ductwork or air filters can cause the system to work harder, resulting in increased noise levels. Common issues include dirty air filters, closed dampers, or debris obstructing airflow.

Age-Related Wear and Tear

As HVAC systems age, they naturally develop more noise due to wear and tear on components. Bearings in motors and fans wear down, capacitors become less effective, and heat exchangers can develop cracks. These age-related issues can lead to a range of noises, from humming and grinding to popping and banging. Regular maintenance can help mitigate some of these issues, but in many cases, they signal that the system is approaching the end of its service life.

DIY Solutions for Minor HVAC Noises

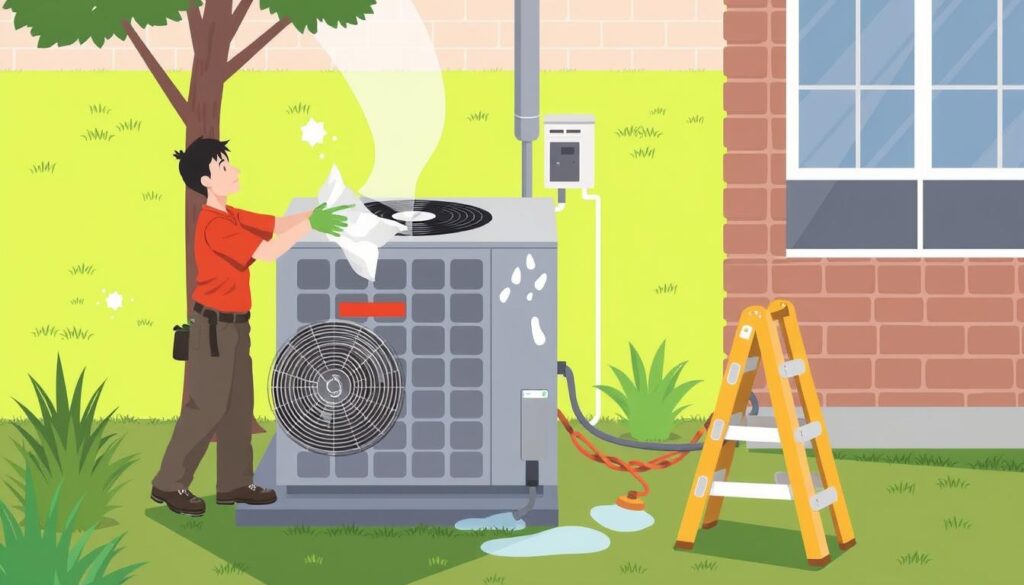
Image of a person cleaning around an outdoor HVAC unit

Addressing minor HVAC noises promptly can prevent more significant problems from developing, and there are several DIY solutions you can try first. Before calling a professional, it’s worth exploring these simple fixes to potentially save time and money.

Cleaning or Replacing Air Filters

A dirty or clogged air filter can cause your HVAC system to work harder, leading to increased noise. Regularly cleaning or replacing the air filter can help reduce noise and improve efficiency. Ensure you check your filter monthly and replace it as recommended by the manufacturer.

Securing Loose Panels and Ductwork

Loose panels or ductwork can cause rattling or clanking noises. Inspect your ductwork and panels to ensure they are securely fastened. Tightening any loose parts can help minimize these noises and prevent further damage to your system.

Clearing Debris Around Outdoor Units

Outdoor condenser units can collect debris like leaves, twigs, and grass clippings, which can interfere with proper operation and create unusual noises. To clear debris:

  • Maintain at least two feet of clear space around all sides of your outdoor unit.
  • Gently clean the exterior fins with a soft brush or vacuum attachment.
  • Remove any vegetation growing too close to the unit.
  • Check for and remove any objects that may have fallen into the top grill of the unit.

After clearing debris, listen for any remaining unusual sounds that might indicate internal issues requiring professional attention.

Professional Solutions for Reducing HVAC Noise

To tackle stubborn HVAC noise, professional solutions offer a range of effective treatments. When DIY methods fall short, experts can diagnose and address the root causes of the noise, ensuring a quieter and more comfortable home environment.

Professional HVAC noise reduction services begin with a thorough assessment to identify the source of the noise. This might involve inspecting the system’s ductwork, components, and overall setup to pinpoint where the noise is coming from and what can be done to mitigate it.

Duct Modifications and Soundproofing

One effective approach to reducing HVAC noise is through duct modifications and soundproofing. This can involve modifying duct layouts to reduce turbulence and noise generation or adding soundproofing materials to ducts and surrounding areas to absorb sound. For more information on soundproofing HVAC systems, you can visit our detailed guide on how to soundproof HVAC systems similar to a recording studio would to keep the audio trapped in a room.

Component Upgrades and Replacements

Sometimes, the solution lies in upgrading or replacing noisy components. This could mean swapping out old or faulty parts for newer, quieter models. For instance, replacing an outdated compressor with a newer one can significantly reduce noise. Component upgrades not only help in noise reduction but can also improve the overall efficiency of the HVAC system.

Compressor Sound Blankets and Vibration Pads

A specific solution for reducing noise from the compressor involves using compressor sound blankets. These are specialized acoustic wraps designed to absorb noise from the compressor, which is often the loudest component of an air conditioning system. Additionally, vibration isolation pads can be used under equipment to prevent the transfer of mechanical vibrations to the home’s structure, further reducing noise.

By implementing these professional solutions, homeowners can enjoy a significantly quieter HVAC system. These methods not only reduce noise but also contribute to a more efficient and longer-lasting HVAC system.

When to Call an HVAC Technician

Noisy HVAC system

Knowing when to call an HVAC technician can save you time and money by addressing potential issues before they escalate. Your HVAC system is a complex piece of equipment that requires professional attention when it starts making unusual noises.

Signs of Serious System Problems

Certain noises from your HVAC system can indicate serious problems that require immediate attention. For instance, a high-pitched screaming from your AC unit or a loud booming from your furnace are signs of potential mechanical failures or other critical issues.

Other signs include persistent clicking or grinding noises, which can indicate worn-out or damaged parts. If you notice any of these symptoms, it’s crucial to call an HVAC technician promptly to prevent further damage.

What to Expect During a Professional Diagnosis

When you call an HVAC technician for a noise issue, you can expect a systematic diagnostic approach. The technician will first listen to the noise while the system operates and ask detailed questions about when it occurs and how long it’s been happening.

  • A comprehensive inspection will include checking electrical components with specialized testing equipment to identify any voltage or amperage abnormalities.
  • The technician will inspect mechanical components for wear, damage, or improper operation that might be causing the unusual sounds.
  • For refrigerant-based systems, pressure tests may be conducted to ensure proper levels and identify potential leaks.
  • After diagnosis, you should receive a clear explanation of the problem, recommended solutions, associated costs, and the consequences of delaying repairs.
  • Professional technicians can often detect and address developing issues that aren’t yet creating noticeable symptoms, preventing future breakdowns.

By understanding when to call an HVAC technician and what to expect during a professional diagnosis, you can ensure your system is running efficiently and effectively, minimizing the risk of unexpected failures and costly air conditioner repairs.

Preventative Maintenance to Keep Your HVAC System Quiet

Regular preventative maintenance is vital for keeping your HVAC system running smoothly and quietly. Your HVAC system is crucial for maintaining comfort in your home, especially during extreme temperatures.

To ensure quiet and efficient operation, annual professional maintenance is recommended. This should include inspection and cleaning of all components, tightening of electrical connections, and lubrication of moving parts. Scheduling maintenance in spring for air conditioning systems and fall for furnace systems ensures your equipment is ready for peak usage seasons.

Homeowners can complement professional maintenance by checking and replacing air filters monthly, keeping outdoor units clear of debris, and listening for changes in the system’s normal operating sounds. Proper refrigerant levels are also essential for quiet operation, as both overcharged and undercharged systems can create distinctive noises.

Investing in preventative maintenance typically costs less than emergency repairs and extends the lifespan of your HVAC equipment. By following these guidelines, you can enjoy a quieter, more efficient HVAC system that provides comfort throughout the year.

HVAC Warranties Explained: What’s Covered and What’s Not

Understanding your heating and cooling system warranty is crucial for protecting your investment and avoiding unexpected costs when problems arise. Unlike other home appliances, HVAC systems require proper sizing, installation, startup, and maintenance to function correctly, making warranty coverage more complex.

Modern warranties have evolved significantly, with many manufacturers now offering 10+ year coverage. It’s essential to comprehend both manufacturer parts warranties and labor warranties from installers to fully protect your HVAC investment.

Key Takeaways

  • Understanding your HVAC warranty is crucial for protecting your investment.
  • Modern HVAC warranties have evolved, with many manufacturers offering 10+ year coverage.
  • Proper sizing, installation, startup, and maintenance are required for HVAC systems to function correctly.
  • Comprehending manufacturer parts warranties and labor warranties is essential.
  • Knowing what is and isn’t covered under your warranty can save you thousands of dollars.

Understanding the Two Types of HVAC Warranties

A well-lit, high-resolution image of two HVAC warranties, one for a residential system and one for a commercial system, placed side by side on a clean, minimalist white background. The residential warranty is shown in the foreground, with its details clearly visible, while the commercial warranty is slightly out of focus in the middle ground. The lighting is soft and even, creating a sense of professionalism and legibility. The image conveys a clear understanding of the two main types of HVAC warranties, as described in the article section title.

The world of HVAC warranties can be complex, but breaking it down reveals two primary types that homeowners should be aware of. HVAC systems are significant investments, and understanding the warranties that protect these investments is crucial for homeowners.

HVAC systems come with two distinct types of warranties that protect different aspects of your investment. As noted by industry experts, “A comprehensive warranty can provide peace of mind and protect your investment from costly repairs.” These warranties are the manufacturer parts warranty and the labor warranty from installers.

Manufacturer Parts Warranty

The manufacturer parts warranty is designed to cover defects in the components themselves. This means that if a part fails due to manufacturing flaws, it will be replaced at no cost for the part itself. Over the years, manufacturer parts warranties have been extending, with many now offering 10+ years of coverage, compared to the standard 3-5 years in the 1990s.

Despite the longer warranty periods, HVAC equipment isn’t necessarily more reliable than before. In fact, some components may be made more economically now, making warranty protection even more important. As the industry trend continues towards longer parts warranty coverage, it’s essential for homeowners to understand what is covered and for how long.

Labor Warranty from Installers

Labor warranties, provided by the installation company, cover the workmanship and installation quality. These warranties are typically for a shorter period, often 1-2 years, unless extended options are purchased. Initial labor warranties are particularly important because most installation or equipment quality issues will become apparent during the first heating and cooling seasons.

When evaluating labor warranties, it’s crucial to understand who backs the warranty—the installation company itself or a third-party insurer. This is especially important if you’re concerned about the long-term viability of the installation company. Extended labor warranties are often available for purchase, providing additional years of coverage beyond the standard period, which can be valuable for expensive systems.

The Complete HVAC Warranty Guide: Coverage Duration and Registration

A comprehensive understanding of HVAC warranty coverage and registration is essential for homeowners to make informed decisions about their heating and cooling systems. HVAC warranties can vary significantly in terms of coverage duration and the registration process.

Standard vs. Extended Warranty Periods

The coverage period of an HVAC warranty is a critical factor that determines how long the homeowner is protected against equipment failures. Standard warranties typically cover parts for a limited time, often around 5 years. In contrast, extended warranties can provide coverage for 10 years or more, depending on the manufacturer’s policies and the registration process.

HVAC warranty coverage periods vary significantly between standard (base) warranties and extended (registered) warranties. Registration typically extends coverage from 5 years to 10 years or more. Most manufacturers require product registration within 60-90 days after installation to activate the full extended warranty coverage.

The Importance of Proper Registration

Proper registration of the HVAC equipment is crucial to ensure that homeowners receive the full benefits of the warranty. After installation, the equipment needs to be registered with the manufacturer to qualify for full warranty coverage, often termed an “extended warranty.” While many installers will handle the registration process as a courtesy, it remains the homeowner’s responsibility to ensure this step is completed within the required timeframe.

The registration process typically requires basic information such as the model and serial number of the equipment, installation date, and contact information. Some manufacturers offer online registration portals, while others may require paper forms to be submitted. Registration not only extends warranty coverage but also ensures that homeowners receive important safety notices or recall information directly from the manufacturer.

Common HVAC Warranty Exclusions to Be Aware Of

Being aware of the typical exclusions in HVAC warranties can help homeowners make informed decisions about their heating and cooling systems. Understanding these exclusions is key to avoiding unexpected expenses when repairs are needed.

Labor Costs Under Manufacturer Warranties

One significant exclusion in many HVAC warranties is labor costs. Manufacturer warranties typically exclude labor costs, which can represent 50-90% of the total repair expense depending on the component being replaced. Even when a part is covered under warranty, you’ll likely still need to pay for the technician’s time to diagnose the issue, remove the defective part, install the replacement, and test the system.

Specific Parts with Limited or No Coverage

Certain components may have limited or no coverage under standard manufacturer warranties. These include sheet metal parts, filters, and sometimes electrical components like capacitors and contactors that are considered “maintenance items.” It’s essential to review your warranty to understand which parts are covered and which are not.

Component Warranty Coverage
Sheet Metal Parts Limited or No Coverage
Filters Limited or No Coverage
Electrical Components Variable Coverage

Circumstances That Void Warranty Protection

Several circumstances can void your HVAC warranty protection. These include improper installation, lack of proper maintenance, using unauthorized replacement parts, having repairs performed by uncertified technicians, and removing or defacing the system’s identification tags or serial numbers. To maintain warranty validity, it’s crucial to work with licensed, qualified HVAC contractors and follow manufacturer specifications precisely.

Critical Components and Their Warranty Coverage

Understanding the warranty coverage for critical components in your HVAC system is crucial for making informed decisions about your home’s heating and cooling equipment. The HVAC system is made up of various parts, some of which are more critical and expensive to replace than others.

Compressor Warranty Details

The compressor is one of the most expensive components of your HVAC system. It is sensitive to proper installation and electrical power fluctuations. Many manufacturers offer extended or separate warranty terms for this critical part. For instance, some may provide a 10-year warranty on compressors, reflecting their confidence in the component’s durability.

Heat Exchanger Coverage

Heat exchangers in furnaces are prone to cracks or failures due to extreme temperature fluctuations. Robust warranty coverage is particularly important for this component due to potential safety risks, such as carbon monoxide leakage. Some manufacturers now offer extended or even limited lifetime warranties on heat exchangers, providing homeowners with added peace of mind.

Electrical Components and Maintenance Items

Electrical components like capacitors and contactors often fall into a gray area of warranty coverage, as they’re considered “maintenance items.” Filters, on the other hand, are typically excluded from warranty coverage as they require regular replacement. Understanding these nuances is key to managing your expectations and maintenance costs.

Component Typical Warranty Coverage Importance of Coverage
Compressor 5-10 years High
Heat Exchanger 5-20 years or lifetime High
Electrical Components 1-5 years Medium

Warranty Requirements: Keeping Your Coverage Valid

To ensure your HVAC warranty remains valid, it’s crucial to understand the conditions that keep your coverage intact. Warranty requirements are not just suggestions; they are contractual obligations that, when met, ensure you receive the coverage you’re entitled to.

Proper Installation Documentation

Proper installation by licensed, qualified professionals is the first critical requirement for maintaining valid warranty coverage. Most manufacturers require that you retain documentation of the professional installation, including the date, installer’s credentials, and any commissioning reports or startup checklists completed. This documentation serves as proof that the installation was done correctly, reducing the likelihood of warranty claim denials due to improper installation.

Regular Maintenance Requirements

Annual professional maintenance is typically required to keep your warranty valid. During these maintenance visits, technicians should check refrigerant levels, clean coils, inspect electrical components, test safety systems, and document their findings in a service report. This regular maintenance not only keeps your warranty intact but also ensures your HVAC system operates efficiently and effectively.

Record-Keeping Best Practices

Maintaining detailed records of all maintenance, repairs, and service visits is essential. Create a dedicated folder, either physical or digital, to store all HVAC-related documentation. If you experience a major system failure, manufacturers may request proof of regular maintenance before approving warranty coverage. Transferring these maintenance records to the new owner when selling your home can also help maintain warranty coverage and potentially increase your home’s value.

How Ownership Changes Affect Your HVAC Warranty

Changes in home ownership can significantly affect the coverage and validity of your HVAC warranty. When you sell or buy a home with an existing HVAC system, the full warranty may not transfer to the new owner.

Understanding the transfer process and its implications is essential for both parties involved in the transaction. If you’re selling your home, transferring the warranty to the new owner can be a valuable selling point that may increase your property’s appeal and potentially its value.

Warranty Transfer Procedures

Most manufacturers that allow warranty transfers require completion of a formal transfer process within a specific timeframe after the sale—typically 60-90 days. The process usually involves submitting documentation of the sale, the system’s serial number, original installation date, and often payment of a transfer fee (typically $75-$100).

  • Submit documentation of the sale
  • Provide the system’s serial number and original installation date
  • Pay a transfer fee (if applicable)

Reduced Coverage After Transfer

After the transfer, the warranty coverage is frequently reduced. For example, a 10-year warranty might be reduced to 5 years for the new homeowner. Some older HVAC systems may have warranties that are completely non-transferable.

Making a Warranty Claim: Step-by-Step Process

When your HVAC system fails, understanding how to navigate the warranty claim process can save you time and money. The first step is to identify whether your issue is likely covered under the warranty.

Identifying Covered Issues

Check your warranty documentation to see if the problem you’re experiencing is covered. Look for symptoms that indicate a manufacturer defect rather than normal wear and tear or maintenance issues. Before calling for service, perform basic troubleshooting to ensure the problem isn’t something simple like a tripped circuit breaker or clogged filter.

Contacting the Right Provider

When contacting a service provider, mention that you believe the repair should be covered under warranty. This allows them to prepare the proper documentation and potentially assign a more experienced technician. The right provider for warranty service is typically an authorized dealer for your brand.

What to Expect During Repairs

During the repair process, the technician will diagnose the issue, determine if it’s warranty-covered, order any necessary parts from the manufacturer, and complete the repair once parts arrive.

Potential Out-of-Pocket Costs

Even with parts covered under warranty, expect to pay for labor costs unless you have a separate labor warranty. Labor costs typically range from $70-$150 per hour. Additional out-of-pocket costs might include diagnostic fees, refrigerant charges, or shipping for parts.

Cost Type Description Estimated Cost
Labor Costs Hourly rate for technician work $70-$150 per hour
Diagnostic Fees Initial assessment of the issue $50-$100
Refrigerant Charges Cost of refrigerant used in repairs $20-$50

Choosing the Right HVAC Contractor for Warranty Protection

To maximize the benefits of your HVAC warranty, it’s vital to choose a contractor wisely. The right HVAC contractor can make all the difference in ensuring effective warranty protection. A quality installation by certified professionals is the foundation of a reliable HVAC system.

When selecting an HVAC contractor, there are several factors to consider. Look for contractors who are factory-authorized dealers for the brand you’re purchasing, as they receive specialized training and can often offer enhanced warranty terms or expedited warranty service. It’s also crucial to verify that any contractor you consider is properly licensed, bonded, and insured. This not only protects you legally but also indicates a level of professionalism and commitment to industry standards.

Ask potential contractors about their specific labor warranty terms, including duration, what’s covered, and any conditions required to maintain coverage. Checking online reviews, asking for references from past customers, and verifying how long the company has been in business are also essential steps. A quality contractor will provide clear, written documentation of all warranty terms and explain the commissioning process for your new system.

By choosing the right HVAC contractor, you can ensure that your warranty remains valid and that your HVAC system operates efficiently. This decision can provide valuable peace of mind for homeowners, knowing that they are protected in case anything goes wrong with their heating or cooling system.

AC Compressor Repair: Costs, Signs of Failure & Repair Options

The heart of your cooling system is the component that circulates refrigerant, allowing your air conditioner to cool your home effectively. When this critical part fails, it can lead to a significant increase in energy bills and even cause the entire system to shut down.

A failing compressor can manifest through various symptoms, including unusual noises, leaks, or a noticeable decrease in cooling performance. Understanding these signs is crucial for prompt action.

Whether you’re dealing with a minor issue or a complete failure, knowing your air conditioning repair options and the associated costs can help you make an informed decision.

Key Takeaways

  • Recognizing the signs of a failing compressor to prevent further damage.
  • Understanding the costs associated with different types of repairs.
  • Exploring DIY fixes versus professional replacement options.
  • Learning preventative maintenance tips to extend the compressor’s lifespan.
  • Determining when to repair versus replace the compressor based on cost-effectiveness.

Understanding Your AC Compressor

Understanding the compressor’s function is essential for maintaining an efficient air conditioning system. The compressor is a critical component that directly impacts the overall performance of your cooling system.

What Is an AC Compressor and How Does It Work?

The AC compressor is a vital component located outside the air conditioning unit. It is responsible for circulating refrigerant through the coils of both indoor and outdoor equipment, facilitating heat exchange. Contrary to popular belief, the compressor generates heat as part of the cooling process by compressing refrigerant gas.

Key Functions of the AC Compressor:

  • Circulates refrigerant through the system’s coils
  • Facilitates heat transfer from inside to outside
  • Maintains optimal pressure in the system
  • Works in conjunction with other key components like the condenser, evaporator, and expansion valve

Why the Compressor Is Critical to Your Cooling System

The compressor is often considered the heart of the air conditioning system due to its crucial role in pressurizing refrigerant and facilitating heat exchange. A properly functioning compressor ensures efficient cooling and prevents potential system failures.

Compressor Type Efficiency Level Description
Reciprocating Medium Traditional compressor type with moving parts
Rotary High More efficient with fewer moving parts
Scroll High Known for quiet operation and high efficiency
Variable Speed Very High Adjusts speed according to cooling demand

7 Common Signs of AC Compressor Failure

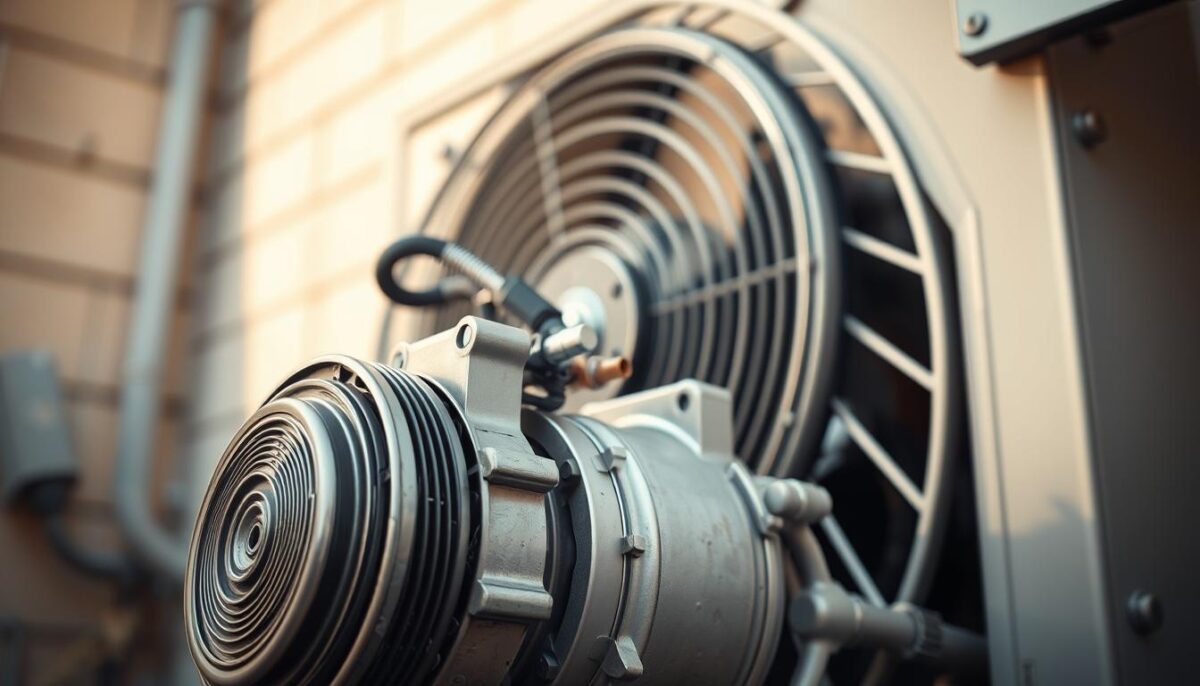
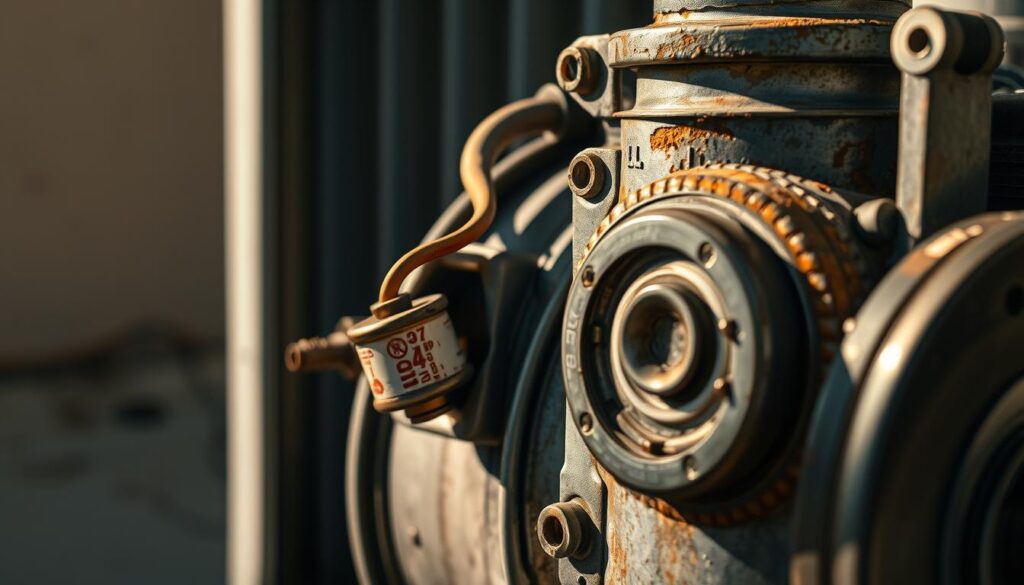
A detailed close-up view of an air conditioning compressor unit, showcasing various signs of potential failure. The compressor is positioned in the foreground, illuminated by a warm, natural light source casting subtle shadows. The middle ground features a selection of worn or damaged components, such as a leaking refrigerant line, a burnt-out capacitor, and a seized bearing. The background blends a neutral, muted environment, allowing the focus to remain on the technical details of the compressor. The overall mood conveys a sense of diagnostic examination, inviting the viewer to closely inspect the various indications of an impending compressor failure.

Identifying the early warning signs of AC compressor failure can save you from unexpected breakdowns and costly repairs. Your air conditioning system’s compressor is a critical component, and its failure can lead to a cascade of issues affecting the overall performance and efficiency of your cooling system.

Unusual Noises Coming From Your Unit

One of the first indicators of a potential issue with your AC compressor is unusual noises emanating from the outdoor unit. Sounds such as clicking, rumbling, or rattling can signal internal mechanical problems within the compressor. These noises are often a sign that the compressor’s components are wearing out or have become misaligned.

Reduced Cooling Performance

If your air conditioning system is running constantly but failing to cool your space effectively, it could be a sign of compressor failure or declining efficiency. Reduced cooling performance is a classic symptom that warrants further investigation into the compressor’s condition.

System Blowing Warm Air

When your air conditioning system blows warm air instead of cool air, it may indicate that the compressor isn’t properly circulating refrigerant through the system. This issue can lead to increased energy bills and reduced system performance.

Frequent System Cycling

Frequent cycling, or the repeated turning on and off of the AC system, suggests that the compressor is struggling to maintain proper pressure levels. This can be due to a variety of issues, including refrigerant leaks or internal compressor problems.

Visible Damage or Leaks

Visible refrigerant leaks around the outdoor unit are a clear indication of compressor or condenser coil issues that require immediate attention. Leaks can lead to a decrease in system performance and an increase in energy consumption.

The following table summarizes the common signs of AC compressor failure:

Sign Description
Unusual Noises Clicking, rumbling, or rattling sounds indicating internal mechanical issues
Reduced Cooling Performance System running constantly but failing to cool effectively
System Blowing Warm Air Compressor not circulating refrigerant properly
Frequent System Cycling Compressor struggling to maintain proper pressure levels
Visible Damage or Leaks Refrigerant leaks indicating compressor or condenser coil issues

DIY AC Compressor Troubleshooting Steps

DIY troubleshooting of your air conditioning compressor involves a series of simple checks that can help identify the problem. Begin by verifying the AC system’s operation and ensuring it has the proper power supply.

Checking Power Supply and Circuit Breakers

Start by examining the switches in your breaker box. Ensure the switch for the air conditioner’s circuit is in the correct position and that none of the switches are oriented differently from the others. If your system isn’t receiving enough power, try switching the breaker to the off position and then back on again.

Inspecting the Condenser Unit

Next, inspect the outdoor condenser unit for any visible damage, debris, or obstructions that might be affecting airflow around the compressor. Clean the area around your outdoor unit to ensure at least 2 feet of clearance for proper air circulation and heat dissipation.

Testing Airflow and Temperature

Test the airflow from vents inside your home to determine if the issue is with air distribution rather than the compressor itself. Check and replace the air filter if it’s clogged, as restricted airflow can cause the system to work harder and stress the compressor.

When to Stop DIY Efforts and Call a Professional

If basic troubleshooting doesn’t resolve the problem, it’s time to call a professional. Never attempt to handle refrigerant or internal compressor repairs without proper certification, as these require specialized tools and knowledge. Document all troubleshooting steps you’ve taken to provide valuable information to the technician if professional service becomes necessary.

Professional AC Compressor Repair Options

Professional AC compressor repair near me

Contact Us

Understanding the professional repair options for your AC compressor can help you make informed decisions about your cooling system. Professional technicians have the expertise and specialized tools to diagnose and fix complex issues with your AC compressor.

Compressor Motor Repair

Professional compressor motor repair often involves diagnosing electrical issues, replacing worn bearings, or rebuilding the motor assembly. Technicians must carefully assess the motor’s condition to determine the most cost-effective and efficient repair solution.

Refrigerant Recharge and Leak Repair

Refrigerant recharge services include proper evacuation of the system, leak detection using specialized equipment, and precise refrigerant charging to manufacturer specifications. This ensures that your AC system operates efficiently and effectively, while also complying with environmental regulations.

Electrical Component Replacement

Electrical component replacement may include capacitors, contactors, or relays that can fail before the compressor itself needs replacement. Technicians will inspect these components and replace them if necessary to ensure the compressor operates correctly.

Full Compressor Replacement Process

During a full compressor replacement, professionals will also replace associated components like the expansion valve, orifice tube, and receiver dryer. Before removing the old compressor, they will carefully drain all refrigerant to prevent environmental damage and comply with EPA regulations.

Key steps in the repair process include: – Diagnosing the root cause of the compressor failure – Cleaning the air conditioning system of all foreign substances – Replacing damaged or worn-out components – Ensuring proper refrigerant levels and charging – Testing the system under pressure to ensure all connections are secure and leak-free By choosing professional AC compressor repair services, you can ensure that your cooling system is restored to optimal performance while minimizing the risk of future failures.

AC Compressor Repair Costs Explained

The financial impact of AC compressor repairs can range from minor expenses to major investments. Understanding these costs is crucial for homeowners to make informed decisions about their air conditioning systems.

Minor Repairs: $150-$400 Range

Minor AC compressor repairs typically fall within the $150-$400 range. These repairs often include electrical component replacement, refrigerant top-offs, and basic diagnostic services. Such fixes are usually sufficient for addressing minor issues before they escalate into more significant problems.

Major Repairs: $500-$1,200 Range

Major repair costs can range between $500-$1,200. These repairs often involve partial compressor rebuilds, extensive refrigerant leak repairs, or addressing significant electrical issues. The complexity and cost of parts replacement contribute to the higher cost.

Full Compressor Replacement: $1,300-$2,500 Range

Full compressor replacement represents the most expensive option, with costs ranging from $1,300 to $2,500. This cost varies based on the unit size, brand, and accessibility. The age of the air conditioner and its overall condition play significant roles in determining whether a replacement is justified.

Factors That Influence Repair Costs

Several factors influence AC compressor repair costs. Labor costs, which typically account for 30-50% of total repair expenses, can vary significantly by geographic location and time of year. The age of the air conditioner and manufacturer warranty coverage also play crucial roles in determining the final cost. Emergency service calls, especially during peak summer months, can increase costs by 25-50%.

  • Labor costs account for 30-50% of total repair expenses
  • Units over 10 years old may not justify expensive compressor repairs
  • Manufacturer warranty can reduce replacement costs within the covered period
  • Emergency service calls can increase costs by 25-50%

Repair vs. Replace: Making the Right Decision

Compressor failure presents a critical decision for homeowners: whether to repair or replace the entire AC system. This decision involves considering several key factors that can significantly impact the efficiency, reliability, and cost-effectiveness of your cooling system.

Age of Your AC System

The age of your air conditioner plays a crucial role in determining whether to repair or replace it. Typically, air conditioners have a lifespan of 10-15 years. For systems over 10 years old, compressor replacement may be less economical due to potential compatibility issues and the approaching end of the system’s lifespan.

Cost-Benefit Analysis

Conducting a cost-benefit analysis is essential. The “50% rule” is a useful guideline: if repair costs exceed half the price of a new system, replacement is usually the more economical choice. Additionally, consider the frequency of recent repairs; multiple issues within a short timeframe often indicate a system nearing the end of its useful life.

Energy Efficiency Considerations

Modern replacement systems offer significantly improved efficiency ratings, potentially reducing energy costs by 20-40% compared to units 10+ years old. Newer systems may also qualify for utility rebates, tax credits, or other incentives that can offset replacement costs.

Warranty Coverage Factors

Manufacturer warranty terms should be carefully reviewed. Many manufacturers offer 5-10 year coverage on compressors, but may require proof of annual maintenance. Understanding your warranty coverage can significantly influence your decision.

Factor Repair Replace
System Age Suitable for newer systems Recommended for systems over 10 years old
Cost Potentially lower upfront cost Higher initial cost, but potential long-term savings
Efficiency Maintains current efficiency level Significantly improved efficiency with new systems

Preventing Future AC Compressor Problems

Preventing future AC compressor problems requires a combination of regular maintenance and smart usage habits. To keep your air conditioning system running efficiently, it’s crucial to adopt practices that reduce strain on the compressor.

Regular professional maintenance is key to preventing compressor issues. Scheduling a spring tune-up can help identify potential problems before they become major issues. Additionally, changing air filters monthly during heavy use periods maintains proper airflow and reduces strain on the compressor. Keeping the outdoor condenser unit clean and free of debris is also vital, as is maintaining at least 2 feet of clearance around it to ensure adequate air circulation.

Using programmable thermostats can help avoid excessive cycling and maintain consistent temperatures, reducing compressor wear. It’s also advisable to avoid setting the thermostat extremely low during extreme heat, as this forces the compressor to work harder than necessary. Consider installing a compressor saver or hard-start kit, especially for older systems, to reduce strain during startup.

By following these tips and scheduling annual professional maintenance with a qualified service team, you can significantly extend the life of your AC compressor. Keeping contact information for a reliable service team handy ensures prompt response when issues arise.

Frozen AC Coils? Here’s Why It Happens and How to Fix It

Is your air conditioning system not cooling your home effectively? One possible cause could be frozen evaporator coils. When this happens, your HVAC unit can’t absorb heat properly, leading to inefficient cooling or even a complete stop.

This comprehensive guide will walk you through the reasons behind frozen coils, how to identify the issue, and step-by-step solutions to fix it. Understanding the mechanics behind this common problem can help you troubleshoot and potentially save on costly repairs.

By the end of this article, you’ll be equipped with the knowledge to address the issue and maintain optimal cooling performance year-round.

Key Takeaways

  • Understand the causes of frozen evaporator coils
  • Learn how to identify the problem with your air conditioner
  • Discover step-by-step solutions to fix the issue
  • Find out how to maintain your HVAC system for optimal performance
  • Prevent future AC freezing issues with simple maintenance tips

Understanding Frozen AC Coils

Frozen AC coils can be a frustrating issue for homeowners, but understanding their function and the problems they cause can help in resolving the issue. The air conditioning system relies on its coils to facilitate the cooling process.

What Are AC Coils and How Do They Work?

AC coils are essential components that carry refrigerant and absorb heat before moving it to the next part of the AC system. The evaporator coil, located indoors, absorbs heat from the indoor air, while the condenser coil, located outdoors, releases that heat outside. They work together during the refrigeration cycle to keep your home cool and comfortable.

Why Frozen Coils Are a Serious Problem

When coils freeze, they become insulated by ice, which prevents proper heat transfer and disrupts the entire cooling cycle. This forces your system to work harder while producing less cooling, leading to increased energy consumption and higher utility bills. If left untreated, frozen coils can cause serious damage to your air conditioning system, including compressor failure, which is one of the most expensive AC repairs.

Common Causes of Frozen AC Coils

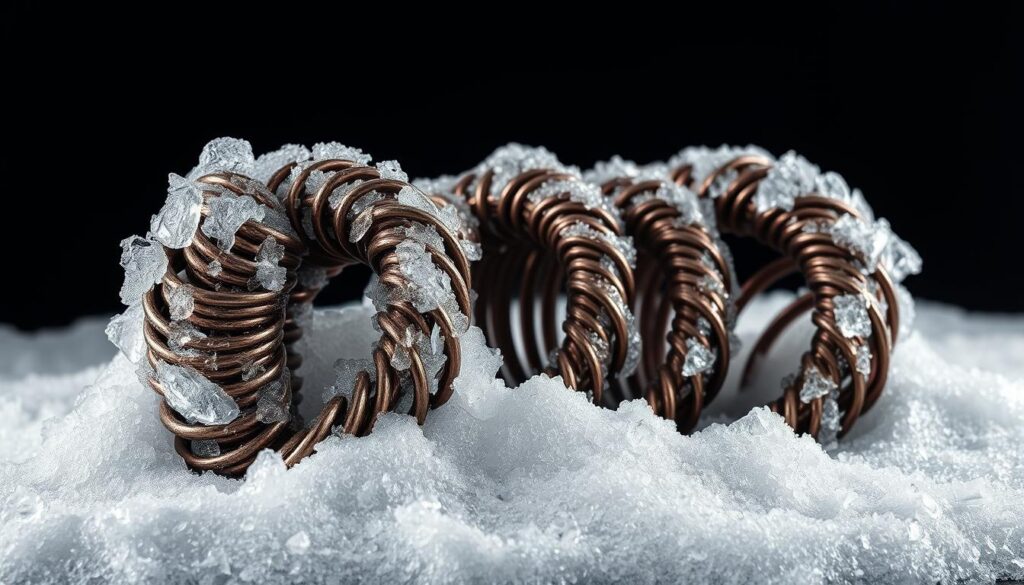
Frozen AC coils, encased in a layer of thick white ice, the delicate metal fins glistening under stark studio lighting. The coil's intricate intertwined structure stands out against a dark, moody background, creating a striking visual contrast. Crisp shadows and highlights accentuate the coil's geometric forms, giving a sense of depth and dimension. The overall scene conveys a sense of technical detail and problem-solving, hinting at the importance of understanding this critical component of an air conditioning system.

Understanding the reasons behind frozen AC coils is crucial for effective troubleshooting and maintenance. When the coils freeze, it can lead to a cascade of problems, including reduced cooling performance and increased energy bills. Several factors can contribute to this issue, and identifying them is the first step towards a solution.

Restricted Airflow Issues

One of the primary causes of frozen coils is restricted airflow. When warm air cannot flow properly over the evaporator coil, the temperature drops below freezing, causing the moisture in the air to freeze on the coils. This can happen due to various reasons such as closed or blocked supply vents, dirty evaporator coils, or problems with the blower fan.

Dirty Air Filters

Dirty air filters significantly reduce airflow through your AC system, creating an environment conducive to ice formation on the coils. It’s recommended to check filters monthly and replace them every 30-90 days to maintain proper airflow and prevent coil freezing.

Refrigerant Leaks and Low Refrigerant Levels

Refrigerant leaks or incorrect refrigerant levels can disrupt the pressure balance in your AC system, causing the evaporator coil to become too cold and freeze. Signs of refrigerant issues include hissing sounds or oily residue around connections. It’s essential to address refrigerant leaks promptly, as they can lead to more severe problems.

Thermostat Problems

A malfunctioning thermostat can cause your AC to run continuously without cycling off, eventually leading to frozen coils. This issue is particularly noticeable when coils freeze overnight due to the prolonged operation.

Blocked or Clogged Condensate Lines

Blocked condensate drain lines prevent the proper drainage of moisture that naturally forms on the evaporator coil. When water accumulates and eventually freezes, it can cause the coil to freeze. Ensuring that the drain pan and lines are clear is crucial for preventing coil freezing and associated water damage.

Signs That Your AC Coils Are Frozen

Identifying the signs of frozen AC coils is crucial for maintaining your air conditioner’s efficiency and preventing further damage. When your AC coils freeze, it can lead to a range of issues that affect your home’s comfort and your system’s longevity.

Several key indicators can signal that your AC coils are frozen. Being aware of these signs can help you take prompt action to address the issue.

Visible Ice on Indoor or Outdoor Units

One of the most obvious signs of frozen coils is the presence of visible ice on either the indoor evaporator coil or the outdoor unit. You might need to remove the access panel to inspect the indoor coil. Visible ice formation is a clear indicator that something is amiss.

AC Running But Not Cooling

If your air conditioner is running continuously but failing to cool your home, it could be a sign that the coils are frozen. The ice prevents the coils from absorbing heat properly, leading to inadequate cooling.

Warm Air Blowing From Vents

When warm air blows from your vents despite the thermostat being set to a cool temperature, it indicates that your system is struggling to cool the air effectively. Frozen coils can cause this issue by hindering the heat absorption process.

Water Leakage and Puddles Near the Unit

Water leakage or puddles forming around your indoor unit can occur when the ice on the coils begins to melt. This can potentially cause water damage to surrounding areas, making it essential to address the issue promptly.

Other signs that may indicate frozen AC coils include unusual sounds from your air conditioner, reduced airflow from your vents, and higher than normal utility bills. Monitoring your system’s performance and being aware of these signs can help you identify and fix issues before they escalate.

Step-by-Step Guide to Fix Frozen AC Coils

Fixing frozen AC coils involves several key steps that can help you get your air conditioning system back to normal operation. When your AC coils freeze, it can lead to a range of problems, including reduced cooling performance and potential damage to your system. By following these steps, you can address the issue effectively and prevent future occurrences.

Turn Off Your AC System Immediately

The first step when dealing with frozen AC coils is to turn off your AC system immediately. This is crucial to prevent any further damage to the compressor and other critical components. Switching off the system allows you to start the thawing process and assess the situation without risking additional harm to your air conditioner.

Allow the Coils to Thaw Completely

After turning off your AC, allow the coils to thaw completely. This process typically takes around 24 hours, depending on the extent of the freezing and the ambient temperature. It’s essential to be patient and not attempt to rush the thawing process by chipping at the ice, as this can damage the delicate coil fins.

Check and Replace Dirty Air Filters

While waiting for the coils to thaw, check your air filters and replace them if they appear dirty or clogged. Dirty air filters are a common cause of restricted airflow, which can lead to frozen coils. Replacing them can often resolve the issue and improve the overall efficiency of your air conditioning system.

Run the Fan to Help Thaw the Coils

To help speed up the thawing process, set your thermostat to “fan only” mode. This setting circulates warm air over the frozen evaporator coil without activating the cooling cycle, thereby aiding in the thawing process. This step can be particularly helpful in getting your system back to normal operation more quickly.

Clean the Coils and Surrounding Areas

Once the coils have thawed, clean the coils and surrounding areas to remove any dust or debris that might be restricting airflow. Specialized coil cleaners are available for this purpose, but in some cases, professional cleaning may be recommended to ensure thorough maintenance.

Check the Condensate Drain Line

It’s also important to inspect the condensate drain line for any clogs or blockages. Look for signs of standing water in the drain pan or use a wet/dry vacuum to clear the line if necessary. A clogged condensate drain line can lead to further issues, including water damage and reduced system performance.

After completing these steps, run your system on fan-only mode for several hours to ensure all components are completely dry before resuming normal cooling operation. Monitor your air conditioner closely over the next few days to ensure the problem doesn’t recur, which could indicate a more serious underlying issue.

Preventing Future AC Coil Freezing

Regular upkeep of your HVAC system is essential to prevent issues like frozen AC coils. By implementing a few simple maintenance practices, you can significantly reduce the risk of coil freezing and ensure your air conditioning system operates efficiently throughout its lifespan.

Regular Air Filter Replacement Schedule

Establishing a regular air filter replacement schedule is crucial for preventing frozen coils. Homes with pets, allergies, or high dust levels may need monthly changes, while others can go 2-3 months between replacements. A dirty air filter can restrict airflow, causing the coils to freeze. By keeping your air filter clean, you can maintain proper airflow and reduce the risk of coil freezing.

Proper Airflow Maintenance

Maintaining proper airflow throughout your home is vital. Keep all vents open and unobstructed, even in unused rooms, as closing vents creates pressure imbalances that can lead to frozen coils. Additionally, ensure that the area around your outdoor condenser unit is clear of debris, vegetation, and obstructions to maintain proper airflow and heat dissipation.

Annual Professional HVAC Maintenance

Scheduling annual professional HVAC maintenance before the cooling season begins is highly recommended. A qualified HVAC technician can ensure your system is clean, properly charged with refrigerant, and operating efficiently. This maintenance can help prevent refrigerant leaks and other issues that lead to frozen coils.

Monitoring Refrigerant Levels

Having a qualified HVAC technician check refrigerant levels during maintenance visits is crucial. Both overcharging and undercharging can contribute to coil freezing issues. Proper refrigerant levels ensure that your system operates efficiently and effectively.

Other preventive measures include:

  • Considering the installation of a programmable thermostat to prevent excessive system cycling and maintain consistent temperatures throughout your home.
  • Having your ductwork inspected for leaks or restrictions that might be reducing airflow to the evaporator coil.
  • Cleaning your evaporator coil professionally every 1-2 years to remove built-up dirt and debris.
  • Monitoring your system’s performance regularly for early warning signs of potential freezing issues.

When to Call an HVAC Professional

If your air conditioning system continues to malfunction with frozen coils, professional assistance is necessary. Despite attempting basic troubleshooting steps such as changing the air filter or clearing the condensate drain line, if the issue persists, it’s a clear indication that expert help is required.

Persistent freezing issues often signify a more complex problem that requires the attention of an HVAC technician. These professionals can conduct a thorough analysis, including checking refrigerant levels, system pressures, and airflow, to diagnose the root cause of the issue.

Some scenarios that necessitate immediate professional help include refrigerant leaks, indicated by hissing sounds or oil spots around the unit, and repeated freezing despite proper maintenance. HVAC technicians have the specialized tools and certification needed to handle refrigerant-related issues and other complex problems.

By calling an HVAC professional, you can ensure that your air conditioning system is properly repaired, and future issues are prevented through regular maintenance plans. Depending on the age of your system and the extent of repairs needed, your technician can also advise on whether repair or replacement is the most cost-effective solution.

AZ Home Services Group is Here for You!

Don’t take our word for it. Listen to some of the feedback provided by our customers!

I just got a new AC/heat pump unit installed. It was a stressful situation and decision but AZ Home Services Group made it much easier. I felt supported all the way through. Everything was quick, easy, and stress-free. The new unit is unbelievably quiet! I am very pleased and would recommend AZ Home Services Group.

avatar

Mary Sequoia

New Air Conditioner

AZ Home Servies Group was excellent. They arrived on time and explained the issues with my air conditioner. They were courteous, professional, knowledgeable, and gave me financing options to work with and a fair price. I highly recommend them!

avatar

Philip Glacier

Air Conditioner

AZ Home Services Group did an awesome job servicing my AC and making some recommendations to increase the effectiveness of our unit. We were able to schedule our appointment right away. AZ Home Services Group is our go-to and always provides great service and the people are knowledgeable. We are very pleased!

avatar

Amy Redwood

Air Conditioner Service